
Today i will teach you how to make best concrete text effect in photoshop. Even you can find the link below how to make concrete texture yourself, first i have made concrete texture after i have applied in the layer style. First try that tutorial once done the texture then after just follow this text procedure. I have made this concrete text effect with in 8 steps, those are very easy steps and i have attached PSD file also to download directly from the link without paying any cost. Just Download PSD file in the end of the tutorial and considerate if you are not understand any of this steps.
You may also like!
>>Concrete Texture and Making Tutorials Simple 6 Steps
Ok, Let’s start the procedure
[ads1]
Step-1: First take new document in the size of 900×500 px, and fill the background any gray color combination and then write down something on the page as shown the screen shot and arrange in center. Here i took the font family “AcmeFont”, better to take this font family in your practice also well, if you haven’t get same font in your system then prefer to any bold fonts family, because this effect seem to better looking in bold fonts only.

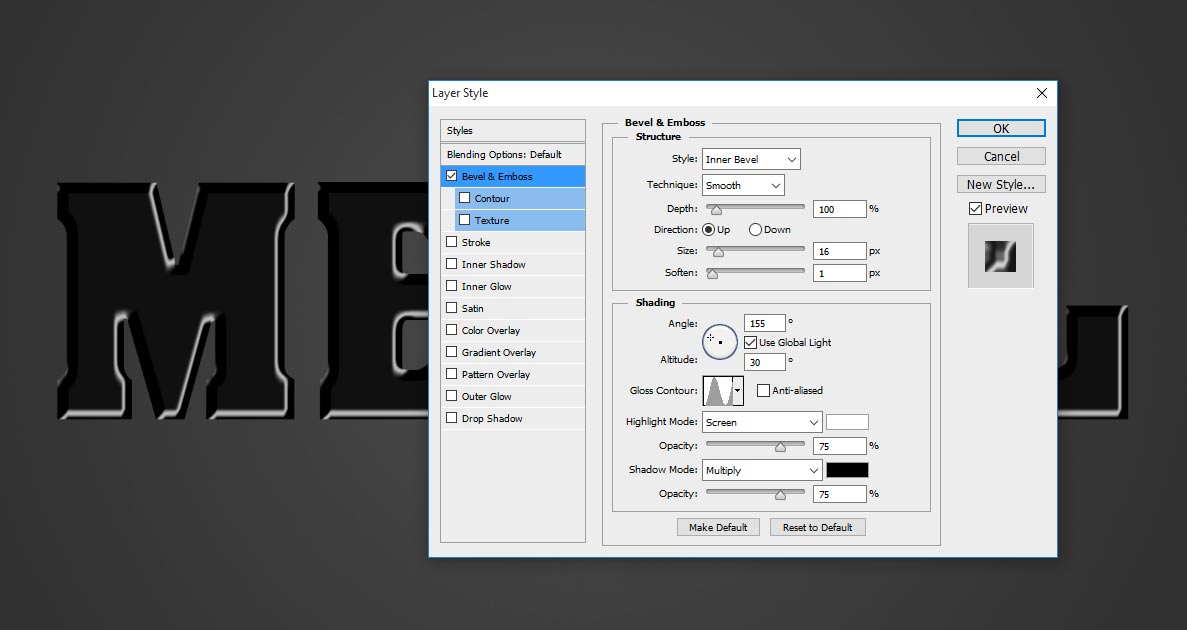
Step-2: Apply blending option to the text layer, just go to Menu> Layer>Layer Style> Blending Option, here choose Bevel and Emboss and follow the values;
Style-Inner Bevel,
Technique-Smooth,
Depth-100%,
Direction-Up,
Size-16px,
Soften-1px,
Angle-155 degree,
Altitude-155 degree,
Gloss Contour-Ring,
Highlight Mode-Screen, Color- White, Opacity-75%,
Shadow Mode-Multiply, Color – Black, Opacity-75%
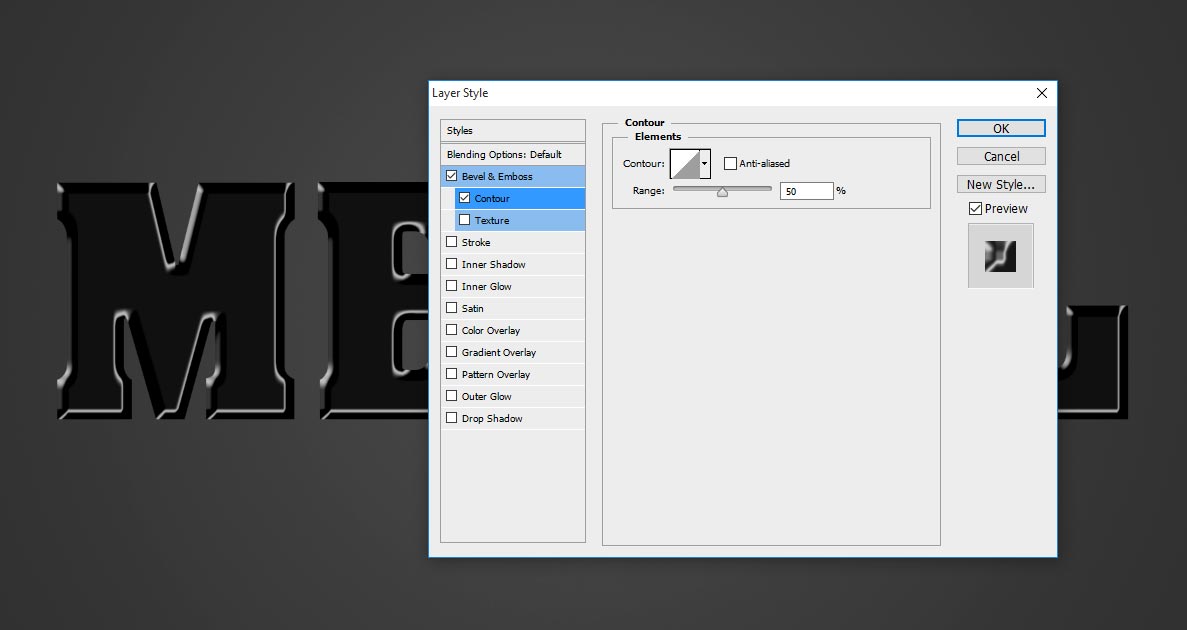
Step-3: Select Directly on the Contour and keep the range 50% and leave it contour in the default elements.
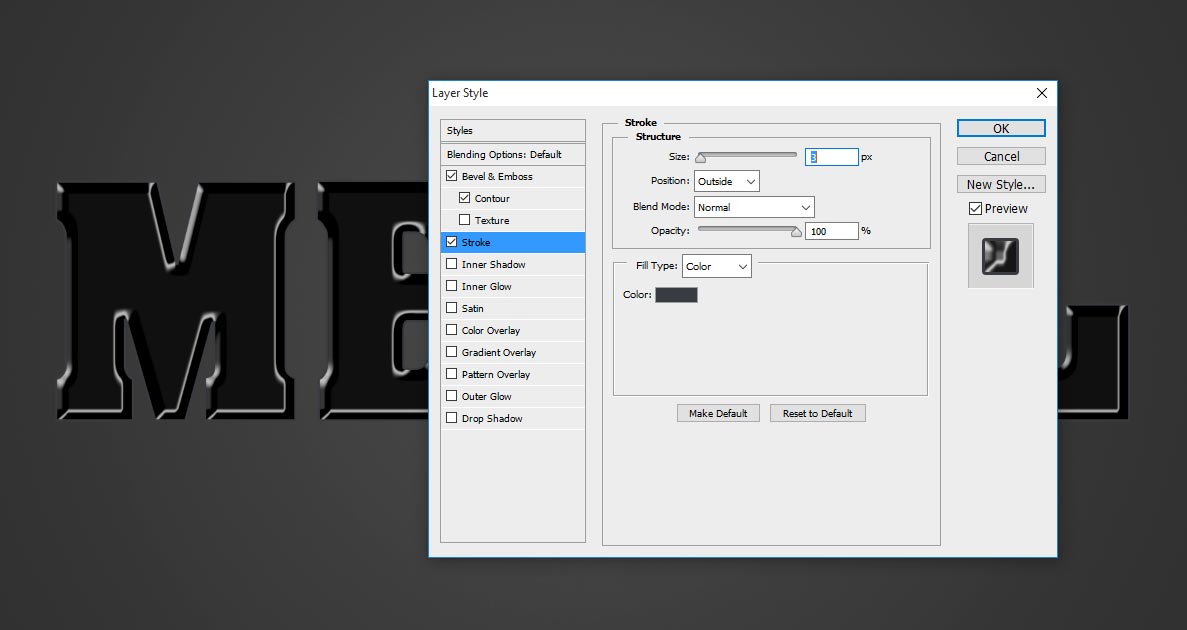
Step-4: Choose Stroke, this stroke works very partially in the edge of the text;
Size-3 px,
Position-Outside,
Blend Mode-Normal,
Opacity-100%,
Fill Type-Color, Color-#383c42.
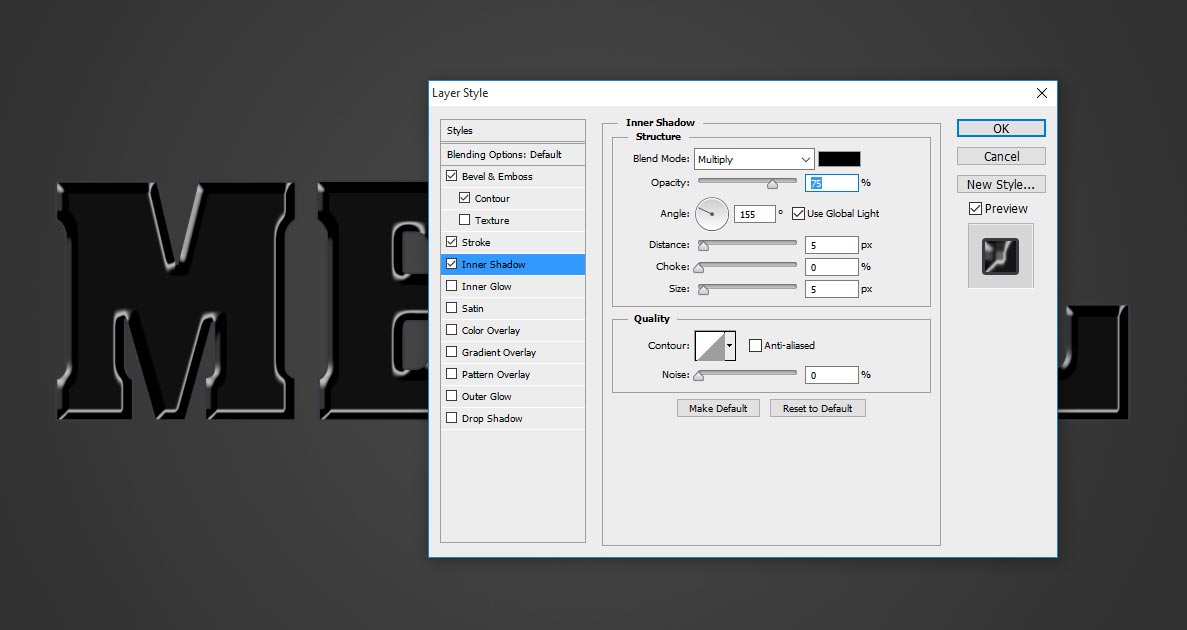
Step-5: Take Inner Shadow and apply the following setting;
Blend Mode- Multiply,
Opacity-75%,
Distance-5 px,
Size-5px.
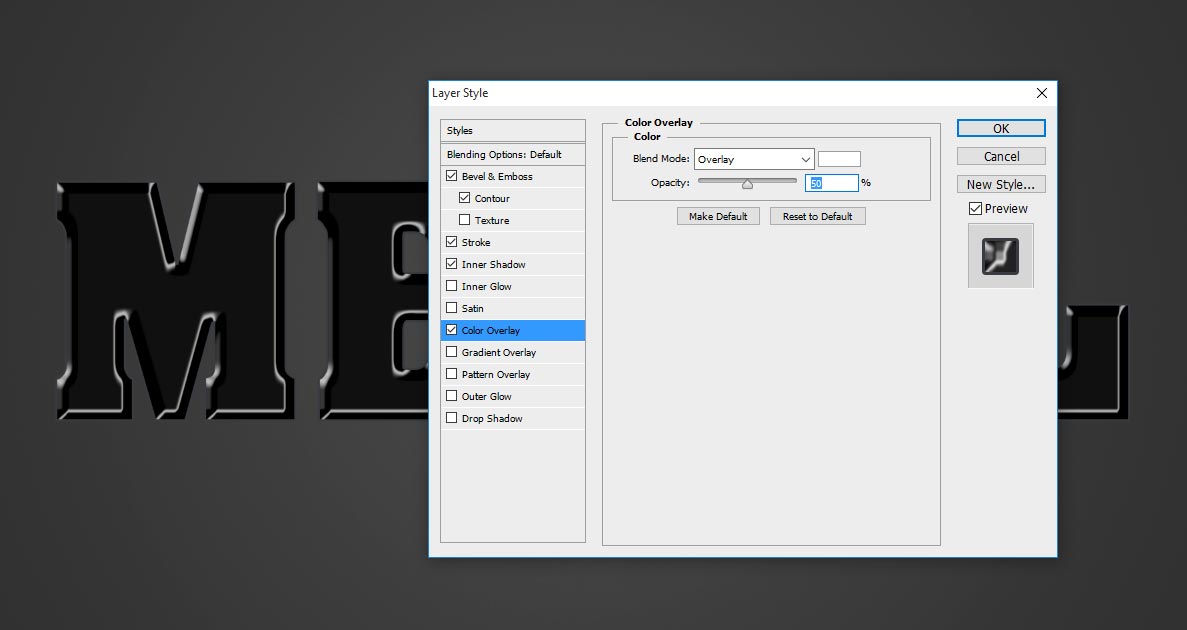
Step-6: Now we are going add shinning effect on the text, this shinning effect you can see after apply the texture in the Patter Overlay;
Blend Mode-Overlay, Color-White,
Opacity-50%.
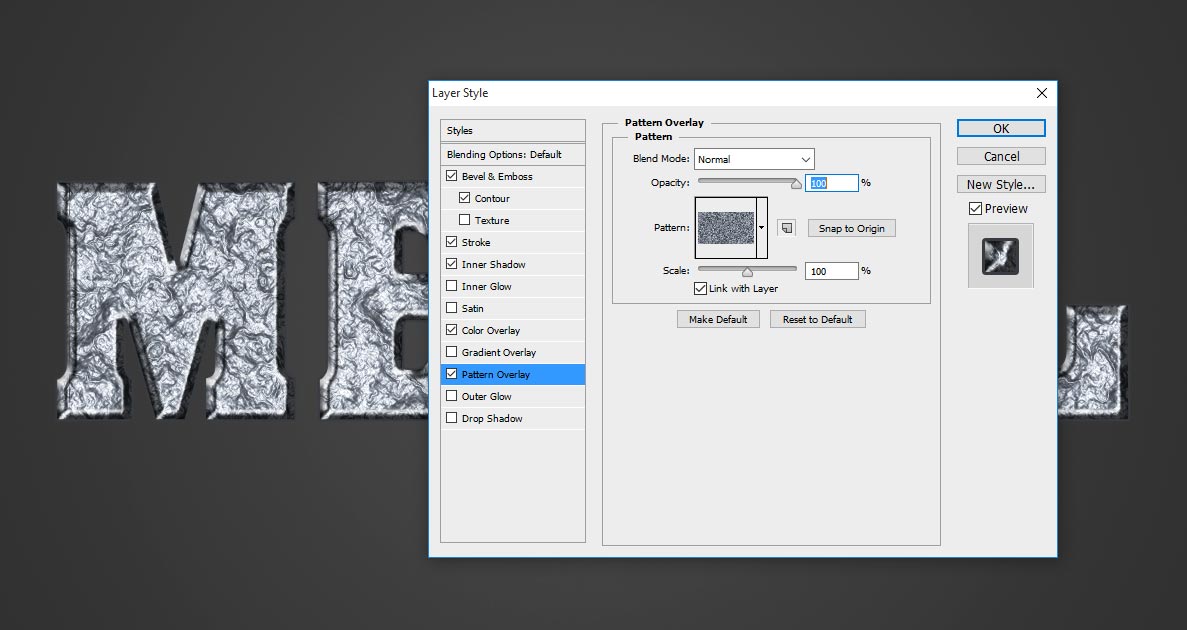
Step-7: Now Choose Pattern Overlay, above attached link tutorial you have seen this pattern texture how to make, now just define it as a pattern just go to Edit>Define Pattern and after you can see the option here and select that pattern as well;
Blend Mode-Normal,
Opacity-100%,
Pattern-Apply Created Concrete Texture,
Scale-100%.
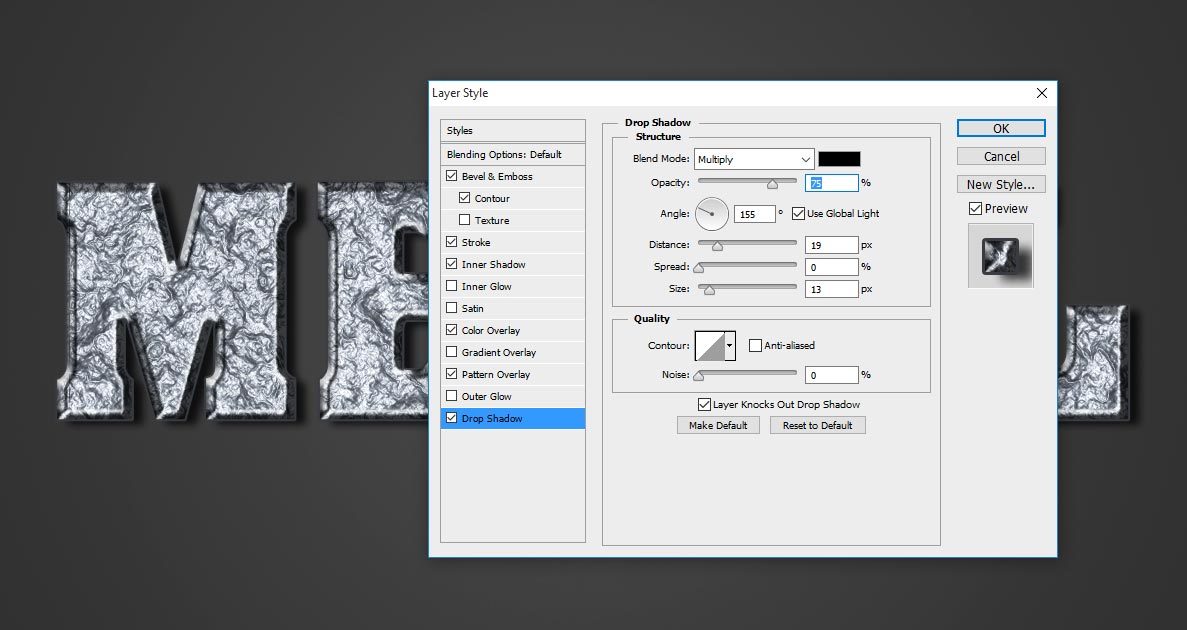
Step-8: Almost done all the steps as well, now we are going to add drop shadow to concrete text.
This shadow gives better eye catch looking on the background; Just change the values as shown the screen shot image.
Blend Mode-Multiply,
Opacity-75%,
Distance-19px,
Size-13px.
Thanks for reading this tutorial, any comments just leave the below comments section, visit regular to get more tricks and tips from this site.

[ads2]
[button color=”green” size=”medium” link=”https://www.alldesigncreative.com/free-psd/concrete-text-effect-psd-file-free-download/” icon=”Download PSD” target=”true”]Download PSD[/button]