
Hi, in this tutorial i am teaching very easy way how to create milk text effect in photoshop. I have used 7 steps to create this milk text effect. There are many ways to create milk text effect, i will disclose all those tutorial tricks one by one in my website. Even i am attaching project PSD file to download as a free and you can get link end of this tutorial.
[ads1]
Step-1: Take new document in the size of 1200x800px with default 72 dpi. and after take any milk background image as shown the screen shot or download same milk background end of this tutorial. Once taken background after write down any name on the page and fit it in center. Mostly take any bold type of font family, because those fonts only works in great way, here i took the font family “MelodBold”, your wish you can take any font family available in your software, but it should be bold that’s it.

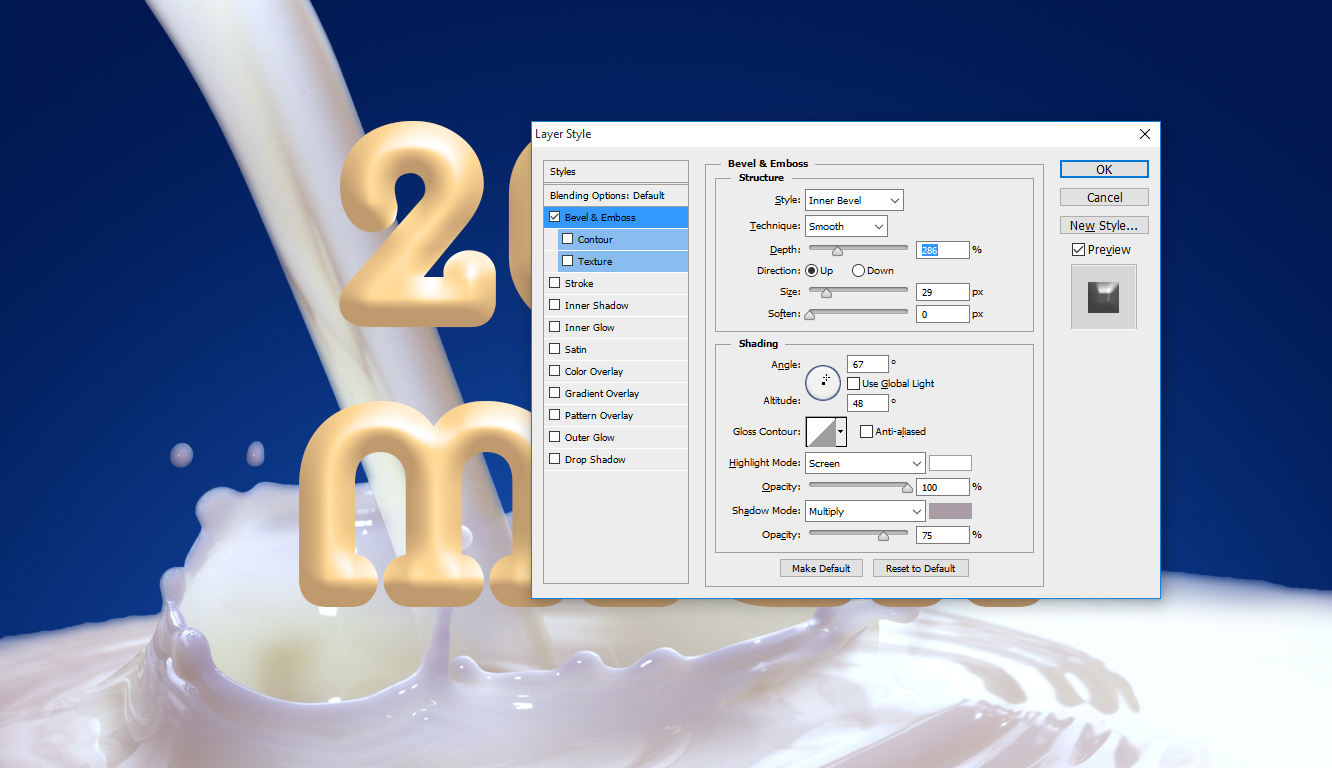
Step-2: Apply blending option to the text layer and choose Bevel and Emboss and follow the values;
Style-Inner Bevel,
Technique-Smooth,
Depth-286%,
Direction-Up,
Size-29px,
Angle-67 degree,
Altitude-48 degree,
Highlight Mode-Screen, Color- White, Opacity-100%,
Shadow Mode-Multiply, Color-#aa9da6, Opacity-75%.
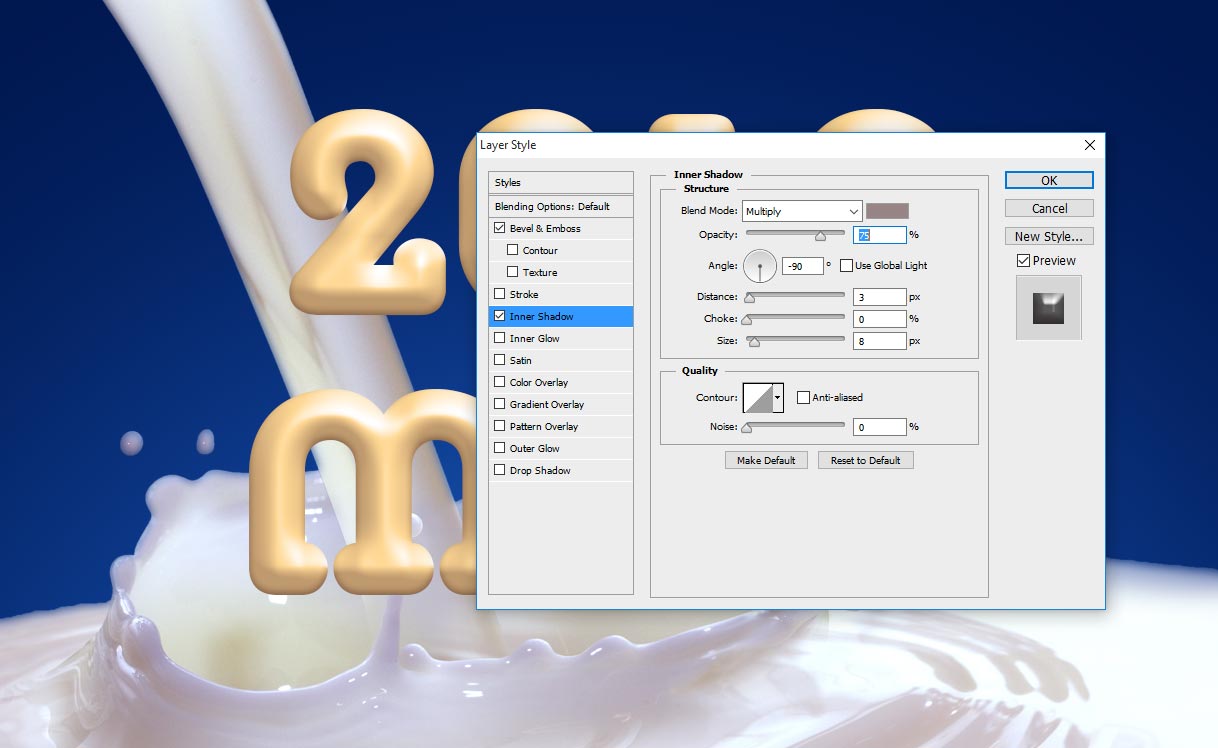
Step-3: Choose Inner Shadow, this step gives little rosy brown shadow inside the text;
Blend Mode-Multiply,
Opacity-90 degree,
Distance-3px,
Size-8px.
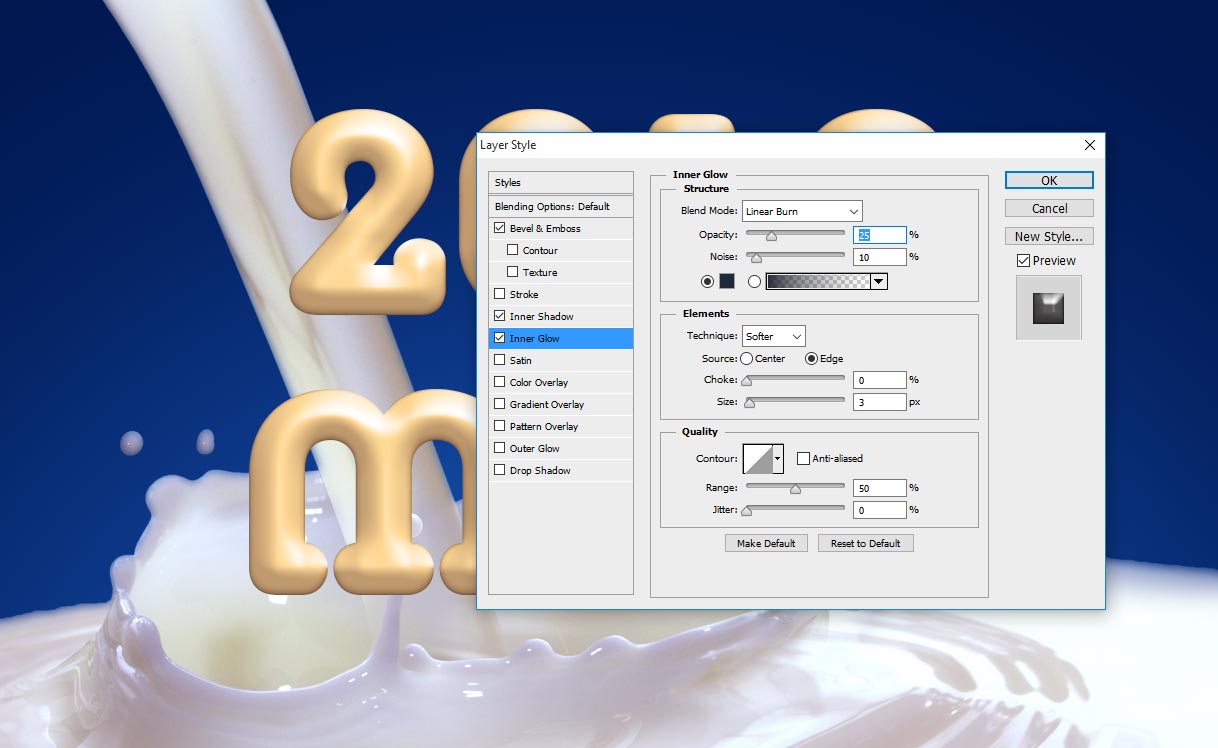
Step-4: Now take Inner Glow, This step works very partially inside the text, it gives light state gray in side the text;
Blend Mode-Linear Burn,
Opacity-25%,
Noise-10%,
Color-$1f2939,
Technique-Softer,
Source-Edge,
Size-3px,
Range-50%.
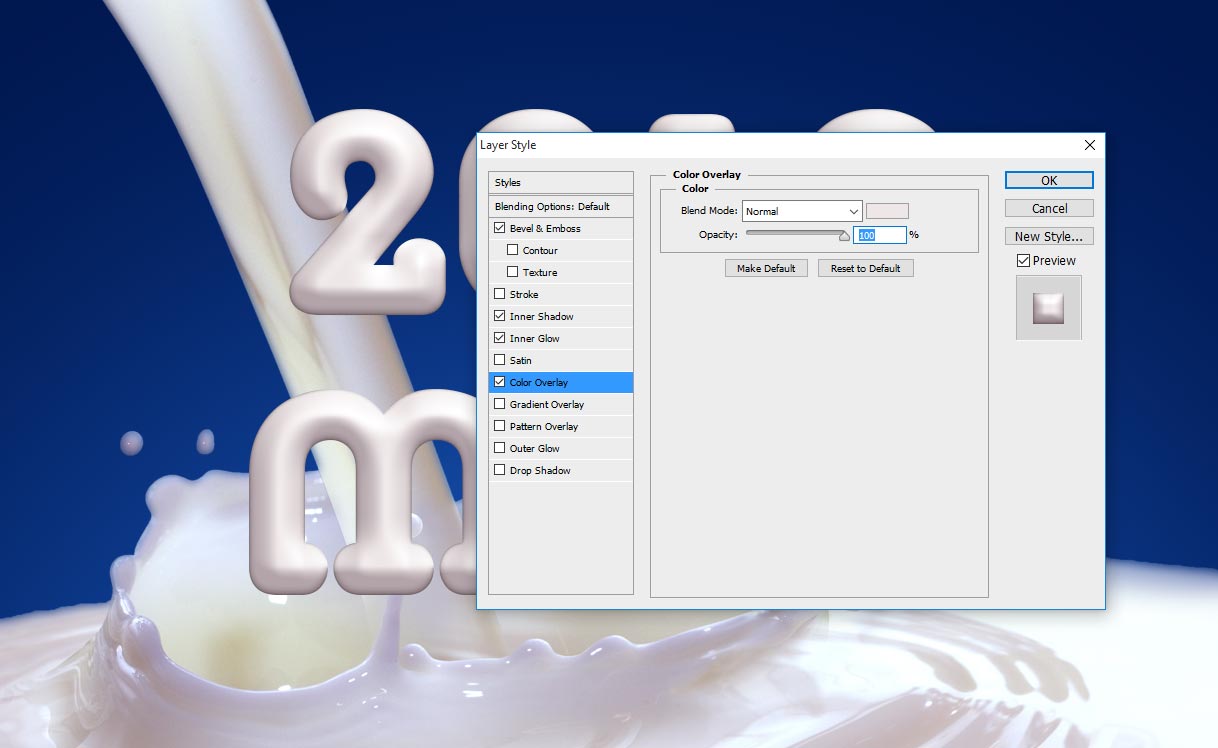
Step-5: Take Color Overlay. This color overlay gives exact milk color on the text, just change the values and see how does it works;
Blend Mode-Normal,
Color-#eee7e7,
Opacity-100%.
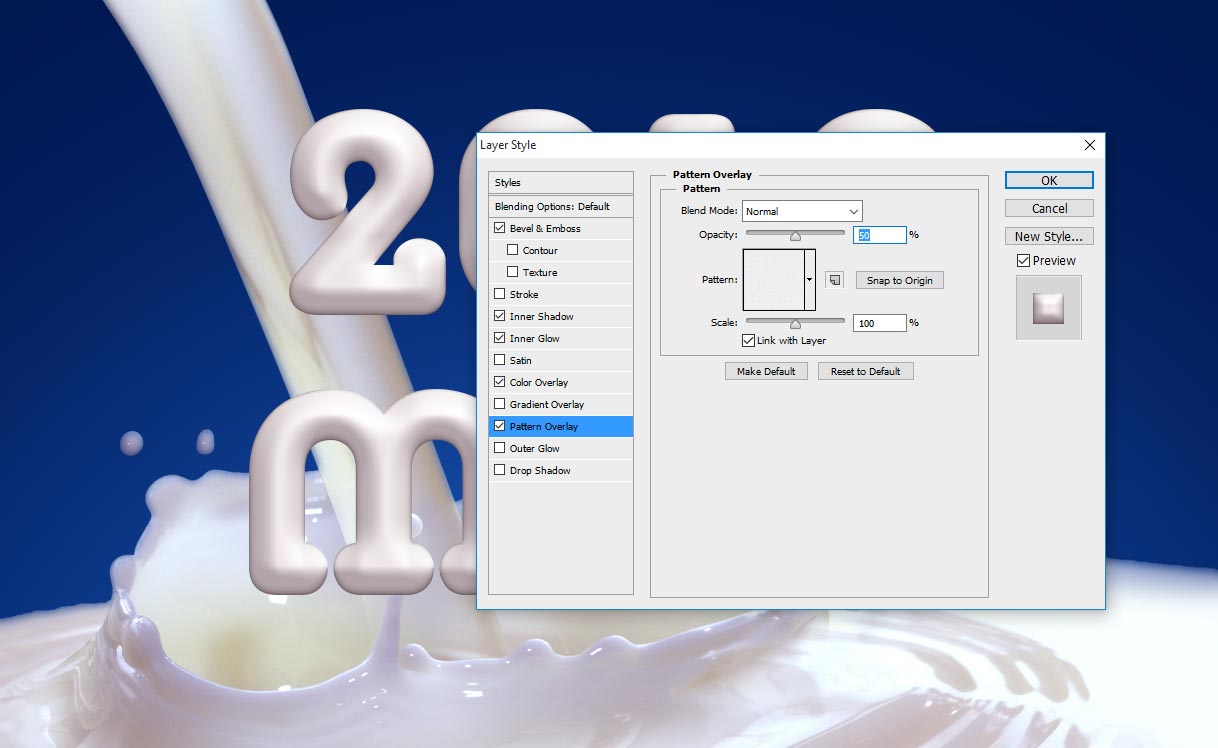
Step-6: Now Select Patter Overlay, This step also works very partially, if you need then follow or skip this step as well;
Blend Mode-Normal,
Opacity-50%,
Pattern-Gray granite,
Scale-100%.
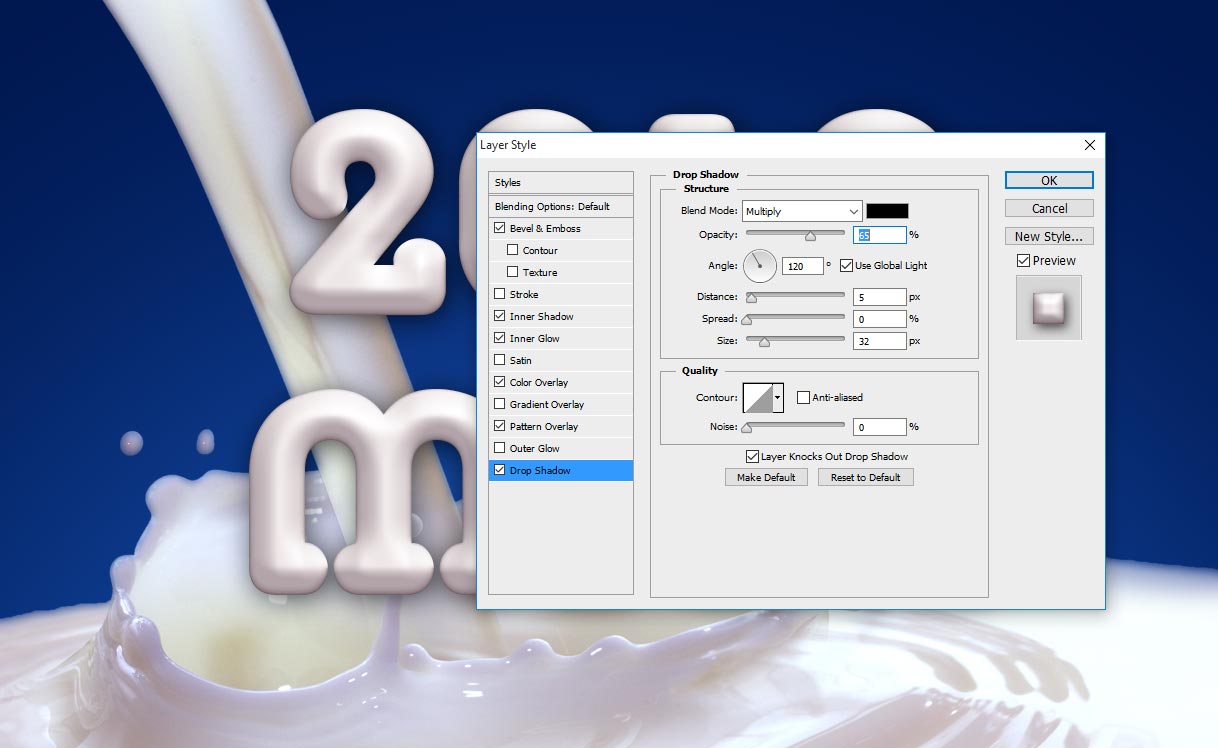
Step-7: This is the final step, choose Drop Shadow, this shadow gives more realistic and brings better eye catching design looks;
Blend Mode-Multiply,
Opacity-65%,
Angle-120 Degree,
Distance-5px,
Size-32px.
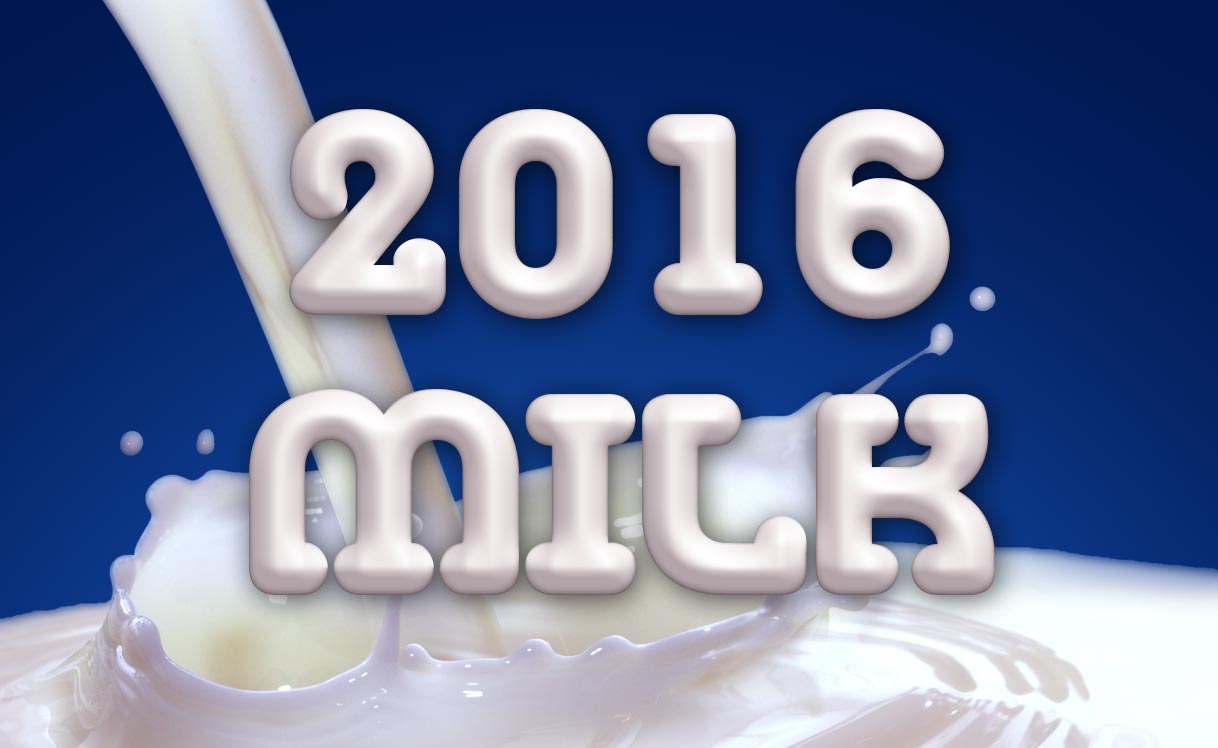
Done all the steps successfully, just see the below milk text effect that is the final output.
Thanks for reading this tutorial “How to create milk text effect in Photoshop”, visit regular and get more tricks and tips.
[ads2]
[button color=”green” size=”medium” link=”https://www.alldesigncreative.com/free-psd/text/milk-text-effect-psd/” icon=”Download PSD” target=”true”]Download PSD[/button]