
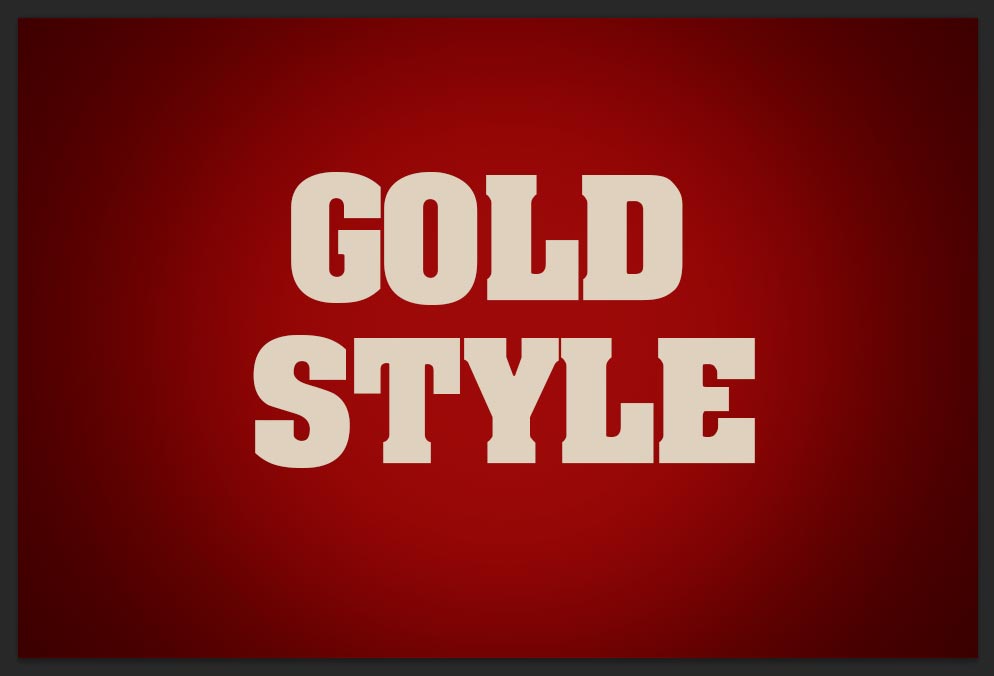
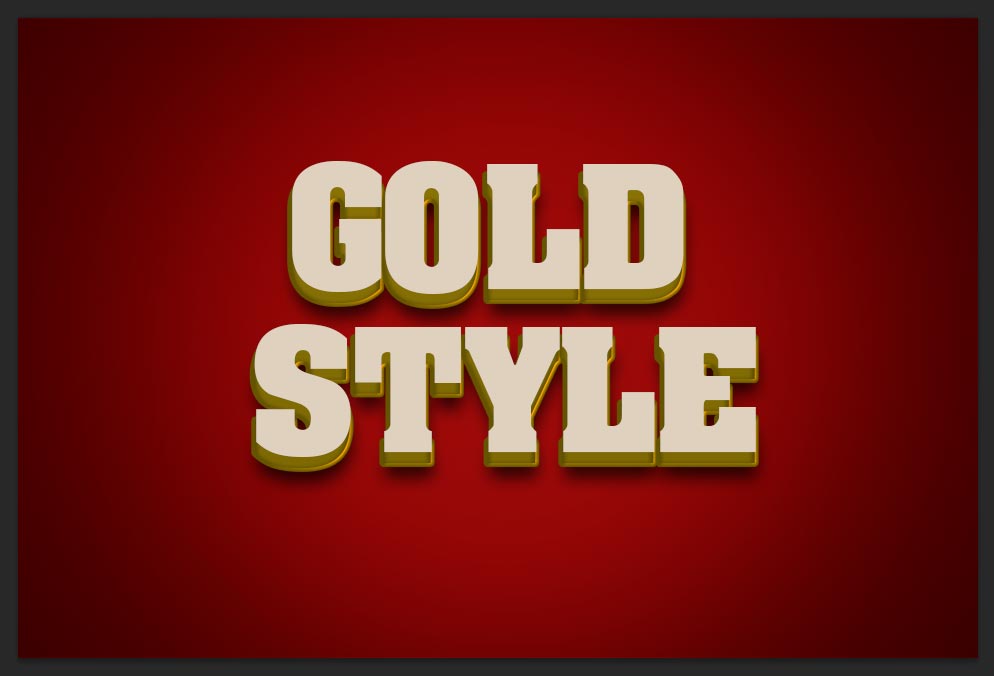
In this tutorial, i am teaching one of best photoshop 3d gold text effect tutorial, this is really very fabulous results once you finished all the steps as showing following steps. This gold text effect seem to be 100% 3D style. This tutorial discuss very clearly 14 steps how to use blending option values to get elegant, shinny 3d gold text effect. Even i have attached PSD file in the end of the tutorial, just download and consider if you have any problem to following these steps.
[ads1]
Step-1: First take new document in the dimension of 960×640 px with default 72 dpi. and fill the background red gradient color as shown the document page and then go to tool palette and select type tool (T) and write down any name on the page and arrange in center.
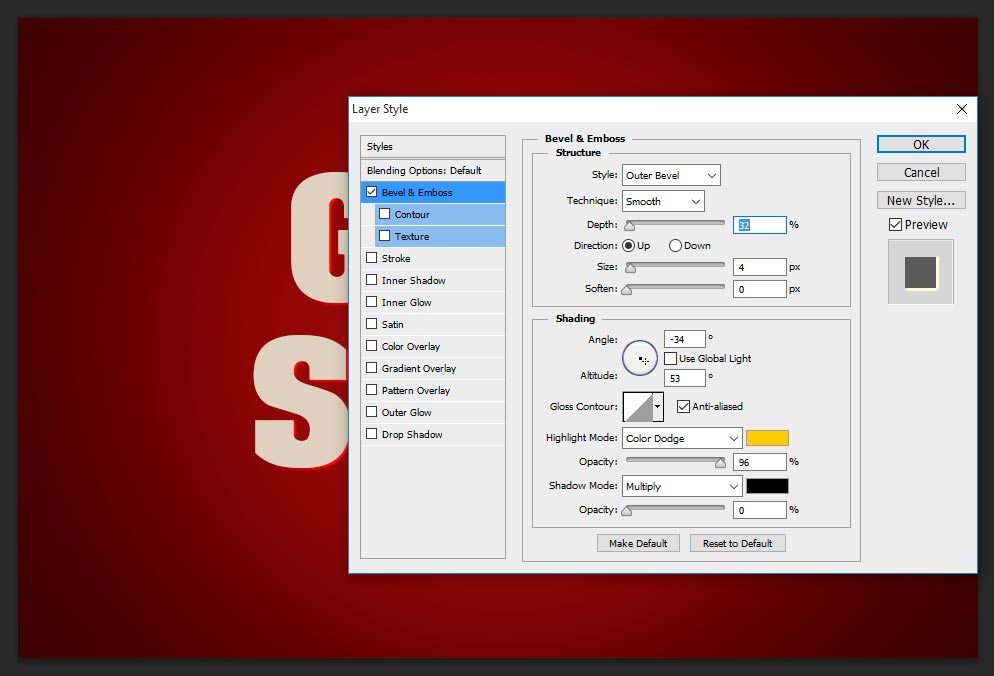
Step-2: Apply blending option to the text layer for that just go to Menu>Layer>Layer Style>Blending Option, here choose Bevel and Emboss and follow the values;
Style-Outer Bevel,
Technique-Smooth,
Depth-32%,
Direction-Up
Size-4px,
Angle-34 degree,
Altitude-53 degree,
Highlight Mode-Color Dodge, Color-#ffcc00, Opacity-96%,
Shadow Mode-Multiply, Color-#000000, Opacity-0%
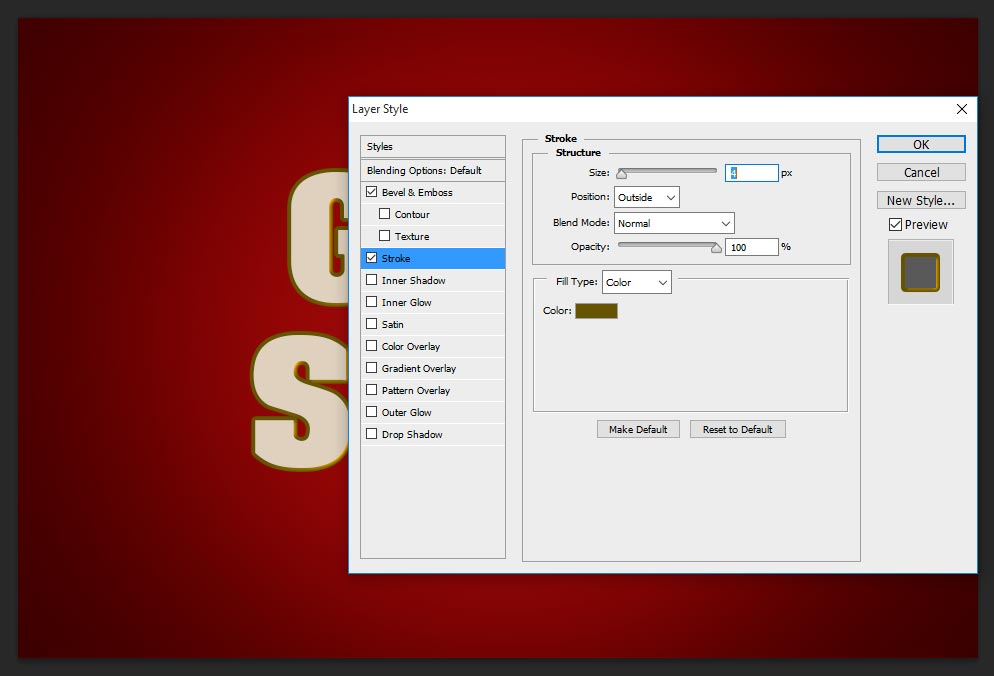
Step-3: Choose Stroke, this gives thickness in the edges, just change the values as follows;
Size-4 px,
Position-Outside,
Blend Mode-Normal,
Opacity-100%,
Fill type-Color, Color-#655400
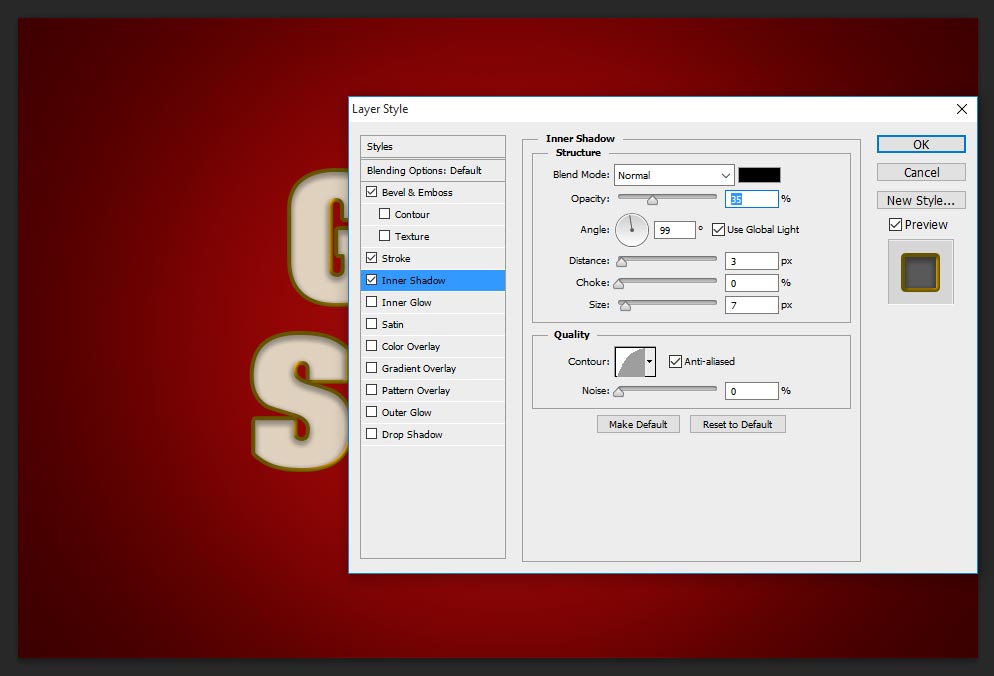
Step-4: Take Inner Glow and change the values as follows;
Blend Mode-Normal,
Opacity-35%,
Angle-99 degree,
Distance-3px,
Size-7px.
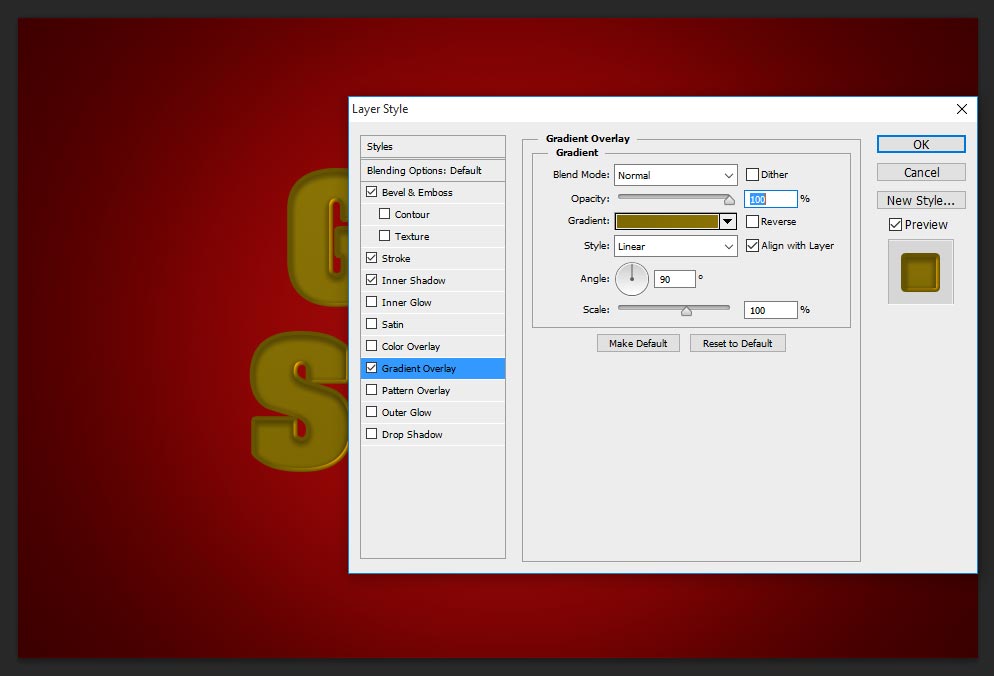
Step-5: Now select Gradient Overlay, This gives entire text with cool olive color and brings 3d realistic looks once finish all the steps;
Blend Mode- Normal,
Opacity-100%,
Gradient-#7e6902, #897205,
Style-Linear,
Angle-90 degree,
Scale-100%.
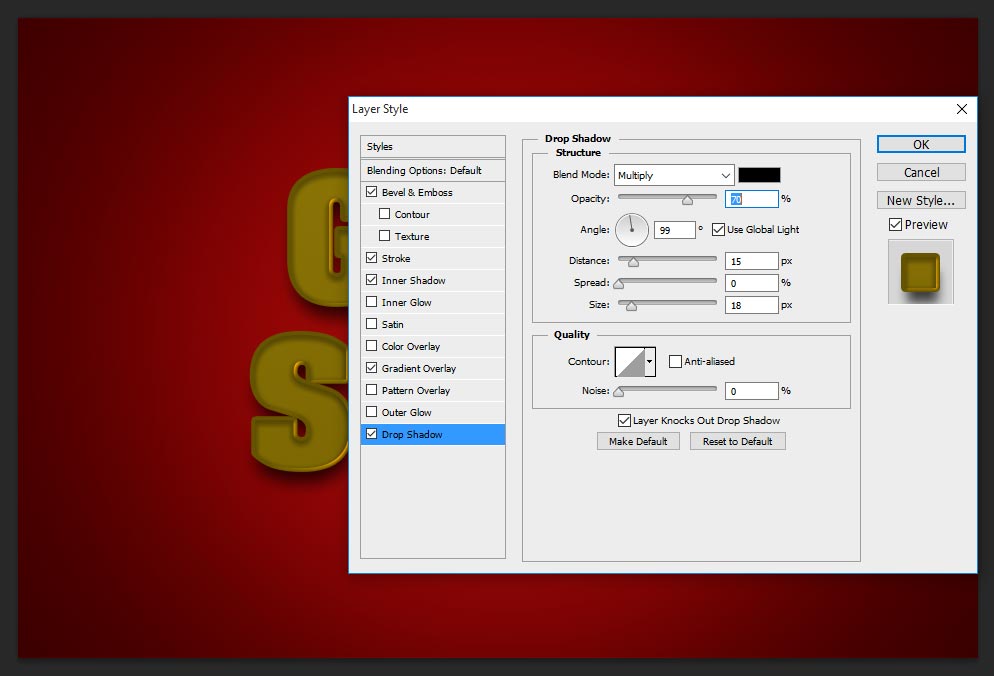
Step-6: Now need to give shadow to text, so choose Drop Shadow and change the values;
Blend Mode-Multiply,
Opacity-70%,
Angle-99 degree,
Distance-15px,
Size-18px.
Step-7: Now duplicate the text layer , Go to layer palette and select layer after just press Ctrl+J then it is duplicate, and then right click on that duplicate layer and choose Clear Layer Style then after your image should be as following our screen shot image.
Step-8: Now choose Bevel and Emboss and change the values as follows;
Style-Inner Bevel,
Technique-Smooth,
Depth-235%,
Direction-Up,
Size-10px,
Angle-88 degree,
Altitude-30 degree,
Gloss Contour-Gaussian,
Highlight Mode-Screen, Color-White, Opacity-70%,
Shadow Mode-Overlay, Color-Black, Opacity-100%.

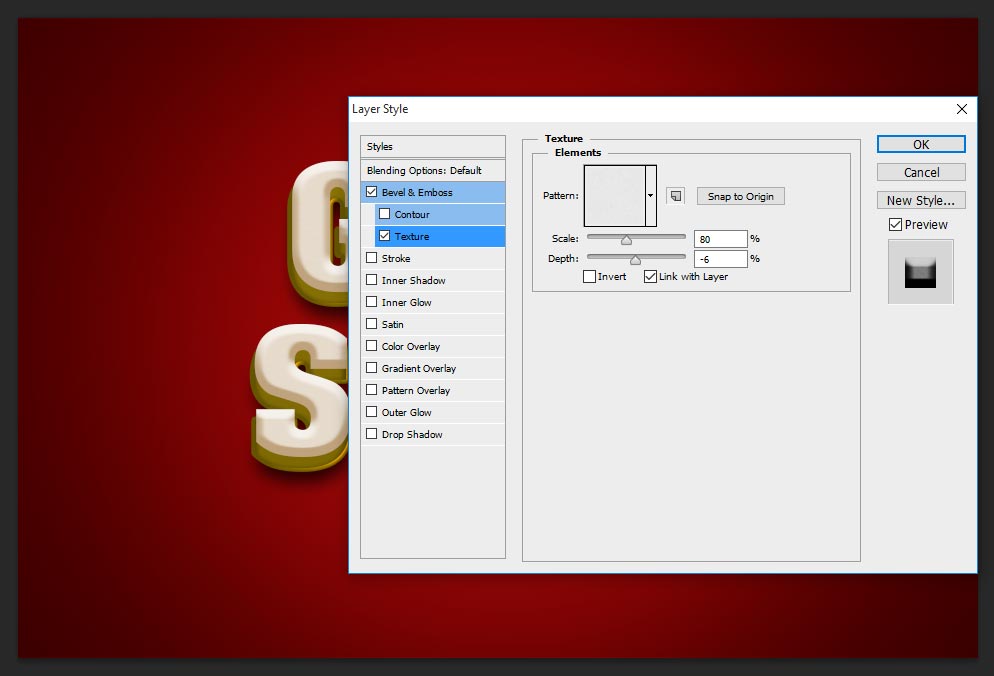
Step-9: Now select Texture and change the pattern as Gray Granite, Scale-80%, Depth-6%, This steps setting works very partially, if you don’t need this step then skip it as well or follows.
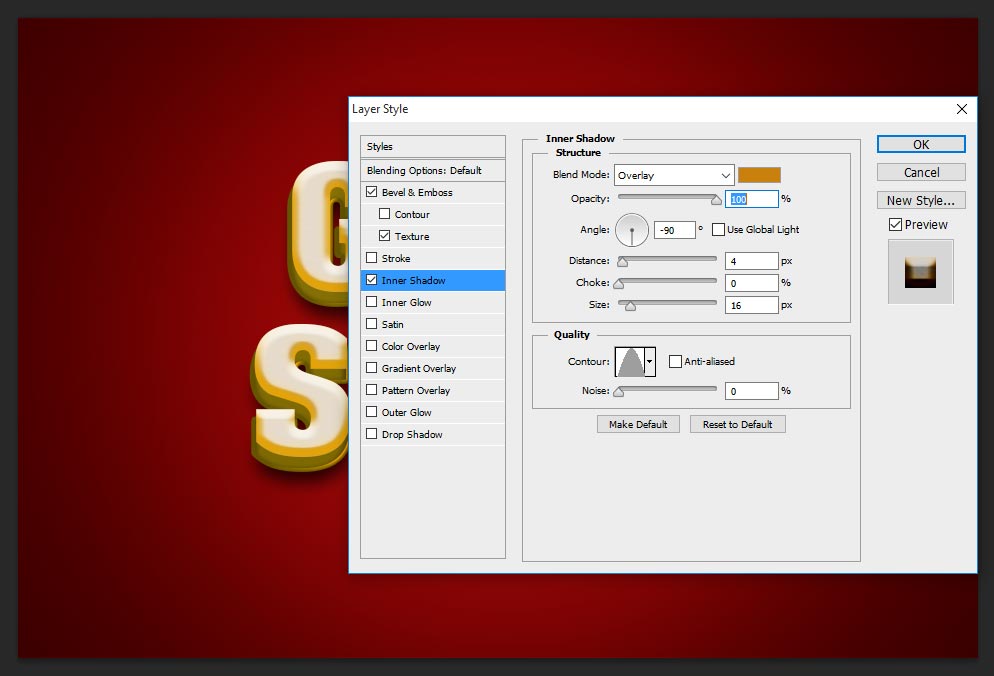
Step-10: Choose Inner Shadow and change the setting as;
Blend Mode-Overlay, Color-#c9800c,
Opacity-100%,
Angle-90 degree,
Distance-4px,
Size-16px,
Contour-Cone.
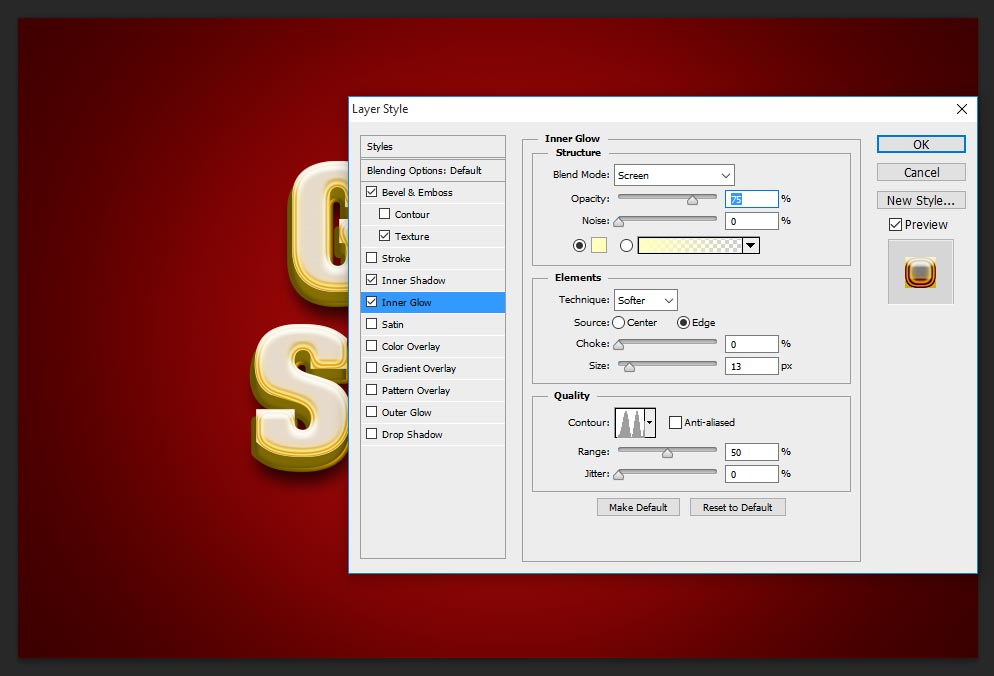
Step-11: Take Inner Glow, This step also works very partially to giving glowing color inside the text, you can follow or skip it;
Blend Mode-Screen,
Opacity-75%,
C0lor-#ffffbe,
Technique-Softer,
Source-Edge,
Size-13px,
Contour-Ring Double,
Step-12: Now take Satin, This satin setting brings better gold effect, this effect result can see after applying Color Overlay;
Blend Mode-Multiply,
Opacity-50%,
Angle-19 degree,
Distance-11px,
Size-14px,
Contour-Cove Shallow.

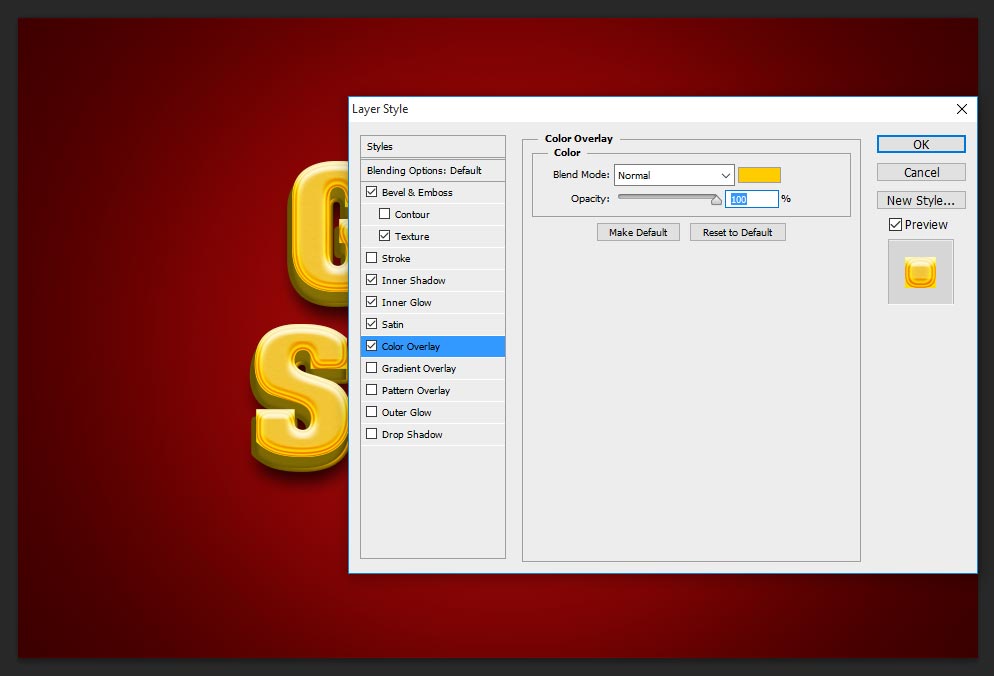
Step-13: Choose Color Overlay, change the blend mode into normal and keep opacity-100%, here color value is #ffcc00.
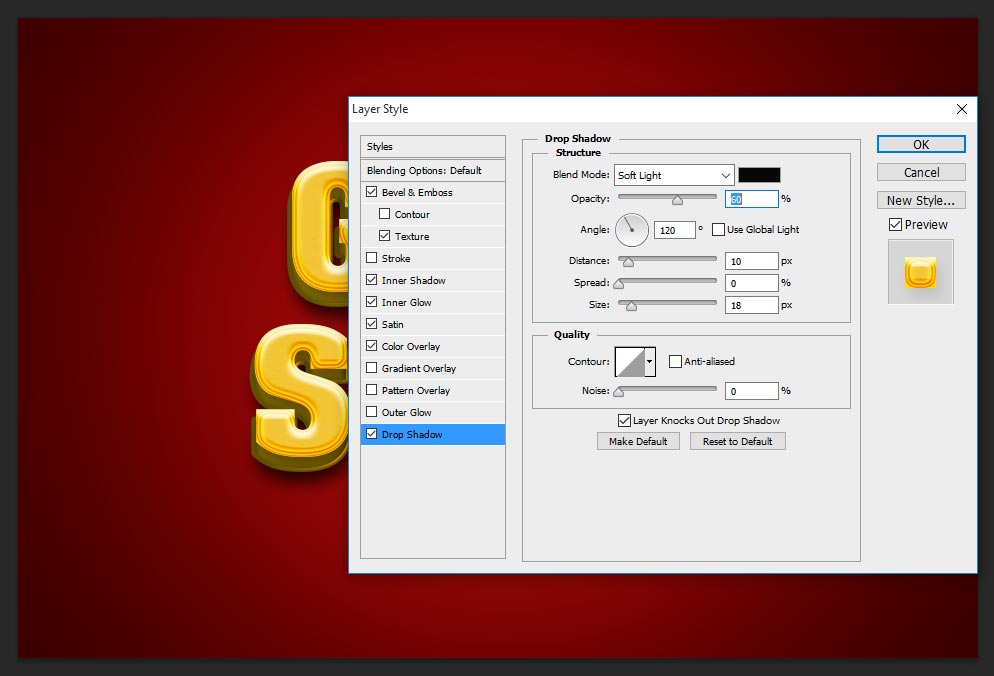
Step-14: Now Finally choose Drop Shadow and change the setting as follows;
Blend Mode- Soft Light, Color-Black,
Opacity-60%,
Angle-120 Degree,
Distance-10px,
Size-18px.
Thanks for reading this tutorial, visit regular and get more tricks and tips

[ads2]
[button color=”green” size=”medium” link=”https://www.alldesigncreative.com/free-psd/text/realistic-gold-style-3d-text-effect/” icon=”Download PSD File” target=”true”]Download PSD File[/button]