In this tutorial, i will explain how to make 3d retro text effect in Photoshop, this is simple tutorial to make yourself , there are many kind of retro text effect is there in web search, but in this tutorial i have tried something different ways to make this cool retro text effect in Photoshop. Even i have added project PSD file in the bottom of this tutorial, just download as a free of cost and consider if you have any doubt to creating this 3d retro text effect photoshop tutorial.
Let’s start the procedure!
Step-1: Take new document and fill the background #277ee8 with sky blue color and write down any name what do you want to effect on the stage.

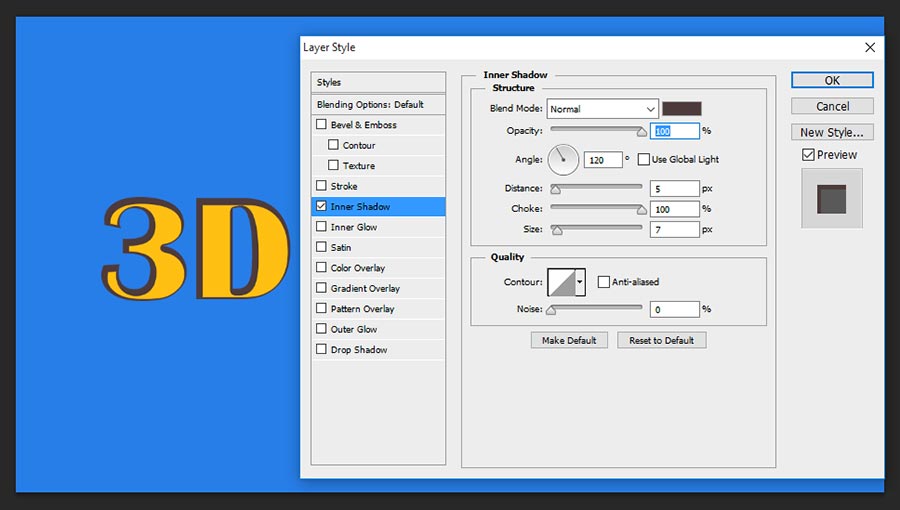
Step-2: Choose Inner Shadow and follow the values;
Blend Mode-Normal, Color-#4d3b3b
Opacity-100%,
Angle-120 degree,
Distance-5px,
Choke-100%,
Size-7px.
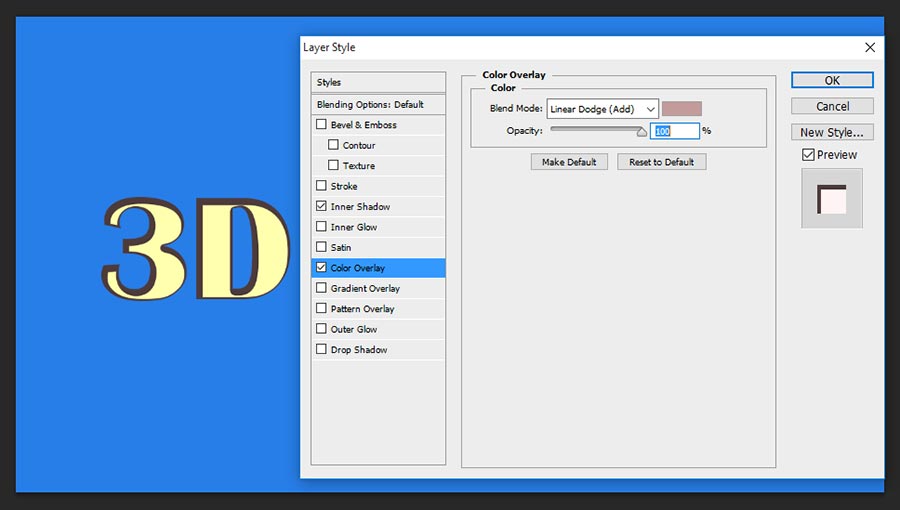
Step-3: Choose Color Overlay, this step can works as a great color effect once you reached in final stage;
Blend Mode-Linear Dodge, Color-c39b9b,
Opacity-100%.
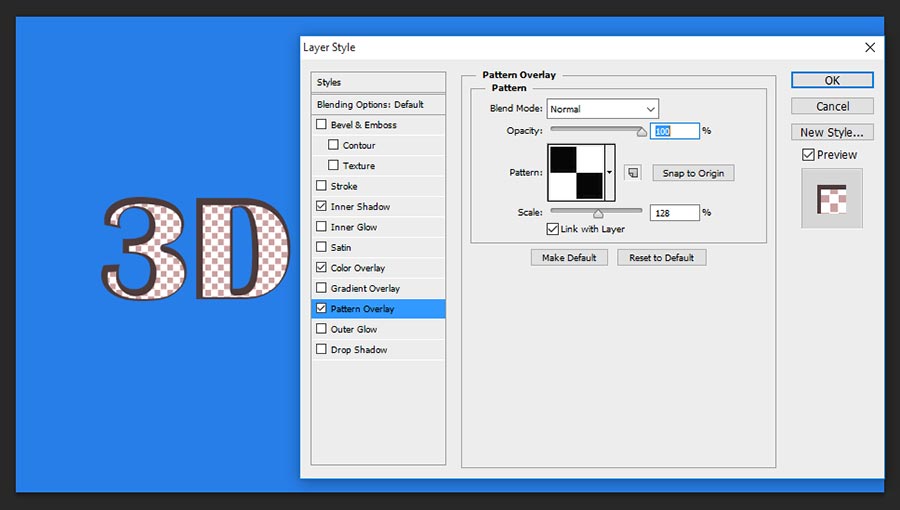
Step-4: Select Pattern and change the setting as follows;
Blend Mode-Normal,
Opacity-100%,
Pattern- Create white and black color combination of box texture as shown the screen shot and define pattern and apply here.
Scale-128%.
Step-5: Take Stroke and change the following setting; this values gives smooth edges inside the text with gradient color filling.
Size-7px,
Position-inside,
Blend Mode-Normal,
Opacity-100%,
Fill Type-Gradient,
Gradient- #e2dacd, #e6dcd3,
Style-Linear,
Angle-90 degree,
Scale-100%.

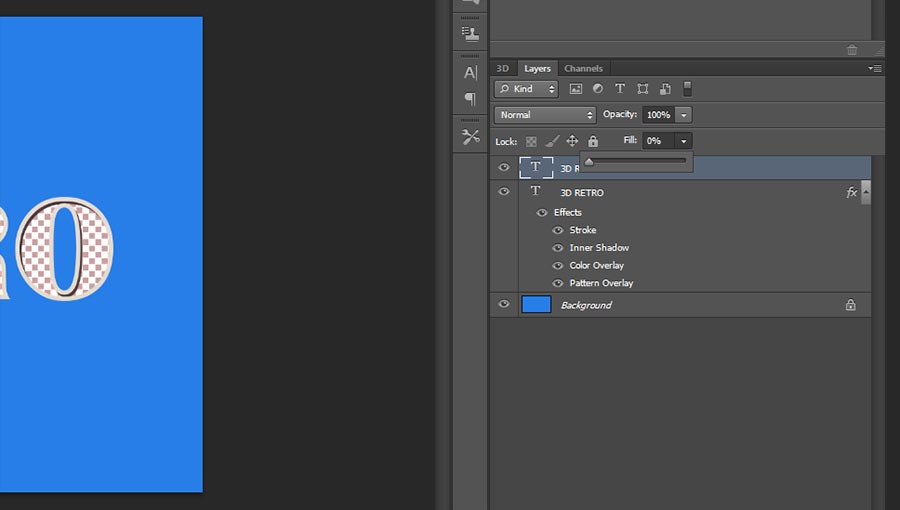
Step-6: Now need to duplicate the first layer, just pressing Ctrl+J you can make easily the second layer, now need to remove all applied effect on the second layer, so just right click on the second layer and choose Clear Layer Style then after your image seem to be as showing the below screen shot image.

Step-7: Make your text fillling 0% as shown the screen shot.
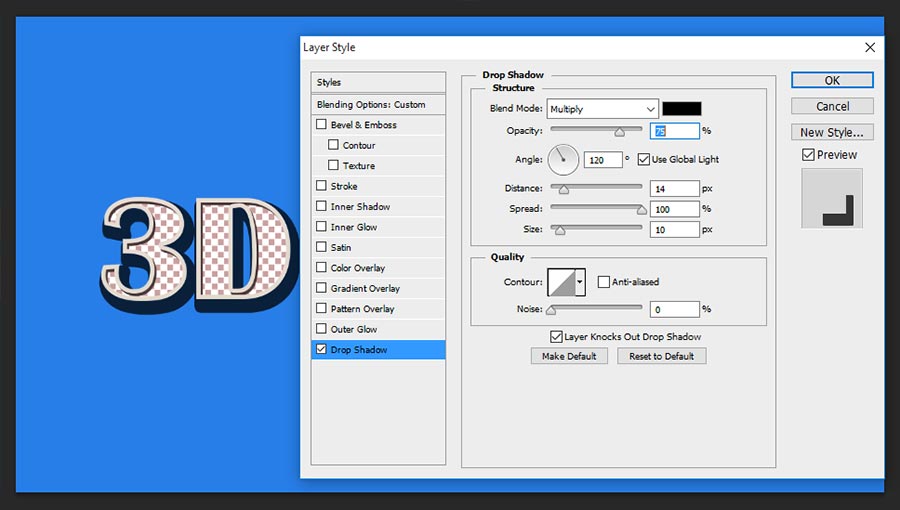
Step-8: Now apply blending option to the second layer and choose Drop Shadow, here change the setting as follows;
Blend Mode-Multiply,
Opacity-75%,
Angle-120 degree,
Distance-14px,
Spread-100%,
Size-10px.
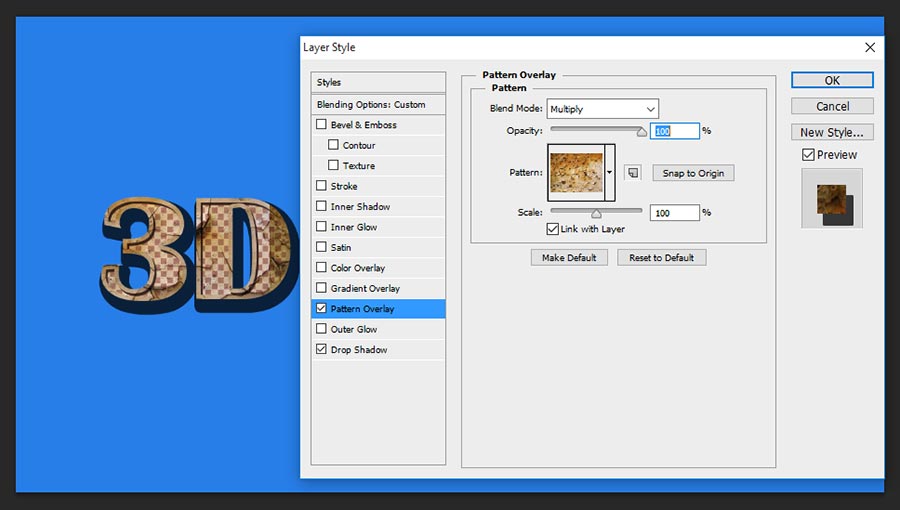
Step-9: Choose Pattern Overlay and change the setting as shown the image;
Blend Mode-Multiply,
Opacity-100%,
Pattern-Take any some fracture texture and apply here, first take texture and make define pattern for that go to edit>choose Define Pattern and then you can get option here to apply that created pattern.
Scale-100%.
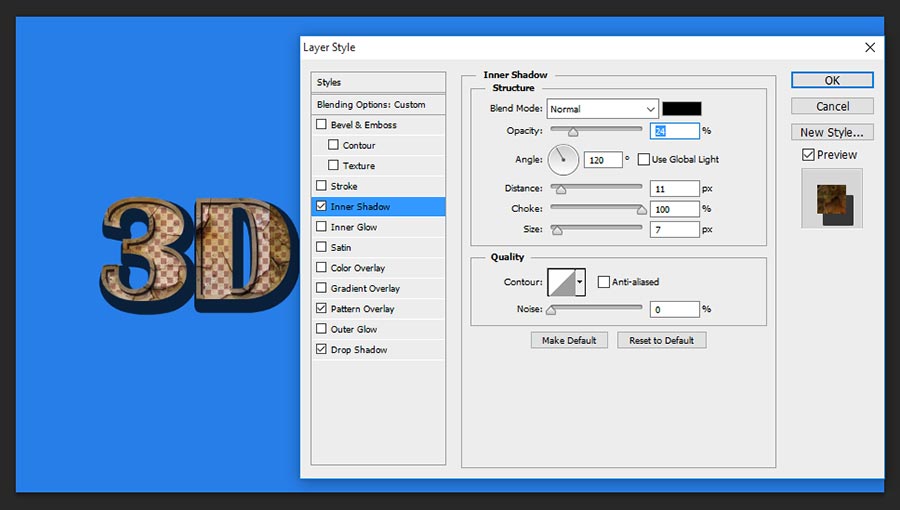
Step-10: Take Inner Shadow and change the values as shown the screen shot image;
Blend Mode-Normal, Color-Black,
Opacity-24%,
Angle-120 degree,
Distance-11px,
Choke-100%,
Size-7px.
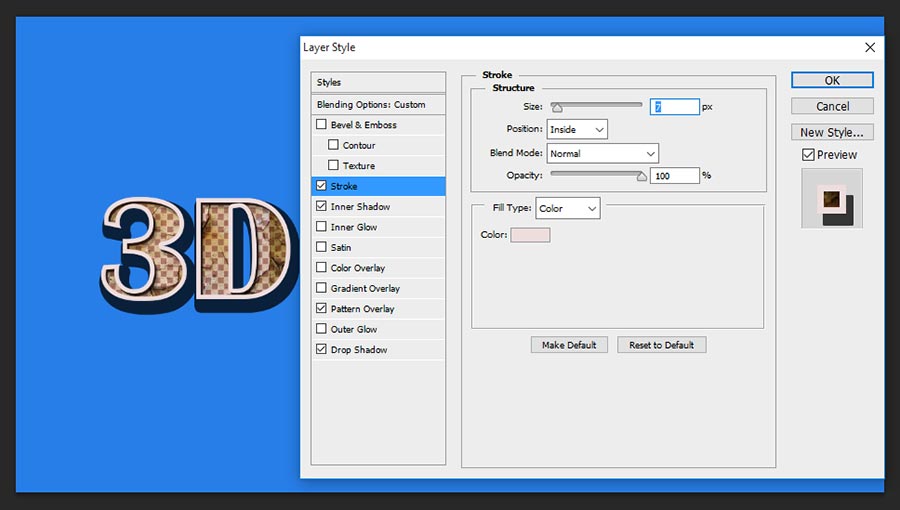
Step-11: This is the final step to get 3d retro text effect in photoshop. Choose Stroke and change the size into 7px, and keep position inside, blend mode and opacity keep it in default values, change the color into light salman color(#eddddd).
Thanks for reading this tutorial, visit regular to get more tricks and tips from this website.