
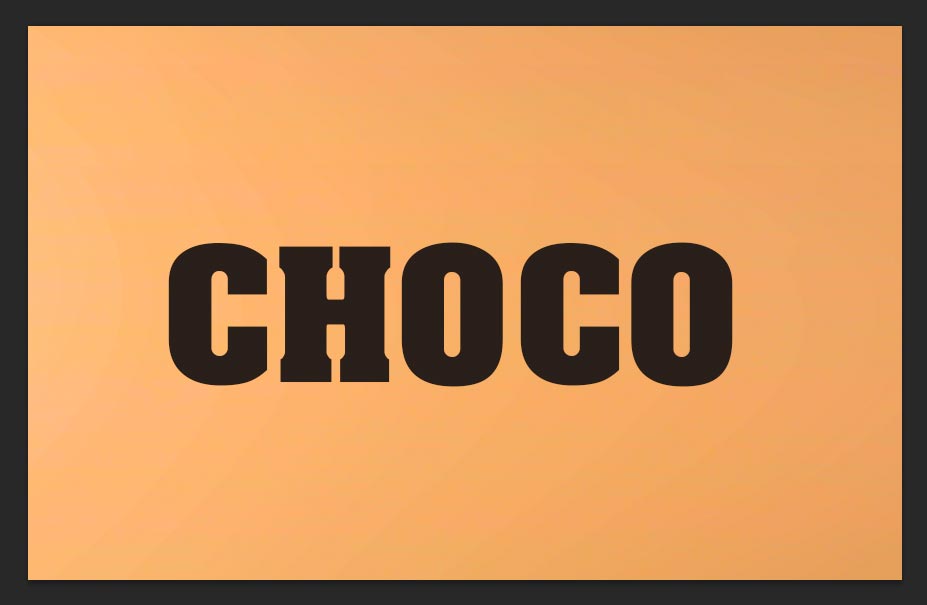
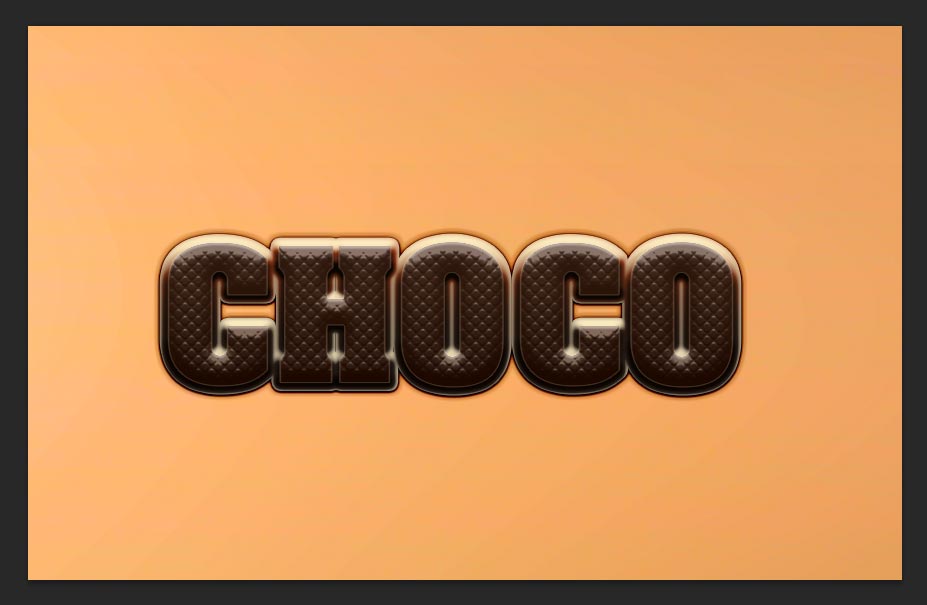
Hi, In this tutorial i will explain in easy way how to make best and real chocolate text effect tutorial in photoshop, this is very simple steps but you can get ultimately awesome effect, if you can see the preview in above image then you can understand what type of final chocolate text effect are you getting from this tutorial. This type of best Chocolate text tutorial first time AllDesignCreative.com bringing initially, visit regular and get awesome tutorial tricks. Creating any text effect tutorial is very easy if they have knowledge in Photoshop, But creating realistic effect and bringing more eye catching effect is little tough, because whoever may have so many year experience and creativity knowledge, only them can possible to create this type of best quality effect. Once you learn all those tricks then you also become very creativity person, because you might have grasp all those tips from the tutorial.
[ads1]
Ok lets start the procudure,
Step-1: First take new document (Ctrl+N) and dimension is width-2000 and height-1333, resolution is 72 dpi, write down any name whats the name do you want to give chocolate effect. Just write down after selecting type tool (T).
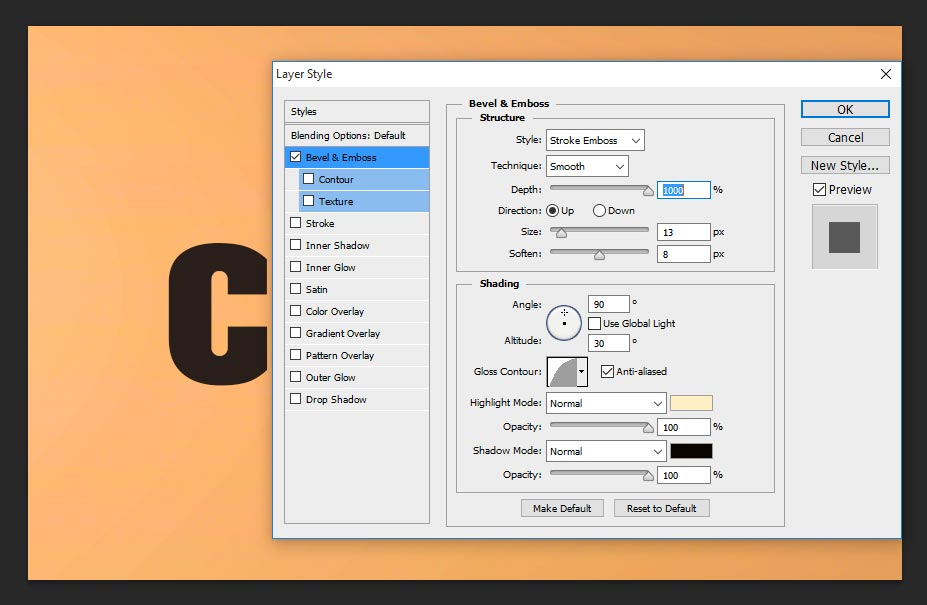
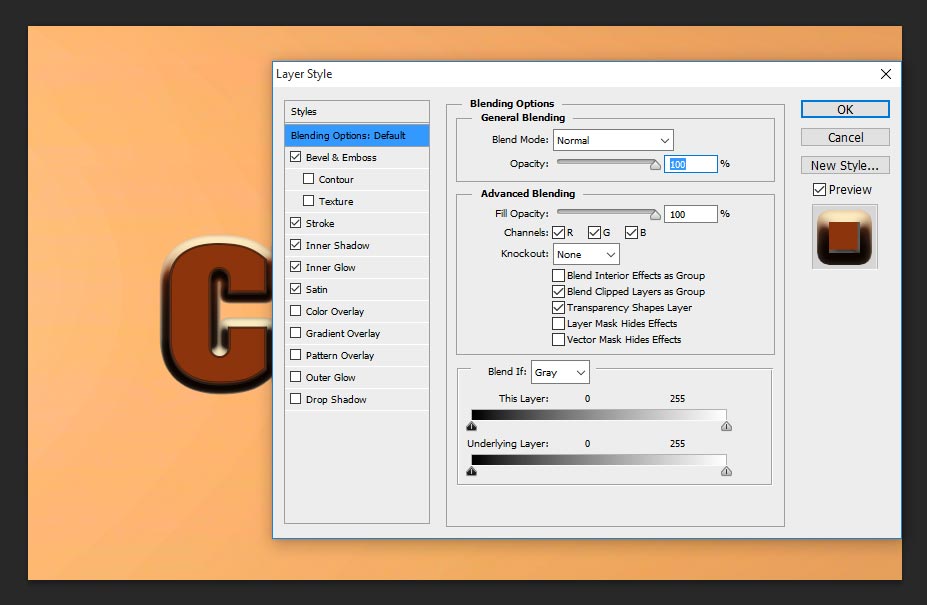
Step-2: Now we need to apply blending option to get our require chocolate text effect, so go to layer> layer style>blending option, now change the values as shown the screen shot.
depth-1000%,
size-13px,
soften-8px,
angle-90 degree, altitude-30 degree,
gloss contour-half round,
highlight mode-normal and color is #ffefc5, opacity-100%.
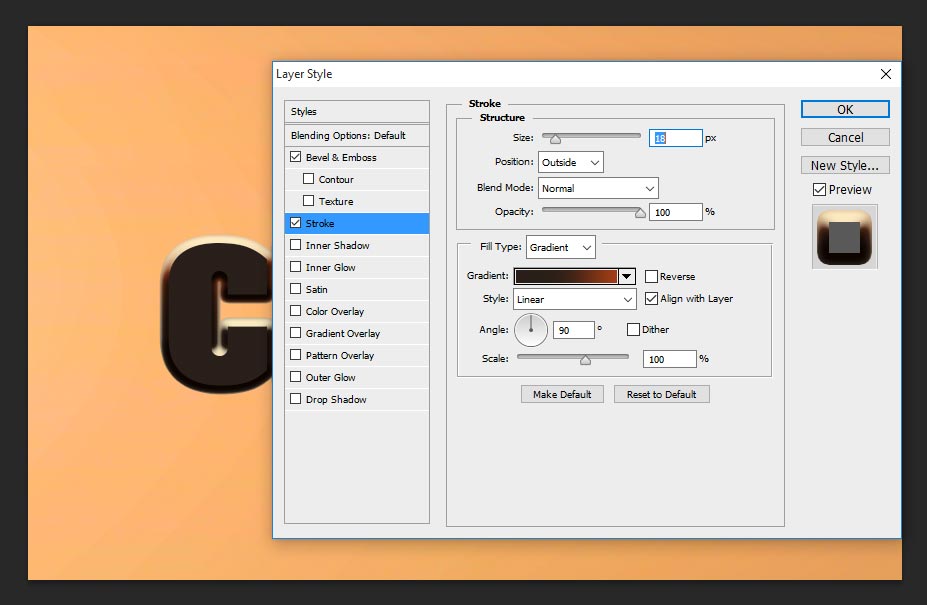
Step-3: Choose stroke, applying this stroke works in edges in great way, see in your practice changing below values how does it coming.
size-18px,
position-outside,
blend mode-normal,
opacity-100%<
fill type-gradient and color value follows #291f1a, #362117, #a33d14.
Keep default values of angle-90 degree, scale-100%.
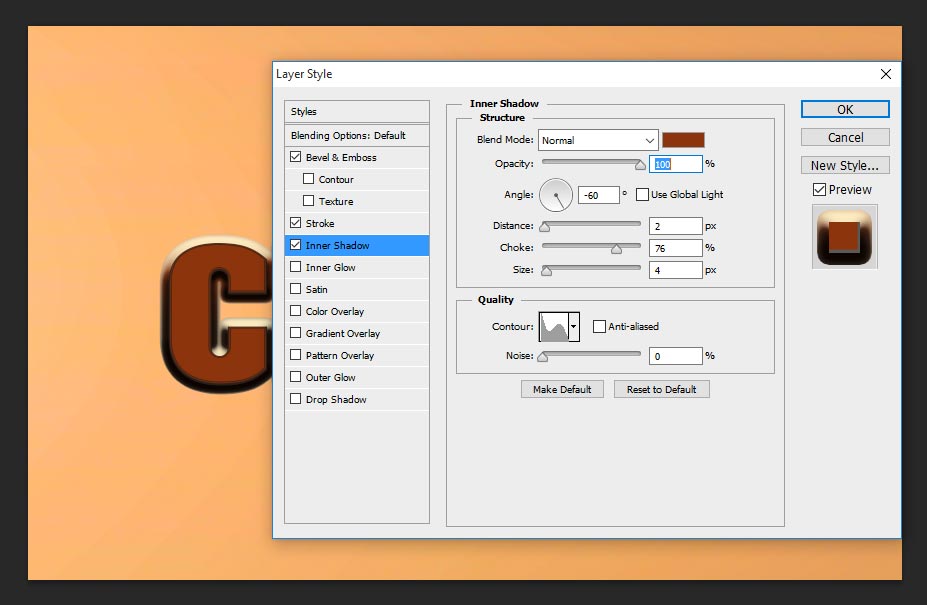
Step-4: Now choose inner shadow, this inner shadow gives better color of chocolate effect and follows the values;
blend mode-normal,
opacity-100%,
angle-60 degree,
distance-2px,
choke-76%,
size-4px.
in quality take contour-rolling slope as shown the below screen shot.
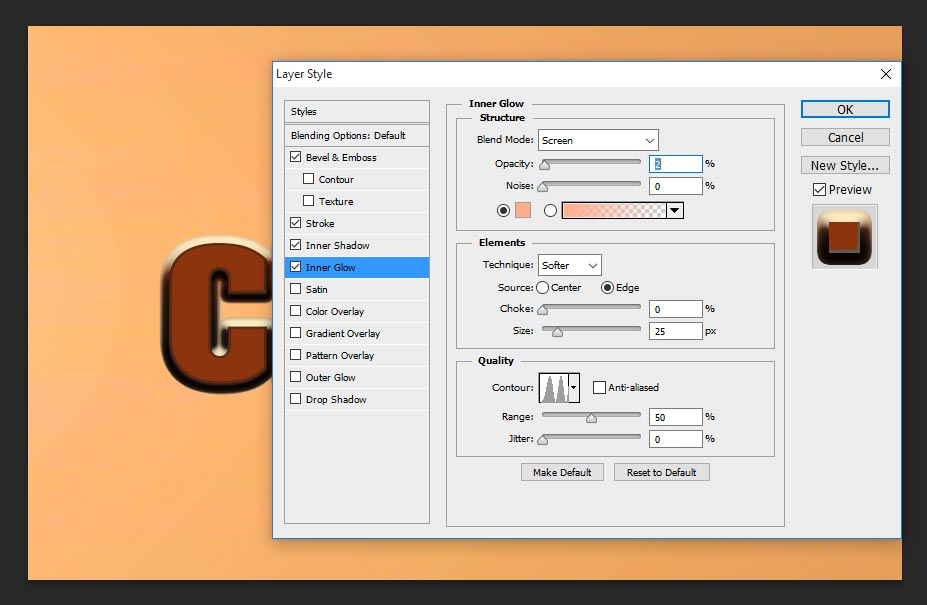
Step-5: Take inner glow and change the values as follows; this step values is not most necessary, may be you can skip also, it gives very slight inner glowing to text.
blend mode-screen,
opacity-2px,
color-#ffae8a,
size-25px,
in quality contour take-ring-double, range-50%.
Step-6: Now select satin and leave just default values, no need to change any setting inside the satin style.
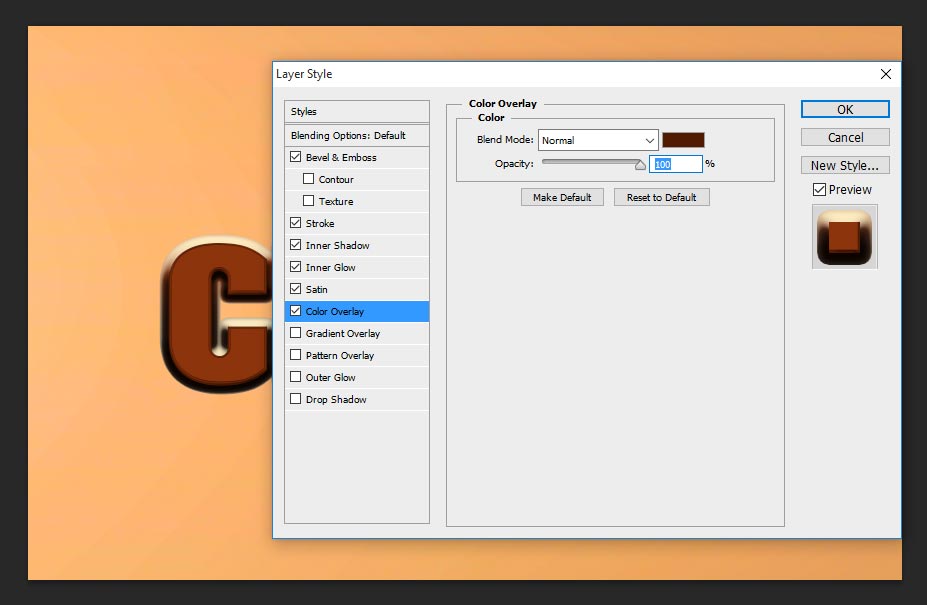
Step-7: Now choose color overlay, here just change the blend mode to normal, opacity-100%,
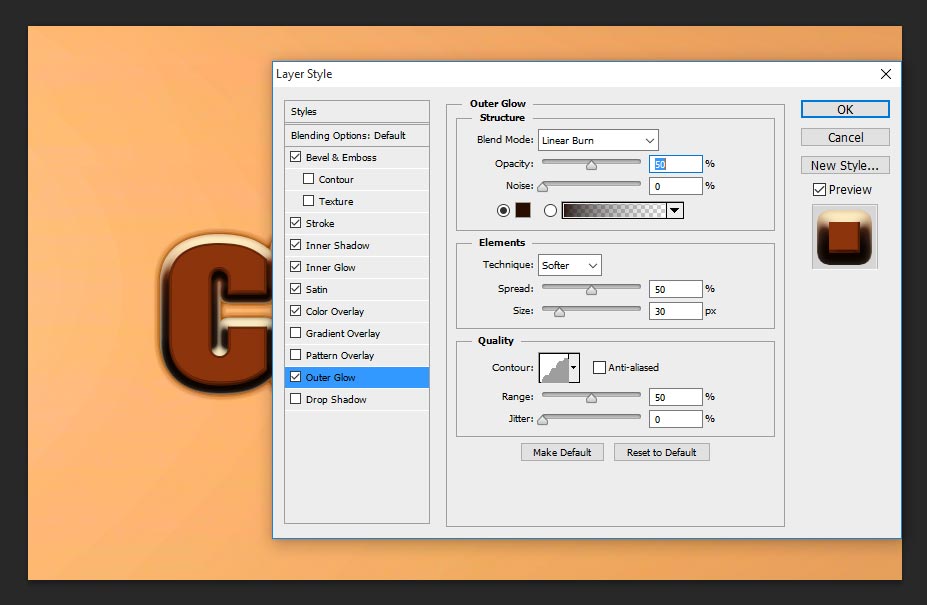
Step-8: Choose outer glow, this outer glow gives little shadow to text as well, just follow the values as shown the screen shot image;
blend mode- linear burn,
opacity-50%,
color-#280d00, gradient color take as shown the screen shot, just one side filling color, other side 0% color filling.
technique-softer, spread-50%, size-30px,
in quality contour-rounded steps, range-50%.
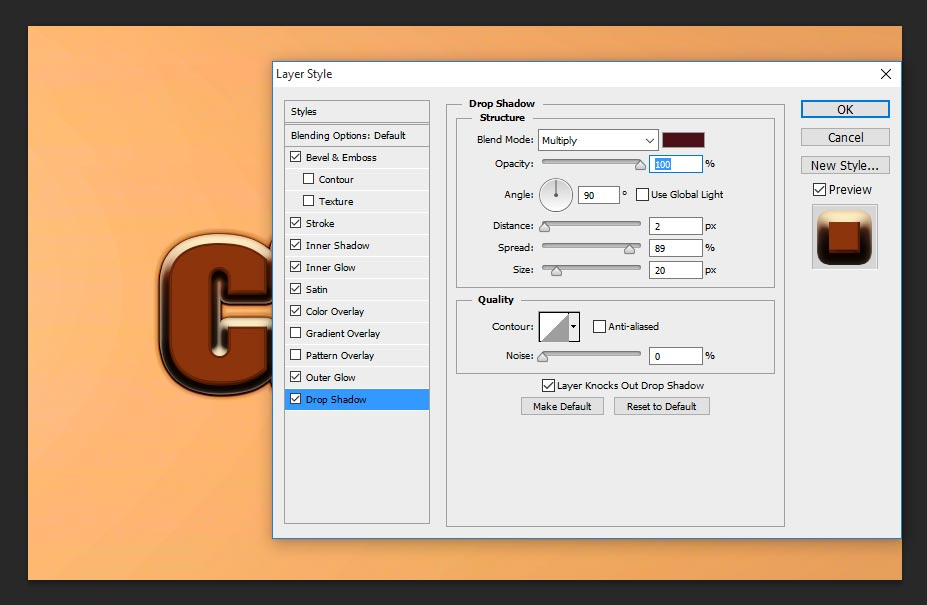
Step-9: Choose drop shadow and follow the values;
blend mode-multiply,
opacity-100%,
distance-2px,
spread-89px,
size-20px.
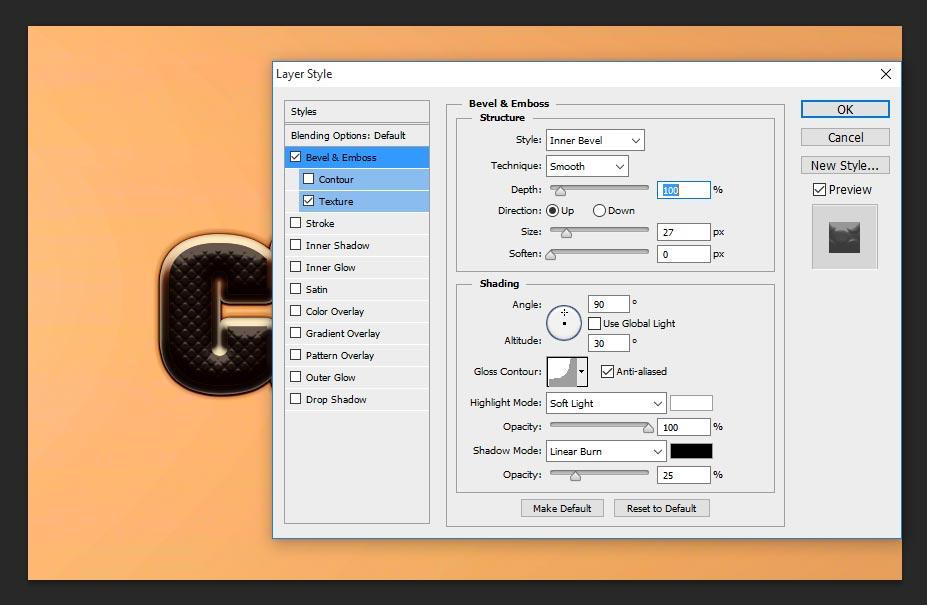
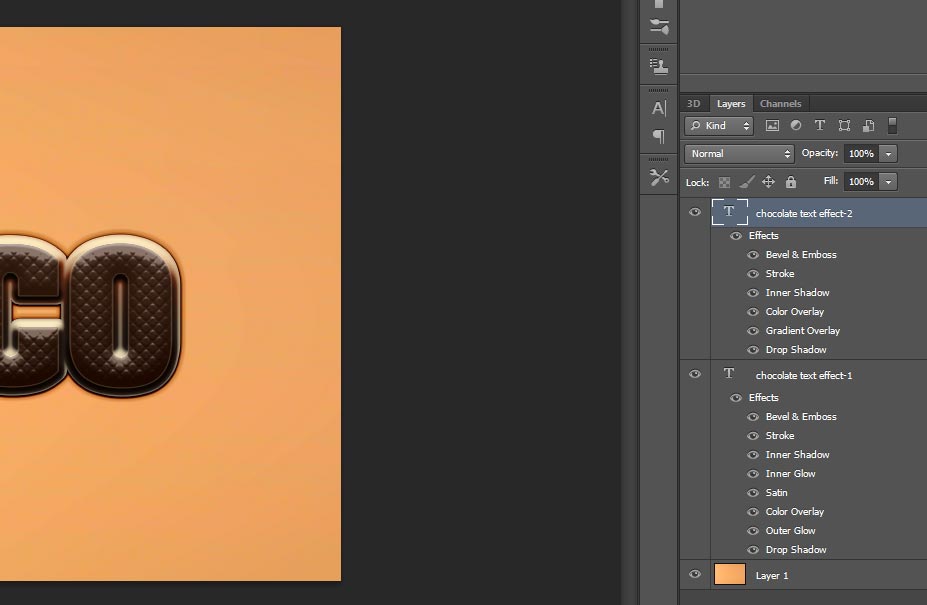
Step-10: So far we have worked in first layer, now duplicate the first layer and right click on the layer and clear layer style. and again apply blending option style go to layer> layer style> blending option and follow the values in bevel and emboss;
size-27px,
angle-90 degree, altitude-30 degree,
gloss contour-cove shallow,
highlight mode-softlight, opacity-100%,
shadow mode-linear burn, opacity-25%.
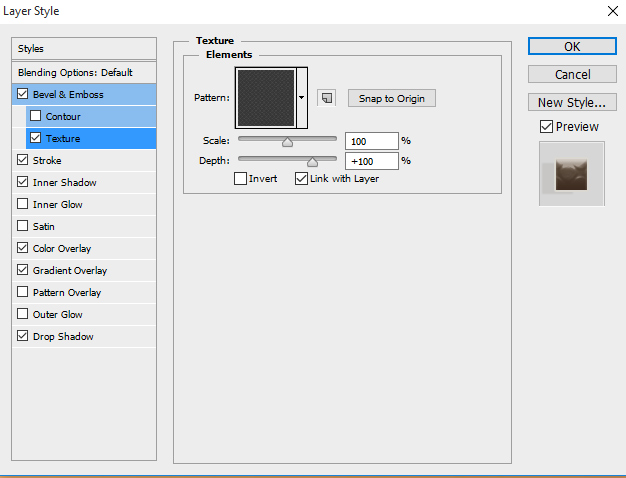
Step-11: Now we have to apply texture, here this texture brings in great effect, take any type of designed lines texture, because this lines texture only brings attractable design on the chocolate text. Just change the settings as follows;
scale-100% it is depends on your taking texture dimension, depth-100%.
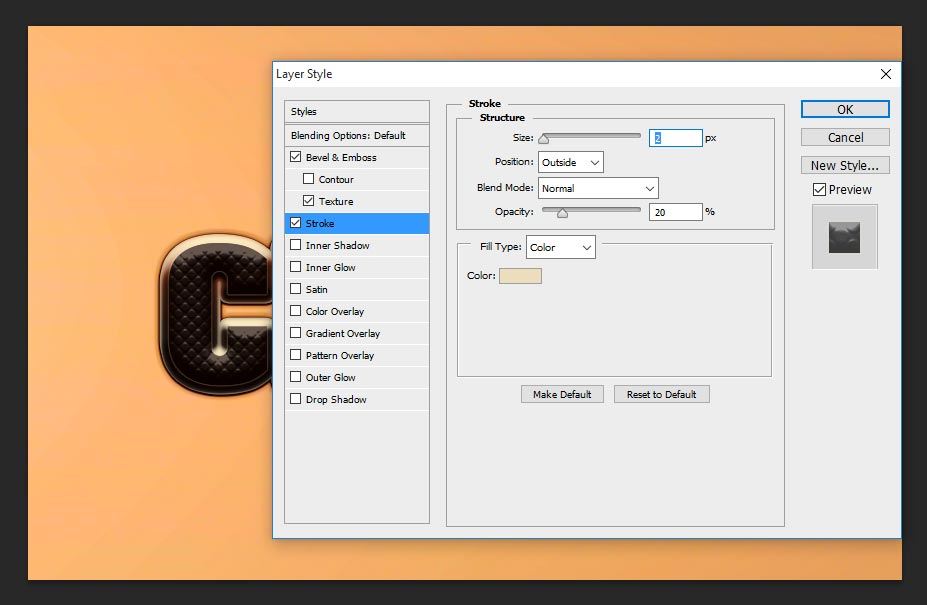
 Step-12: Now choose stroke for little shinning to give in the edges well.
size-2px,
position-outside,
blend mode-normal,
opacity-20%,
fill type-color,
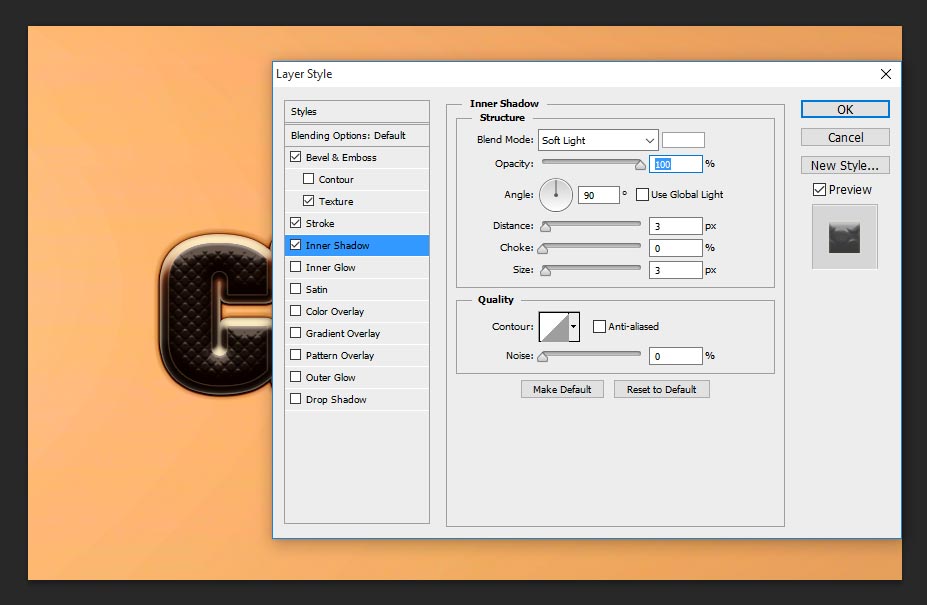
Step-13: Take inner shadow and fallow the settings;
blend mode-soft light,
opacity-100%,
distance-3px,
size-3px.
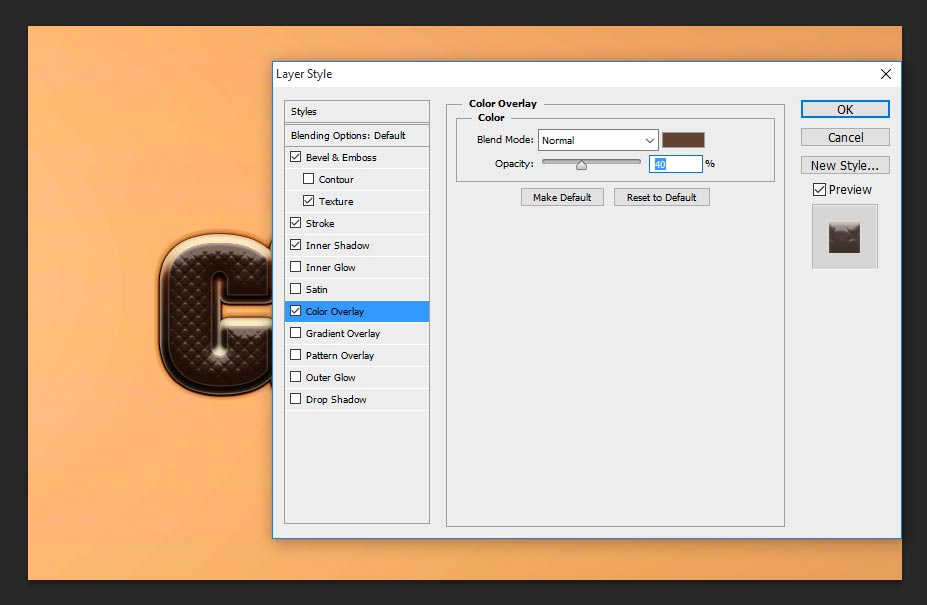
Step-14: Choose color overlay, to give for little bright color over the text, for that just change your color setting as follows;
blend mode-normal, opacity-40%.
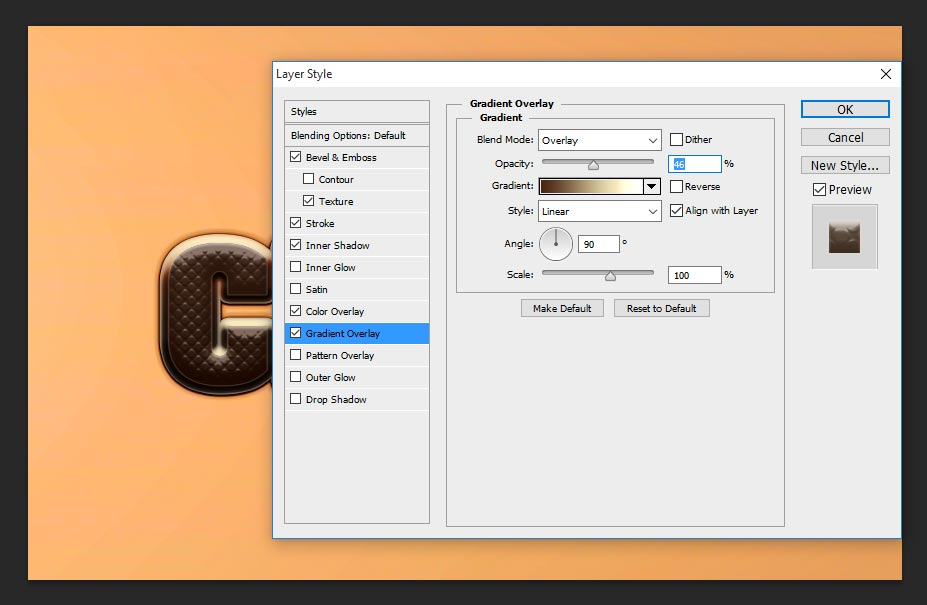
Step-15: Now apply gradient overlay on the text for some more brright shinning on the text, change the setting as follows;
blend mode-overlay,
opacity-46%,
gradient- color-#472512, #f5e8bc, #ffffff,
angle-90 degree, scale-100%.
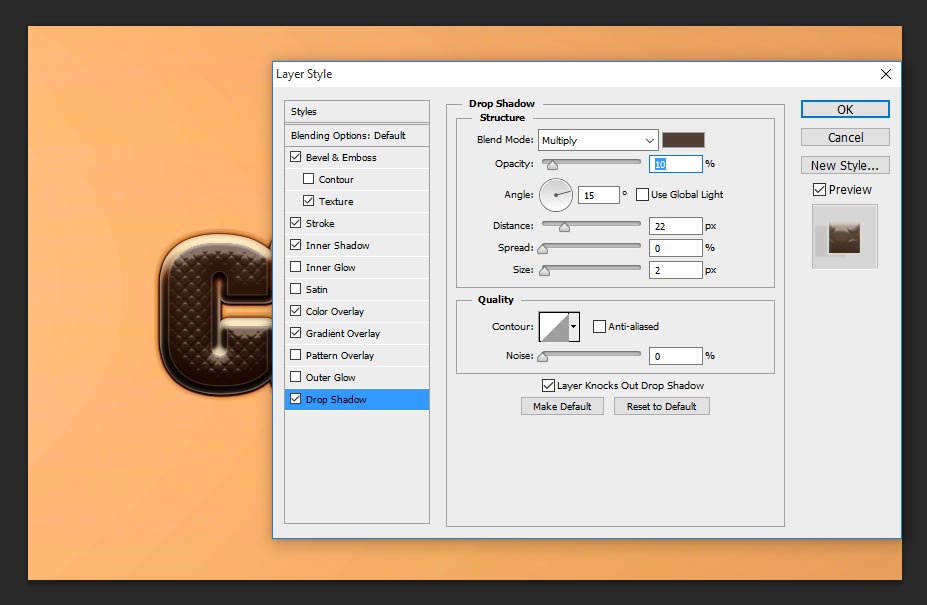
Step-16: We have reached final chocolate text effect in Photoshop, here just need to give the shadow, to giving this shadow depends on your making poster or other any design style, just give it according your requirement on your page style.
That’s it, successfully we have finished this chocolate text tutorial in Photoshop. Thanks for reading this tutorial. Just visit regular to get amazing new effect of tutorial tricks.
[ads2]
[button color=”green” size=”big” link=”https://www.alldesigncreative.com/free-psd/text/chocolate-text-effect-psd-photoshop-file/” icon=”Download PSD File” target=”true”]Download PSD File[/button]