
In this tutorial, i will teach you how to make “real gold plated text effect in photoshop”, just created this awesome text effect with in 8 steps, There are many tricks to create gold text effect, here in this tutorial something new way showing how to make best gold plated text effect. First time we are only bringing this type of new effect in web search. Find the PSD file in the end of this tutorial and download if you need to get better understanding.
Let’s start the procedure!
[ads1]
Step-1: Take new document in the dimension of 1000x670px with default 72 dpi. Now fill the background by using Gradient Tool (G) and write down any name on the page and set it in the center as shown the screen shot image.

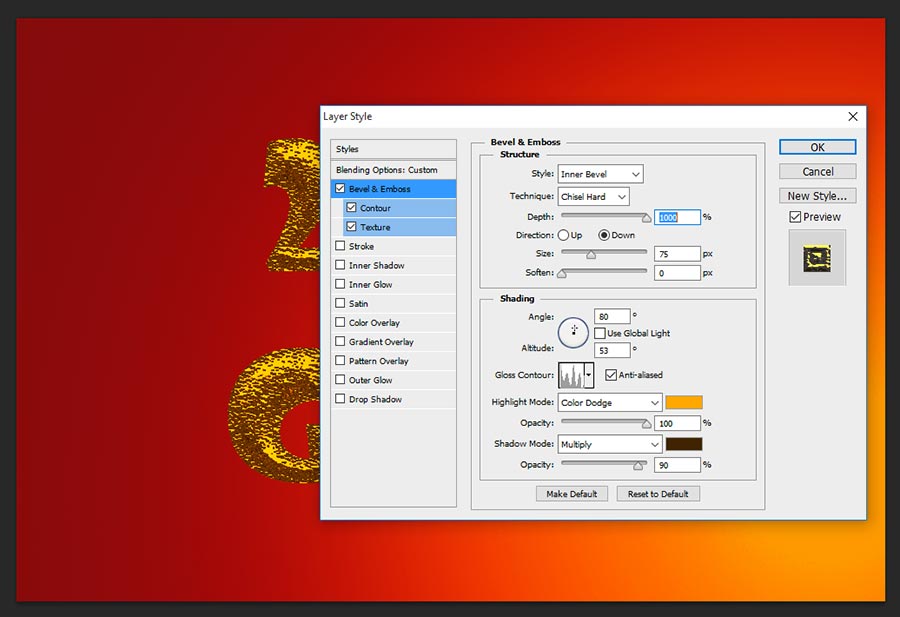
Step-2: Now apply layer style to the text and choose Bevel and Emboss and follow the values;
Style-Inner Bevel,
Technique-Chisel Hard,
Depth-1000%,
Direction-Down,
Size-75px,
Angle-80 degree,
Altitude-53 degree,
Gloss Contour- Drag elements manually as shown the screen shot,
Highlight Mode-Color Dodge, Color-#ffa800, Opacity-100%,
Shadow Mode-Multiply, Color-#402300, Opacity-90%.
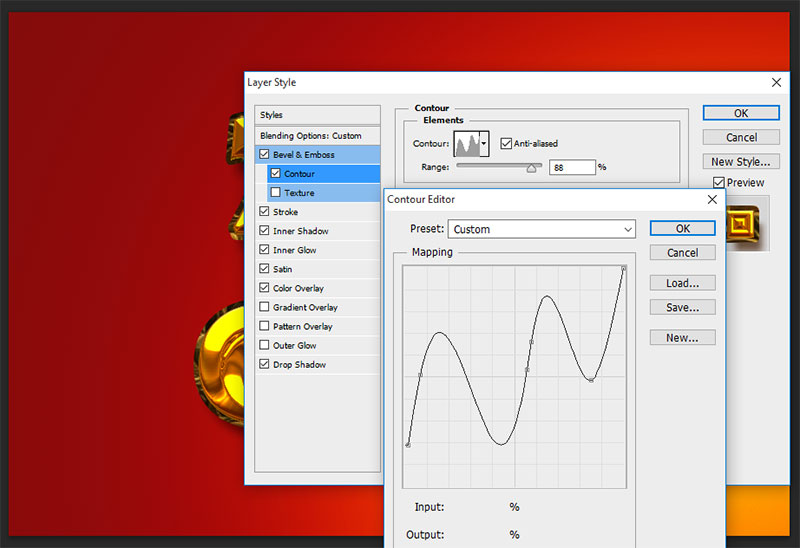
Now select directly on Contour and make manually preset as shown the screen shot image and keep Range in 68%
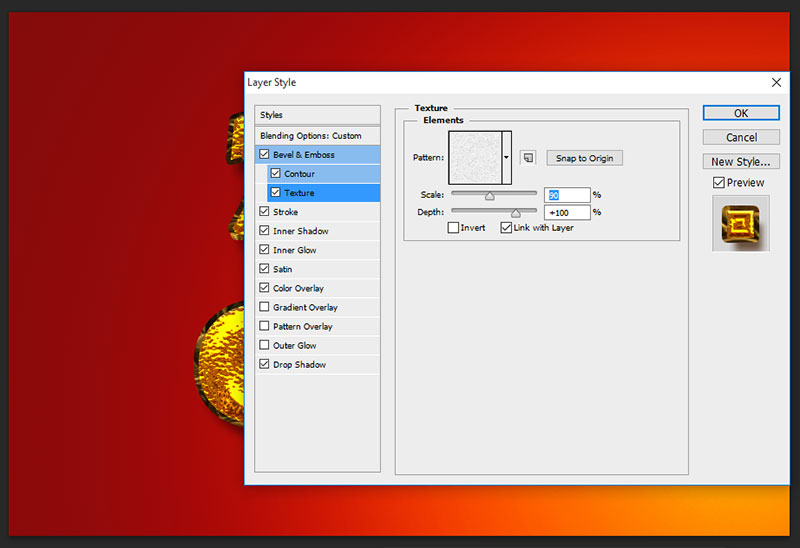
Select Texture, here in the pattern list choose “Gray Granite” and scale it 90% and keep default depth 100%.
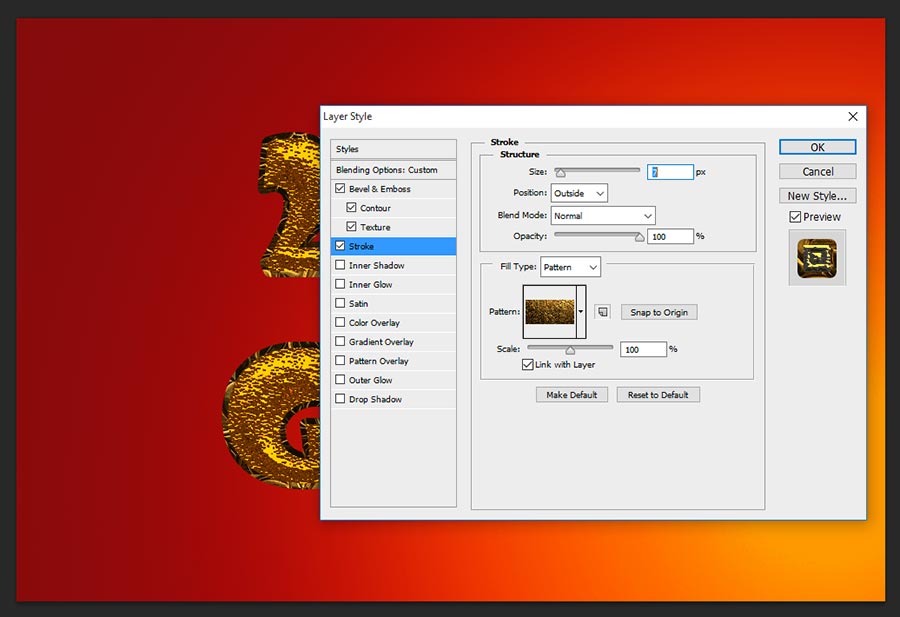
Step-3: Take Stroke, This step will works great in outside of the text border;
Size-7px,
Position-Outside,
Blend Mode-Normal,
Opacity-100%,
Fill Type-Pattern,
Pattern-Choose any gold pattern for the text stroke,
Sclale-100%, It is depends on the pattern size, if your pattern is very big size then reduce your scale % as well and fit it how does it looks well.
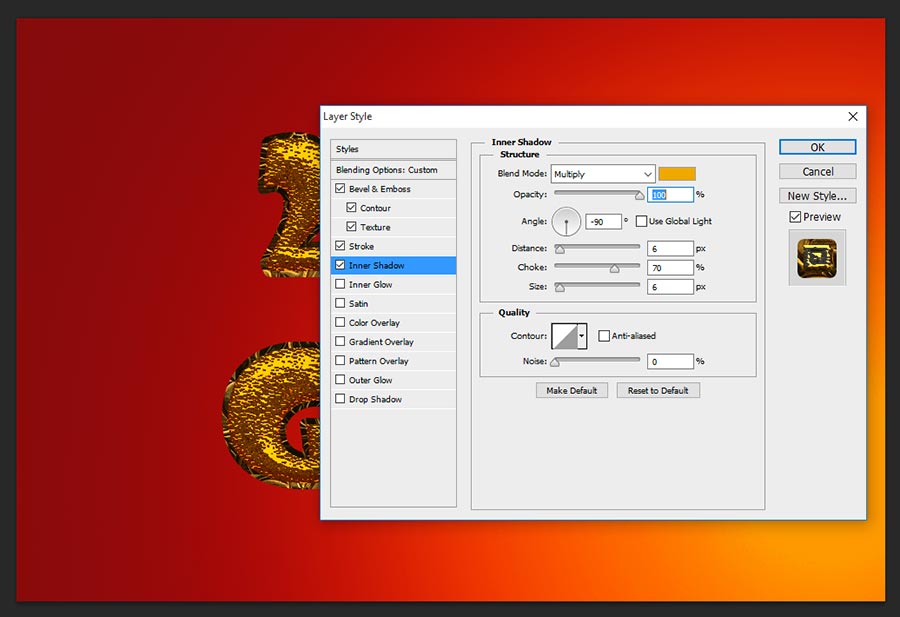
Step-4: Choose Inner Shadow, it gives cool dark gold color shinning inside the text;
Blend Mode-Multiply, Color-#efa900,
Opacity-100%,
Angle-90 degree,
Distance-6px,
Choke-70%,
Size-6px.
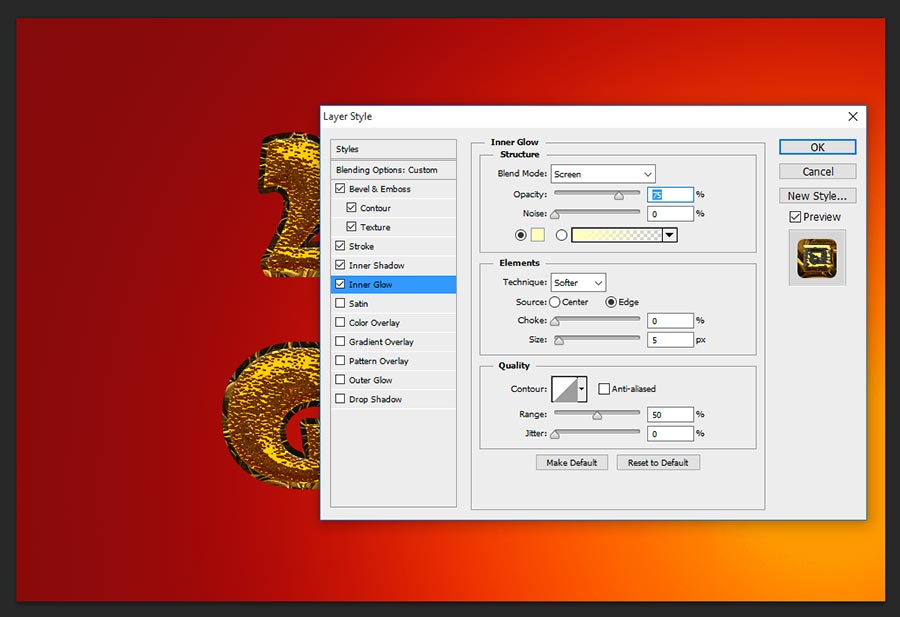
Step-5: Choose Inner Glow, This will works very partially in side the text glowing;
Blend Mode-Screen,
Opacity-75%,
Color-#ffffbe,
Technique-Softer,
Source-Edge,
Size-5px,
Contour-Linear, range-50%.
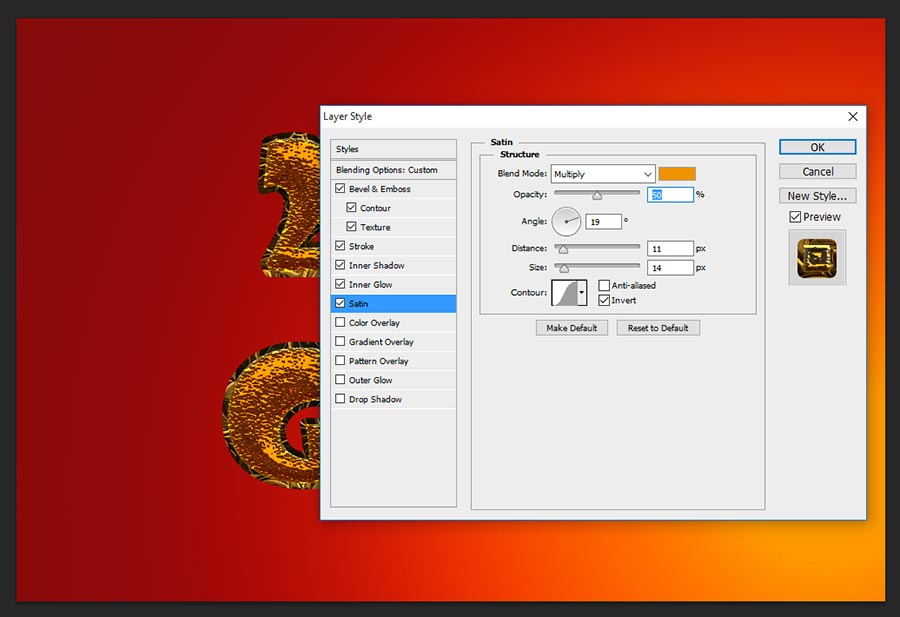
Step-6: Now take Satin and change values as follows;
Blend Mode-Multiply, Color-#f09300,
Opacity-50%,
Distance-11px,
Size-14px,
Contour-Gaussian.
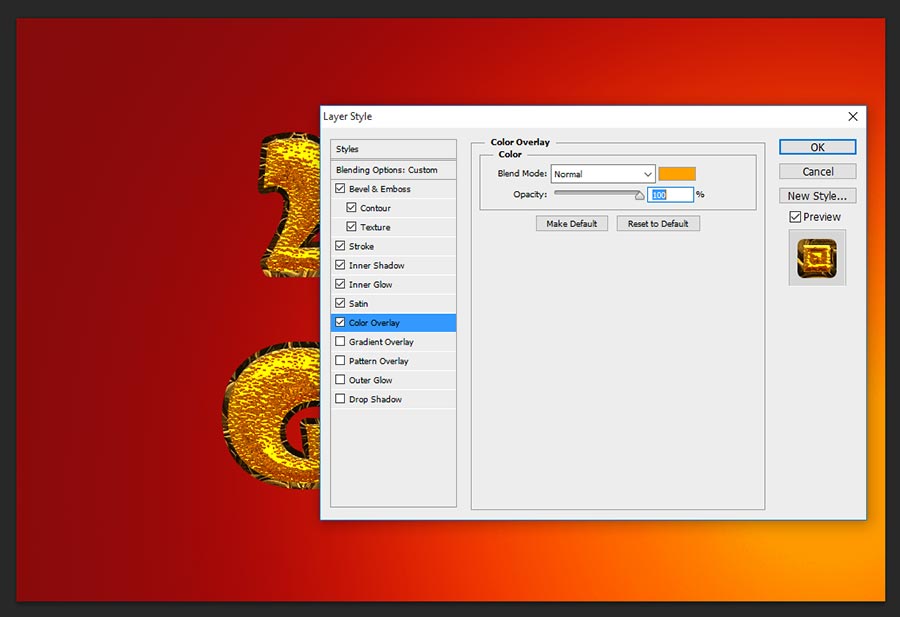
Step-7: Choose Color Overlay, applying this color overlay can get exact real gold plated text effect, this is a great step, just change the blend mode-normal, color-#f09300 and keep opacity-100%.
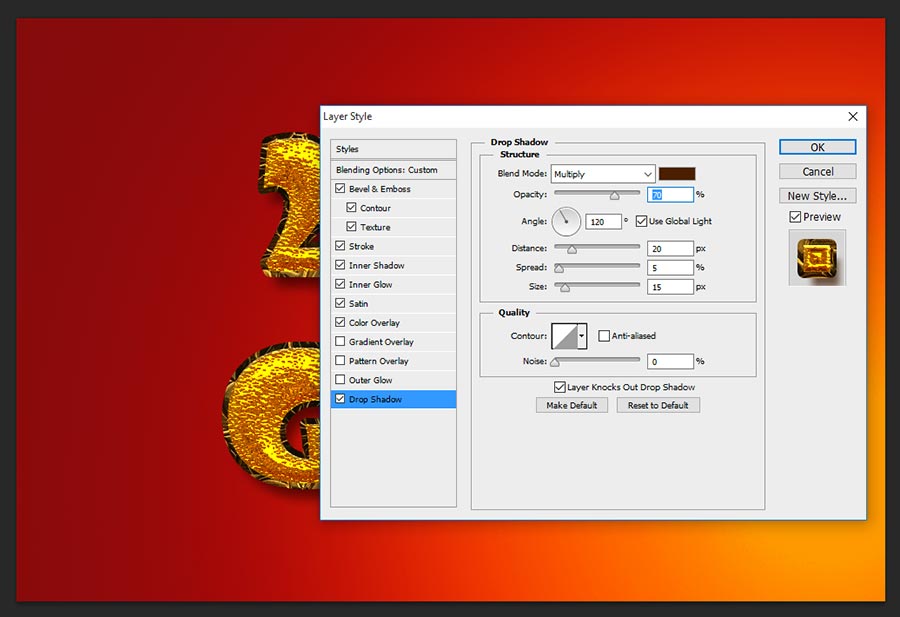
Step-8: Almost done all the steps successfully, now need to apply Drop Shadow to get more realistic gold plated text effect.
Blend Mode-Multiply,
Opacity-70%,
Angle-120 degree,
Distance-20px,
Spread-5%,
Size-15px.
Thanks for reading this amazing gold plated text effect photoshop tutorial and visit regular to get more awesome tips or tricks from my site.

[ads2]
[button color=”orange” size=”medium” link=”https://www.alldesigncreative.com/free-psd/text/2016-gold-effect-psd-file/” icon=”Download PSD ” target=”true”]Download PSD [/button]