
In this tutorial, i will disclose how to make glass text effect in photoshop, this is outstanding tutorial, you can feel 100% realistic glass text effect, once you done all the steps by using my tutorial tricks or tips then you can get awesome glass effect. This glass text effect created by using two layer styles, this type of new innovative glass text effect first time we are only bringing in web. Just follow the procedure how to create this amazing text effect.
[ads1]
Step-1: Take new document, here width is 900px, height is 530px and resolution is default 72 dpi only.

Step-2: Now set the interior opacity for the layer 0% (Fill-0%) then your page seem to be blank as shown the screen shot.
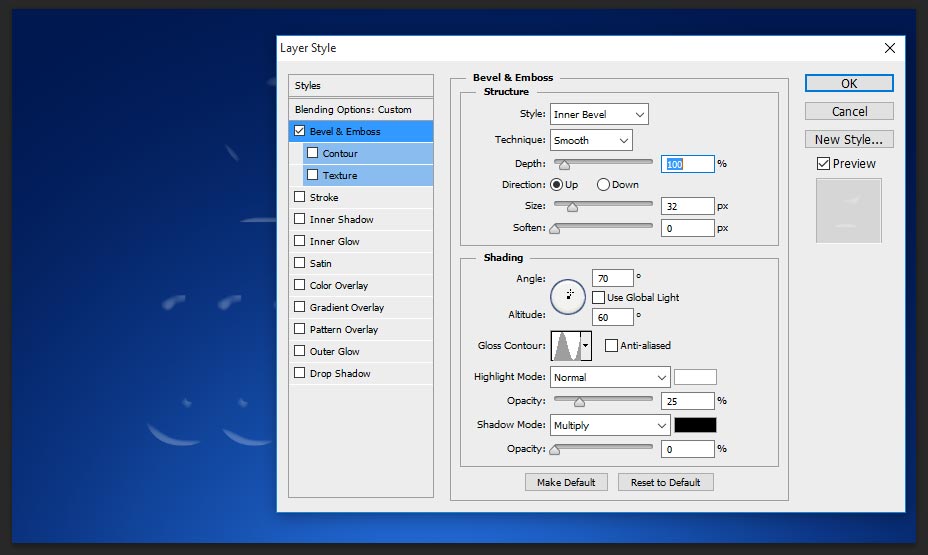
Step-3: Now apply blending option, just go to menu Layer>Layer Style>Blending Option, here choose bevel and emboss and follow the values;
Style:Inner Bevel,
Technique:Smooth,
Depth:100%,
Direction-Up,
Size-32px,
Angle-70 degree, Altitude-60 degree,
Gloss Contour-Ring,
Highlight Mode- Normal, Color-White, Opacity-25%,
Shadow Mode-Multiply, Color-Black, Opacity-0%.
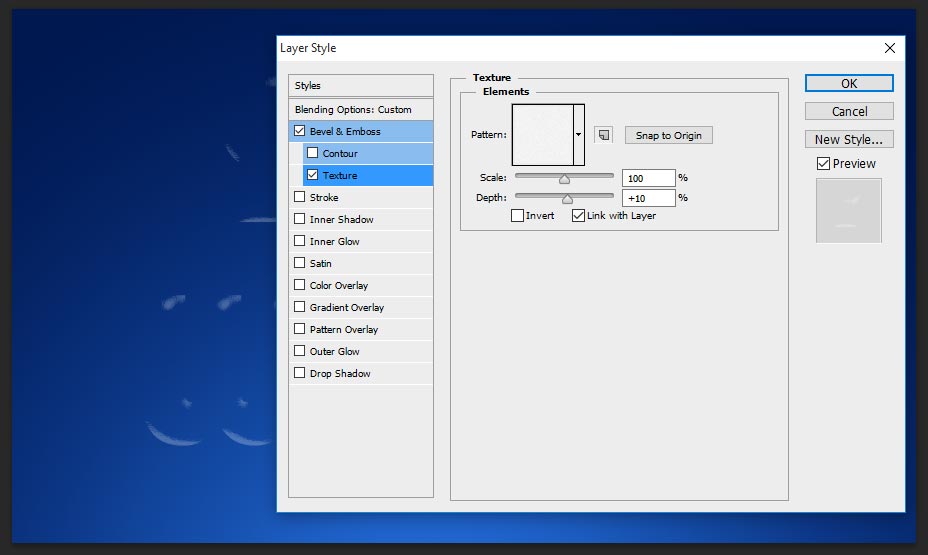
Step-4: Now select Texture, here choose gray granite texture, this is default elements in Photoshop cs6 and scale it 100%, depth+10%
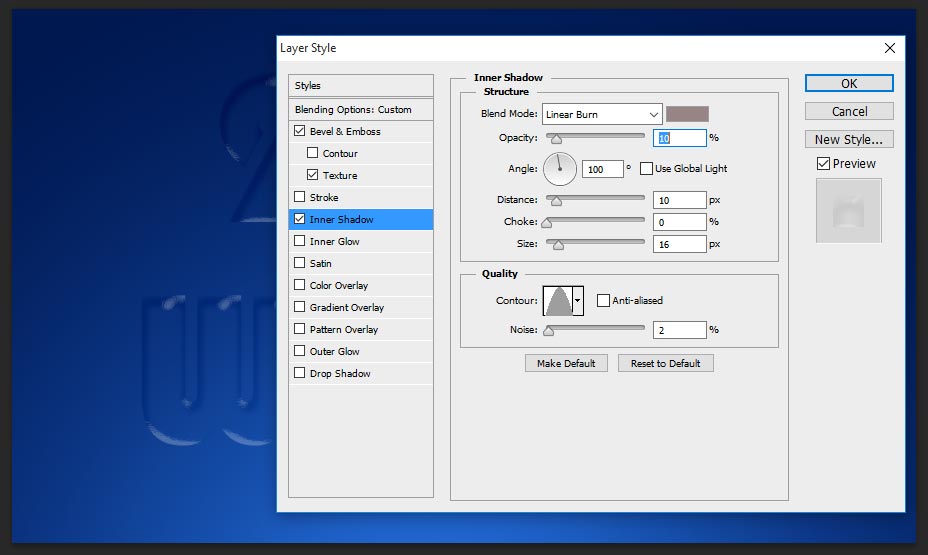
Step-5: Take Inner Shadow, this step gives cool shadow in side the text, just change the values as;
Blend Mode-Linear Burn, Color-#978585,
Opacity-10%,
Angle-100 degree,
Distance-10px,
Size-16px,
Contour-Cone, Noise-2%.
Step-6: Take Inner Glow and change the following setting;
Blend Mode-Overlay,
Opacity-9%,
Noise-15%,
Color-White,
Technique-Softer,
Source-Edge,
Choke-50%,
Size-27px,
Contour-Cone, Range-100%.

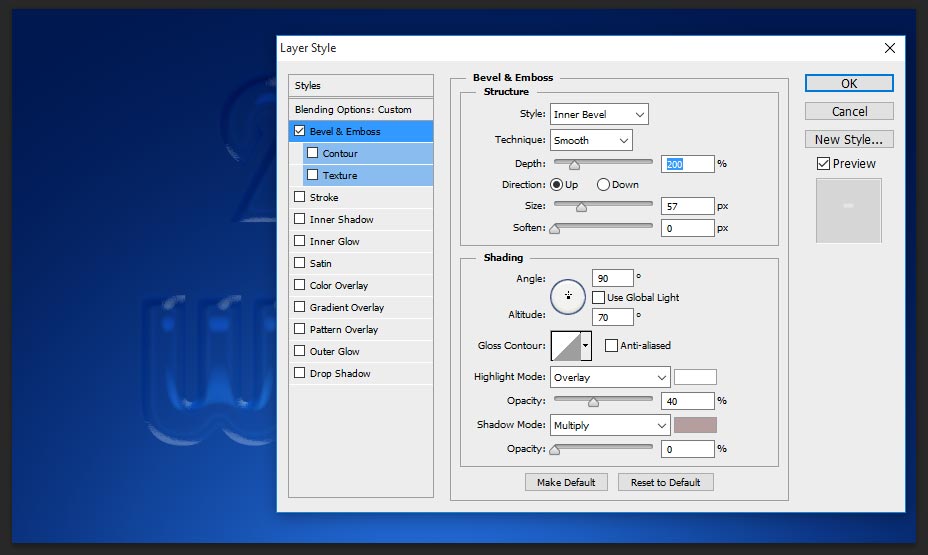
Step-7: So far we have worked in First layer, now need to duplicate the second layer and right click on the layer and select Clear Layer Style, Now your second layer seem to be blank layer, because fill is 0%, now again apply blending option on that layer. Change the Bevel and Emboss values as follows;
Style- Inner Bevel,
Technique-Smooth,
Depth-200%,
Direction-Up,
Angle-90 degree,
Altitude-70 degree.
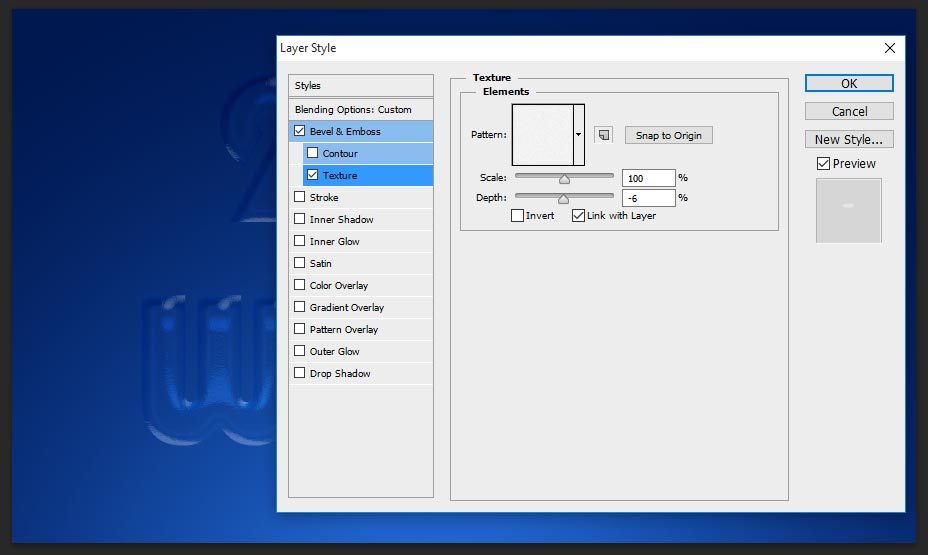
Step-8: Now select directly on Texture, and choose patter as shown the default Gray Granite texture and here scale-100% and keep depth-6%.
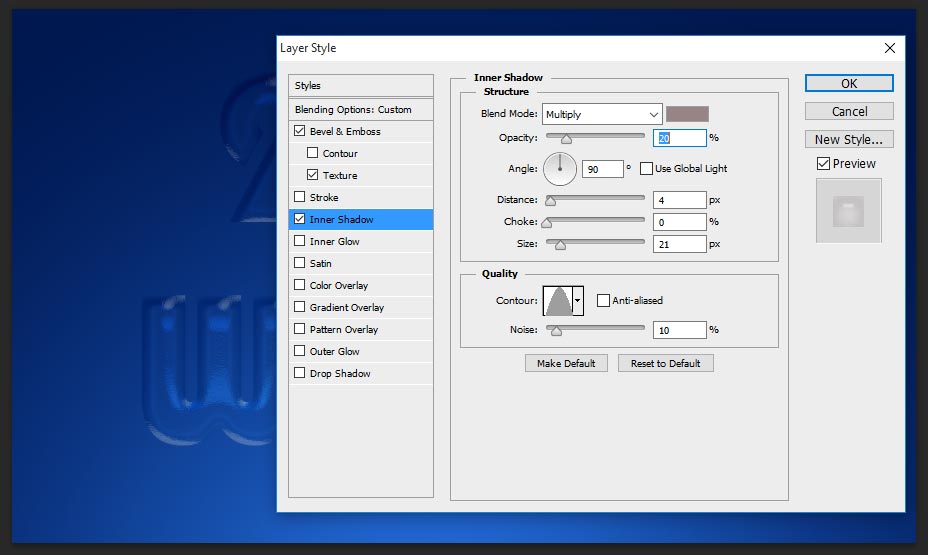
Step-9: Choose Inner Shadow and change the setting values;
Blend Mode-Multiply, Color-#978585,
Angle-90 degree,
Distance-4px,
Size-21px,
Contour-Cone, Noise-10%.
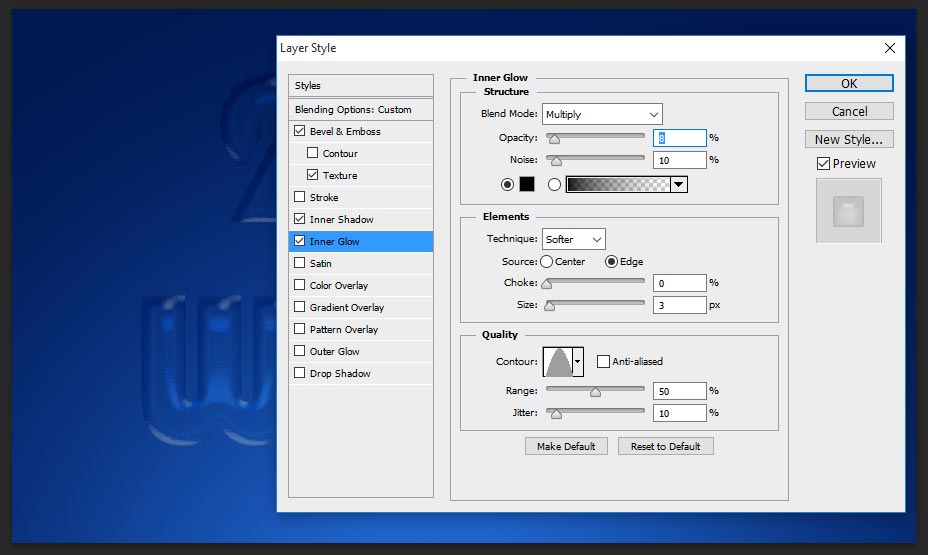
Step-10: Now take Inner Glow and follow the values;
Blend Mode-Multiply,
Opacity-8%,
Noise-10%,
Color-Black,
Technique-Softer,
Source-Edge,
Size-3px,
Contour-Cone,
Range-50%,
Jitter-10%.
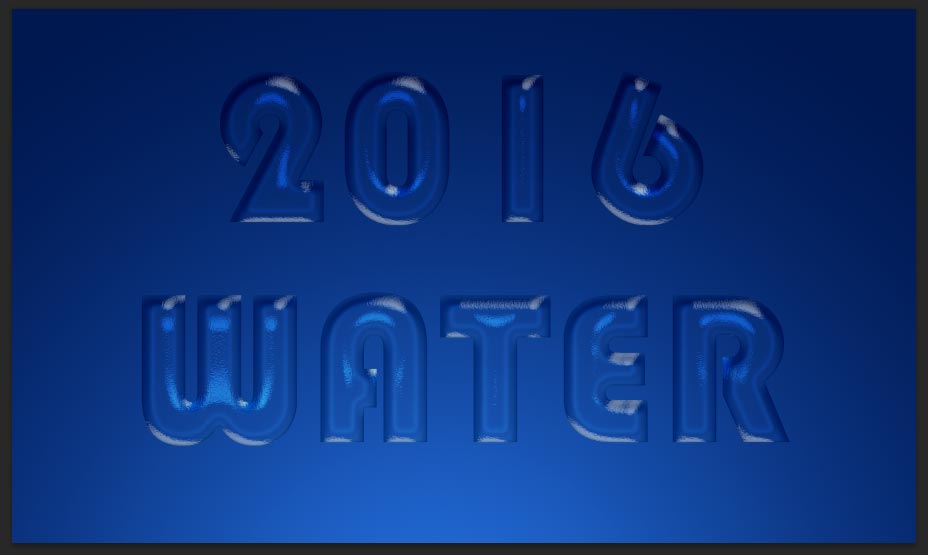
Step-11: That’s it almost done our glass text effect photoshop tutorial, now need to do small steps, now you have two layer styles in your layer palette, just need to duplicate the two layers and make it opacity 50% that’s it, now you can able to get same like below screen shot out put result.
thanks for reading this tutorial, if you have any doubt or anything require need to know just leave the comments in below section….
[ads2]
[button color=”orange” size=”medium” link=”https://www.alldesigncreative.com/free-psd/text/glass-text-photoshop-psd/” icon=”Download PSD” target=”true”]Download PSD[/button]