
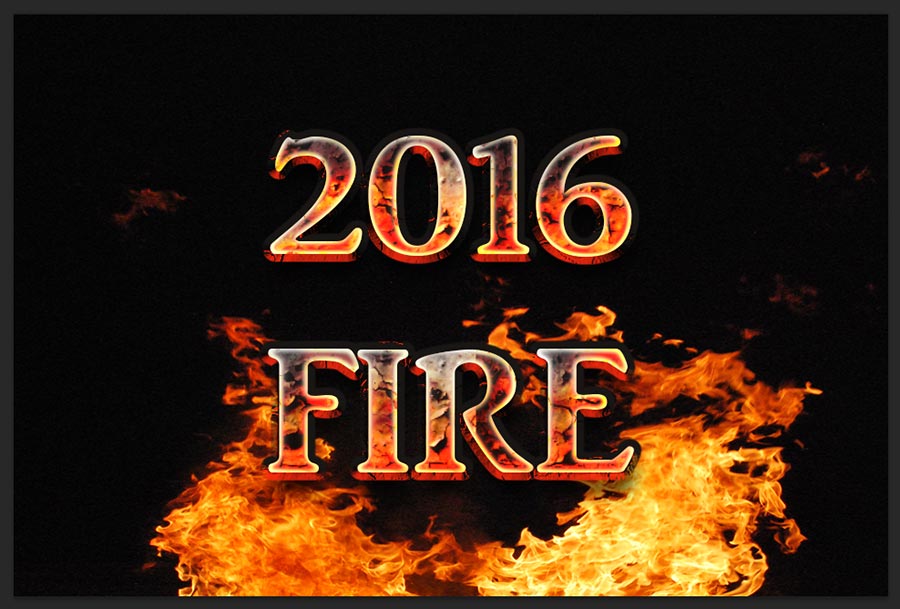
Today i am teaching very simple way how to make fire text effect in photoshop, this tutorial will help you very well to make realistic fire text effect on your practice. To creating fire text effect there are many ways, but here i am disclosing with editable fire text effect psd style, once you done all the steps as shown my tutorial, after then you can change your created psd file with another any name without any problems. This is very quick tutorial, just i made with in 15 steps this amazing fire text effect Photoshop tutorial.
Let’s start the procedure!
[ads1]
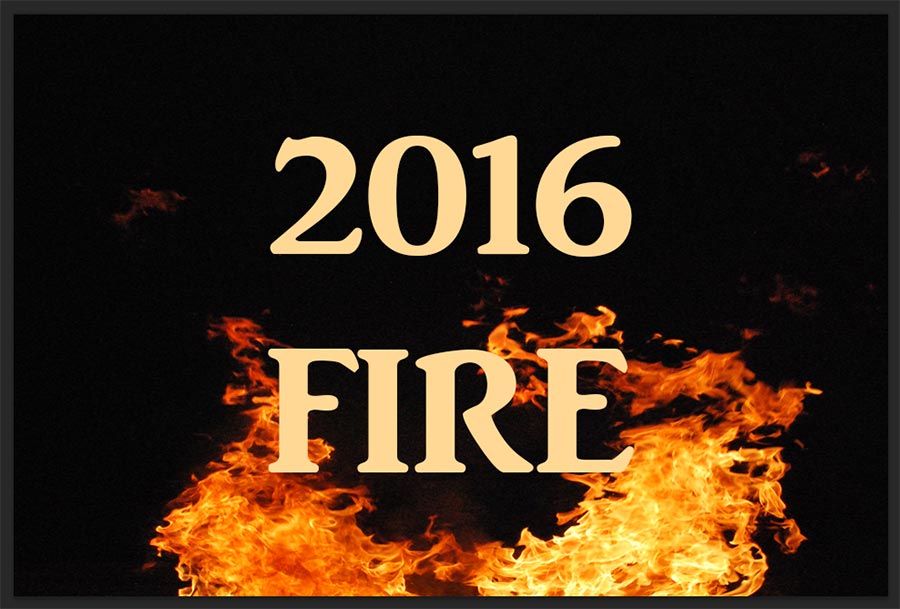
Step-1: First take new document in the size of 900x600px and resolution 72 dpi. and take any sample fire background just like shown below image and write down any name what do you want effect on the stage. here just i am writing 2016 Fire.
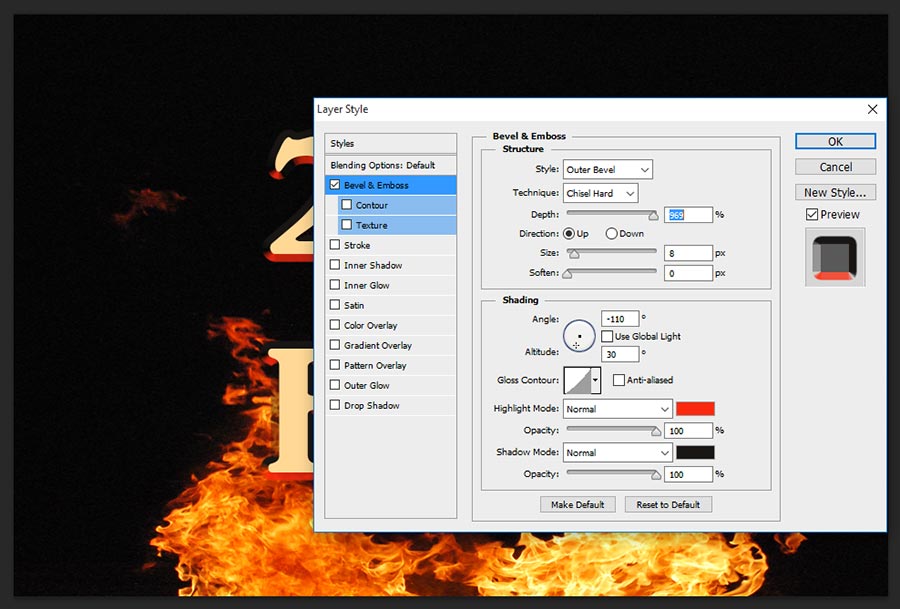
Step-2: Now Apply Blending option to the layer style, go to layer palette and right click on the layer and choose blending option or go to menu Layer> Layer Style> choose Blending Option, here choose bevel and emboss and change the values as follows;
Style-Outer Bevel,
Technique-Chisel Hard,
Depth-969%,
Direction-Up,
Size-8px,
Angle-110 degree, Altitude-30 degree,
Highlight Mode-Normal, Color-#fa2a0f, Opacity-100%,
Shadow Mode-Normal, Color-#191614, Opacity-100%.
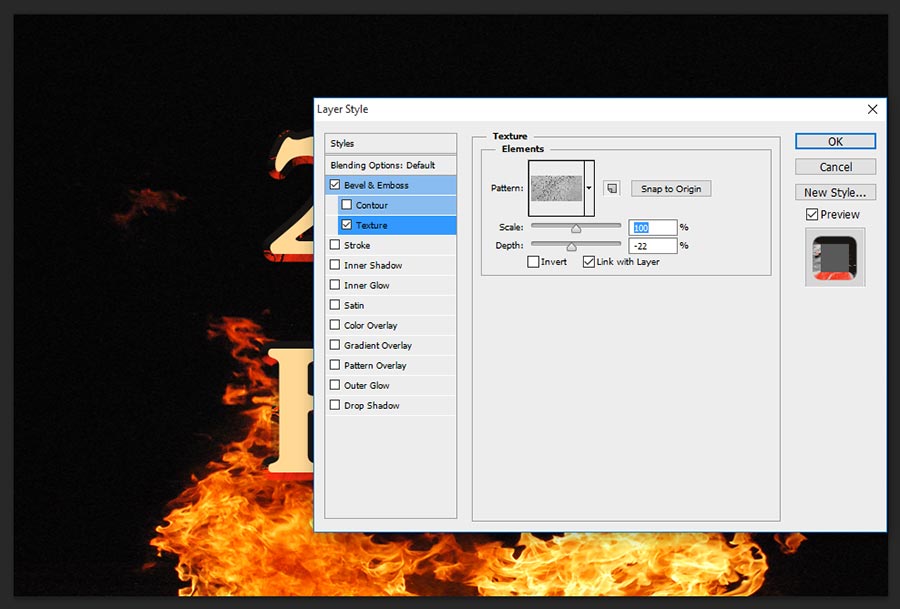
Step-3: In bevel and emboss there is another option Texture just click on the texture then you can see the pattern elements with the values, here patter choose as shown the screen shot and scale it 100%, depth-22%
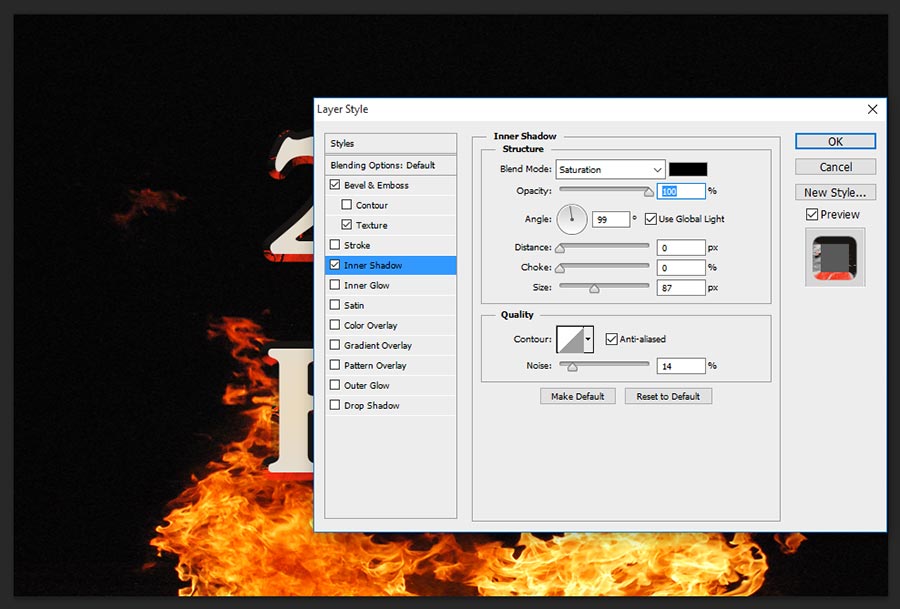
Step-4: Choose Inner Shadow and change the values; this step will work partially color shadow inside the text, but these all works in final effect as a great way.
Blend Mode-Saturation, Color-Black,
Opacity-100%,
Angle-99 degree,
Distance-opx,
Size-87px,
Contour-Linear,
Noise-14%.
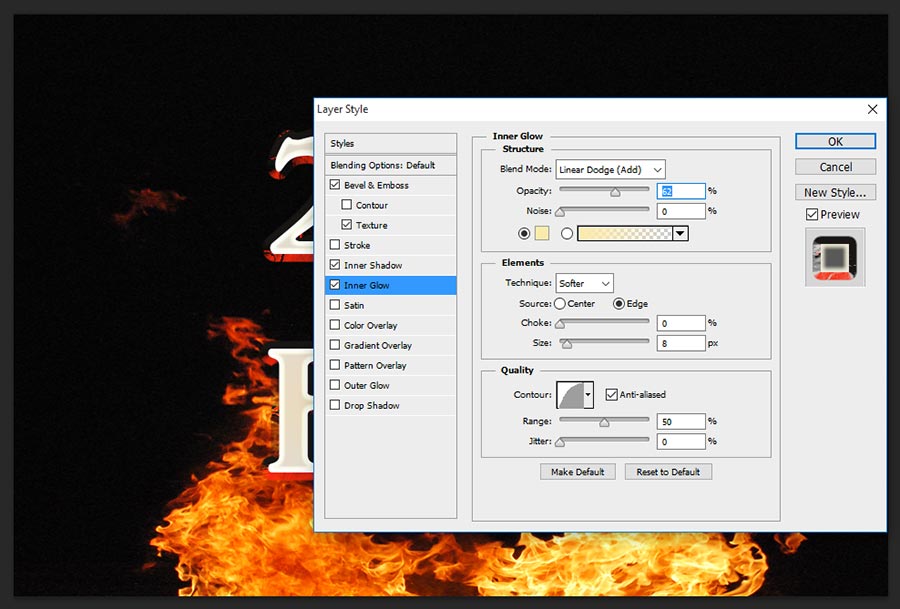
Step-5: Choose Inner Glow, this will gives cool glowing color inside the text;
Blend Mode- Linear Dodge,
Opacity-62%,
Color-#faeaac,
Technique-Softer,
Source-Edge,
Size-8px,
Contour-Half Round,
Range-50%.
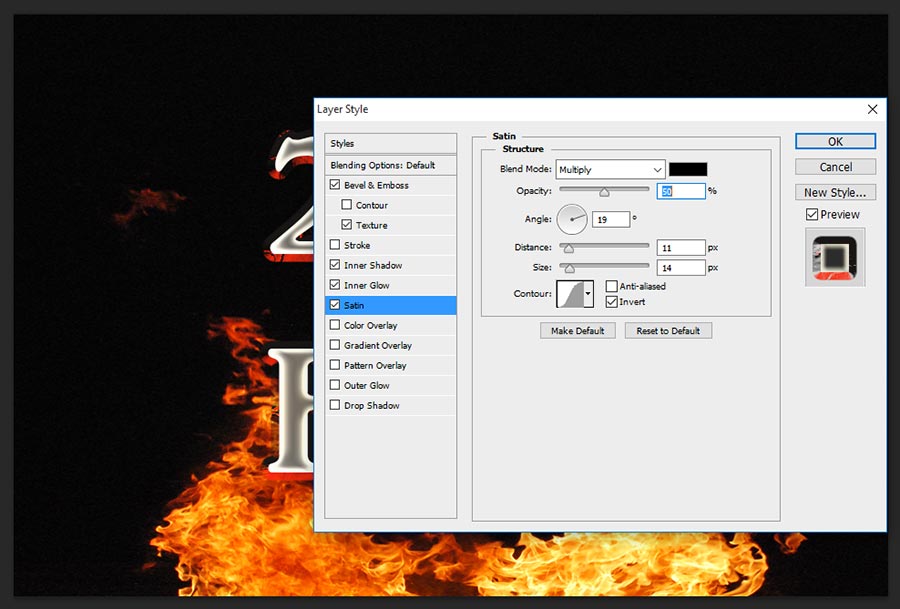
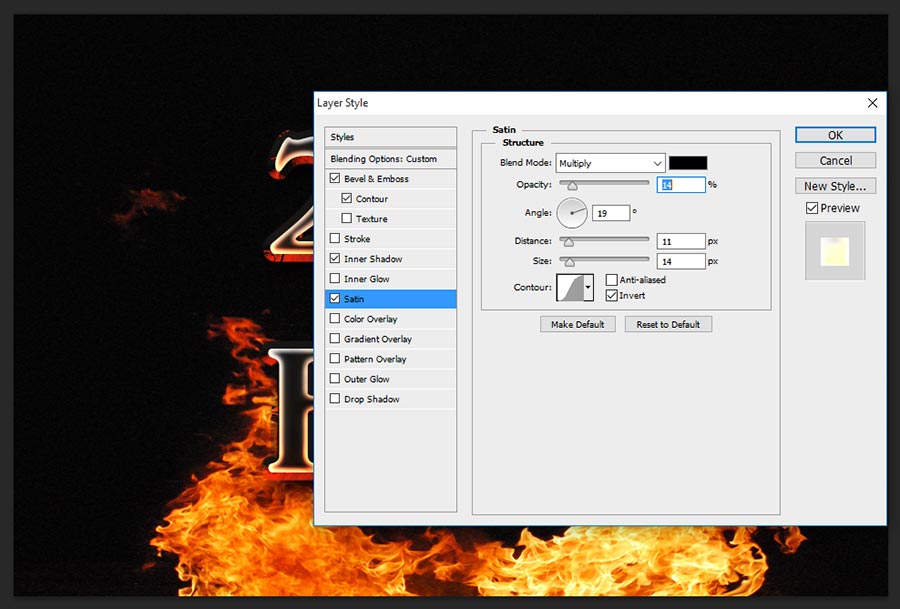
Step-6: Now take Satin and change the setting,
Blend Mode- Multiply,
Opacity-50%,
Angle-19 Degree,
Distance-11px,
Size-14px,
Contour-Gaussian.
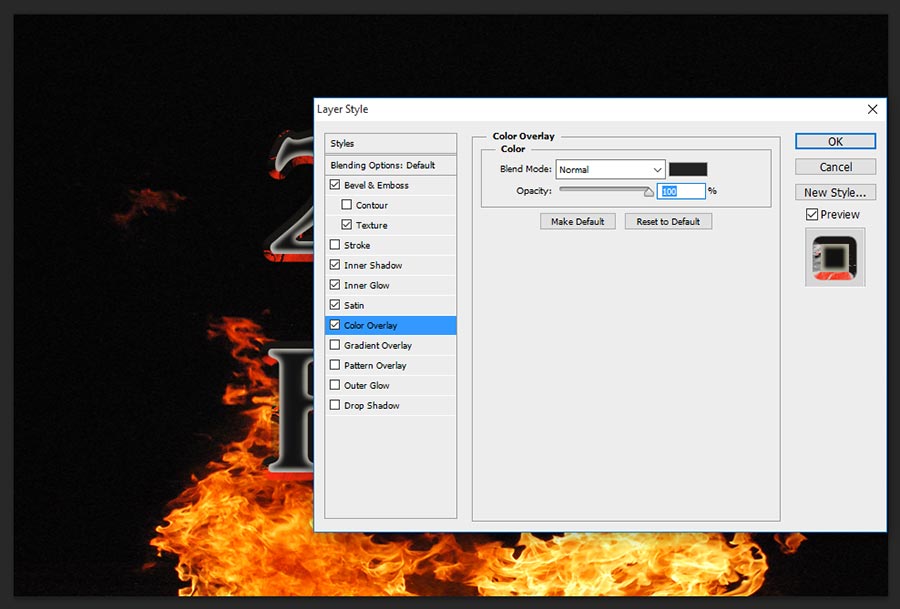
Step-7: Select Color Overlay, this color overlay works to overlapping the black grey color on the text, here Blend Mode- Normal, Color-#232323, Opacity-100%.
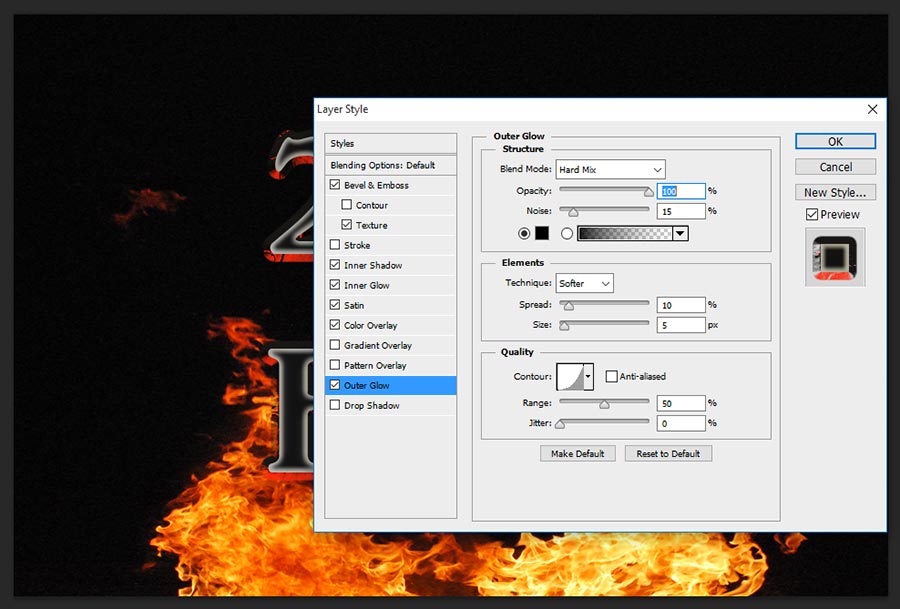
Step-8: Now choose Outer Glow, Skip this step, no need this step here or if you follow then change the values as follows;
Blend Mode-Hard Mix,
Opacity-100%,
Noise-15%,
Technique-Softer,
Spread-10%,
Size-5px,
Contour- Change manually as shown the screen shot.
Range-50%.
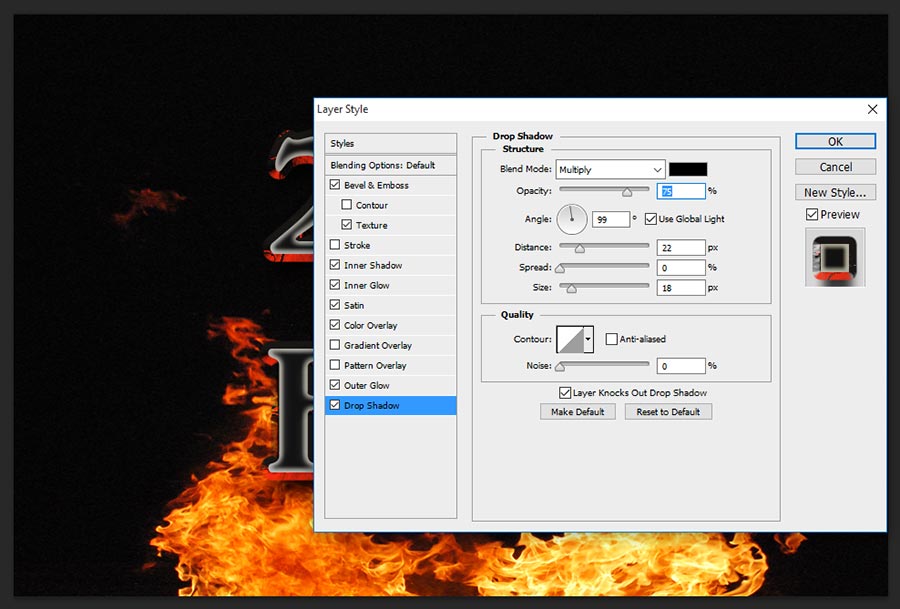
Step-9: Take Drop Shadow, this step gives shadow to the text, so over looks to be more realistic once applied this drop shadow;
Blend Mode-Multiply, Color-Black
Opacity-75%,
Angle-99 degree,
Distance-22px,
Size-18px,
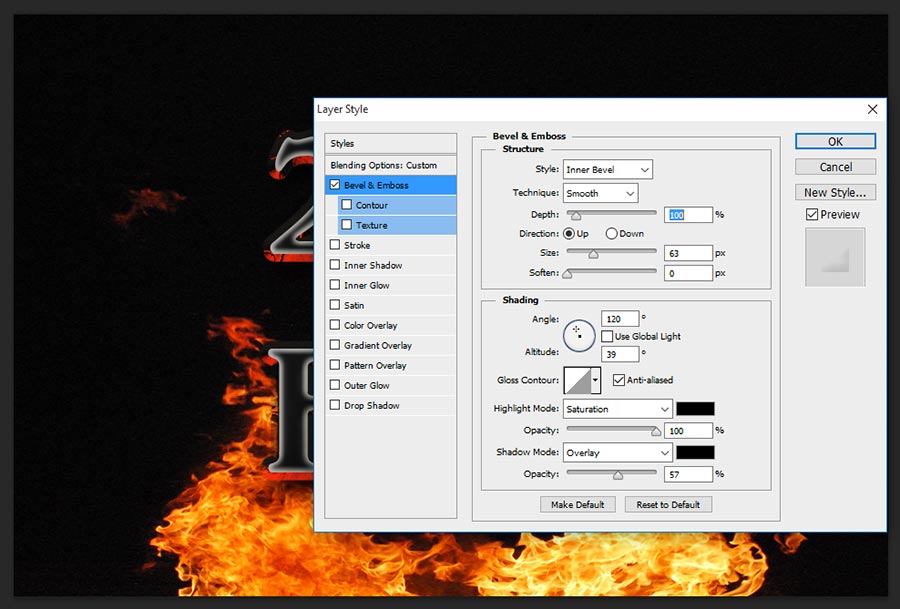
Step-10: So far we have worked in First layer style, now need to duplicate the first layer, after then right click on the second layer and choose Clear Layer Style, then after apply blending option to the text layer, here choose Bevel and Emboss and follow the values as;
Style-Inner Bevel,
Technique-Smooth,
Depth-100%,
Direction-Up,
Size-63p,
Angle-120 Degree,
Altitude-39 Degree,
Highlight Mode-Saturation, Color Black, Opacity-100%,
Shadow Mode-Overlay, Color-Black, Opacity-57%.
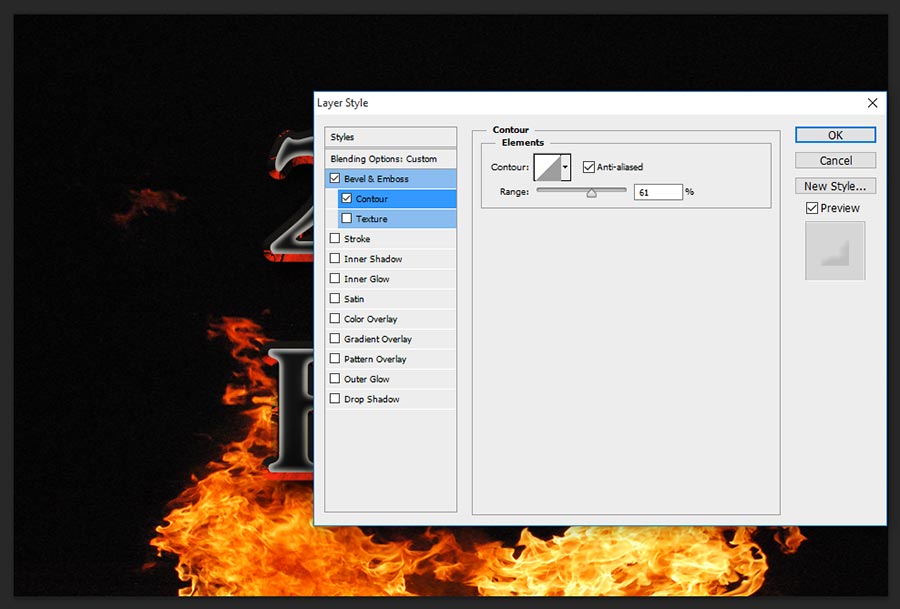
Step-11: Select Directly on Contour and change the range into 61%.
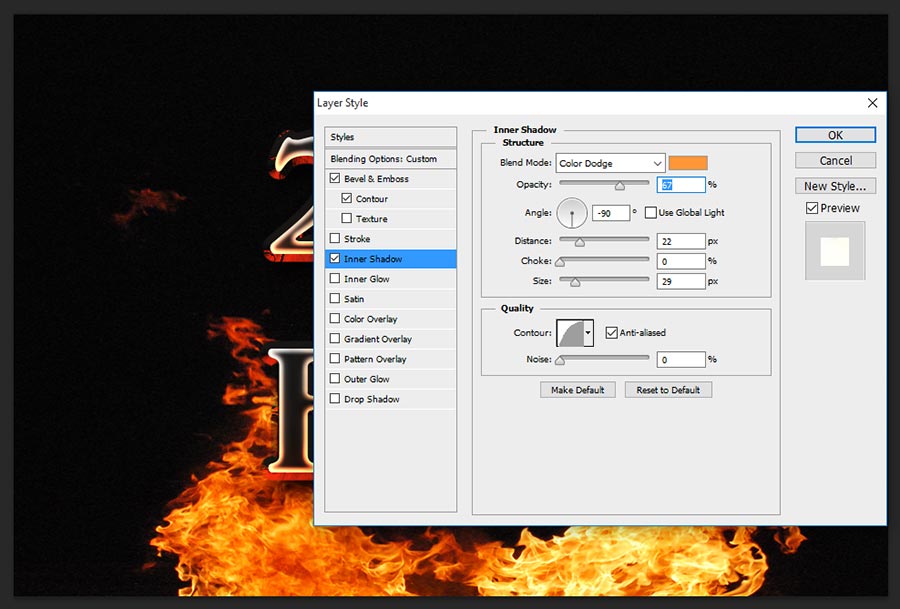
Step-12: Choose Inner Shadow and change the following setting values,
Blend Mode-Color Dodge, Color-#ff9638,
Opacity-67%,
Angle-90 degree,
Distance-22px,
Size-29px,
Contour-Half Round.
Step-13: Choose Satin and follow the values;
Blend Mode-Multiply, Color-Black,
Opacity-14%,
Angle-19 Degree,
Distance-11px,
Size-14px,
Contour-Gaussian
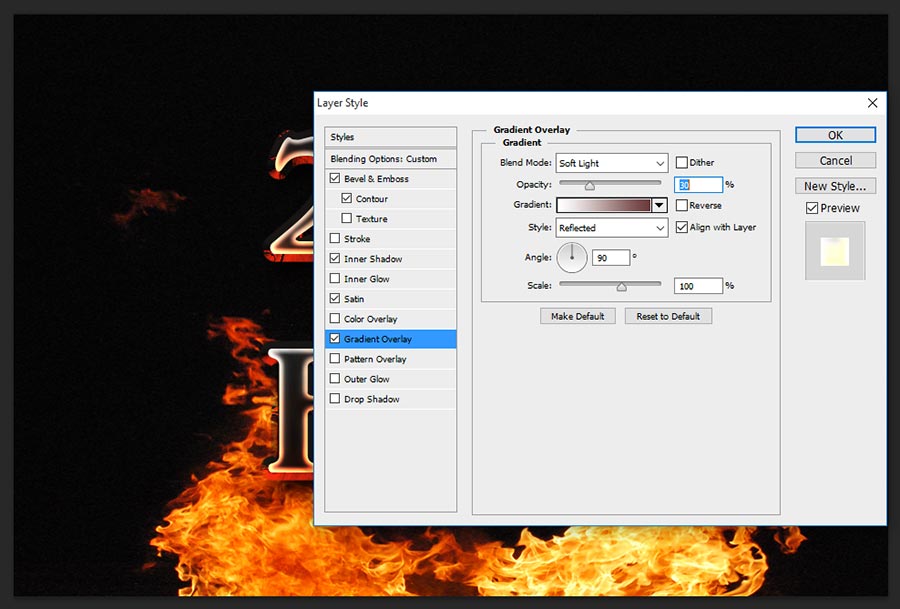
Step-14: Choose Gradient Overlay and follow the values
Blend Mode-Softlight,
Opacity-30%,
Gradient-#ffffff, #6a3a3a.
Style-Reflected,
Angle-90 degree,
Scale-100%.
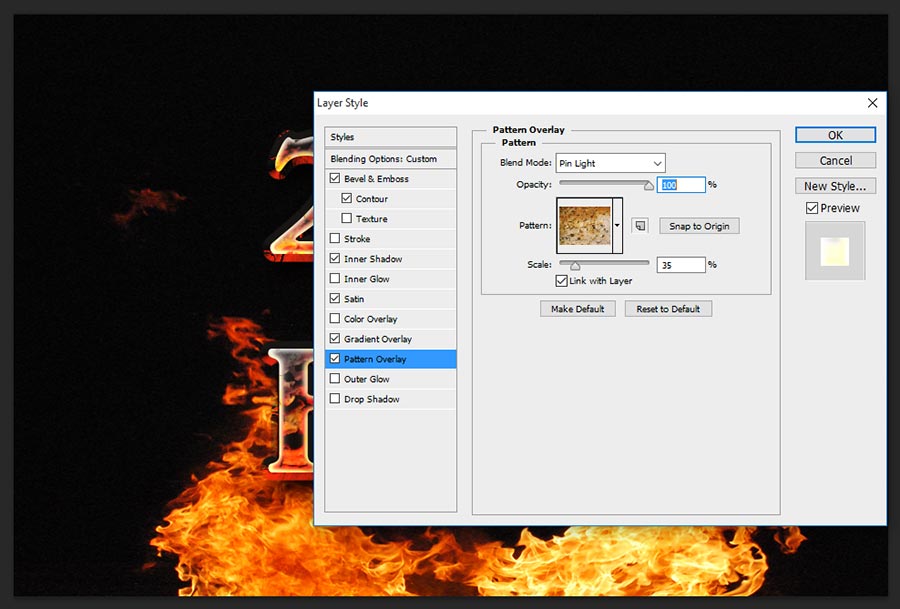
Step-15: This is the final step, here applying this pattern gives more effective fire text effect looks. Just take any rust pattern texture or download from my PSD attached file and apply the texture as shown the screen shot. and keep opacity 100% scale it 35%.
That’s it! we have finished successfully this fire text effect Photoshop tutorial.
Thanks for reading this tutorial, visit regular and get more tricks and tips from my website.
[ads2]
[button color=”orange” size=”medium” link=”https://www.alldesigncreative.com/free-psd/text/2016-fire-text-psd-free-download/” icon=”Download PSD” target=”true”]Download PSD[/button]