
In this adobe photoshop tutorial, i will teach you how to create an easy realistic box gold text effect. It is very simple to make and once you reached final steps by following this tutorial steps, it’s really gives more eye catching text effect design and you never and ever seen such a gold effect and also created by your self by using my tutorial tips that is great to you. i always bring something new text effect of design in my website, just visit regular and get more tricks and tips from my AllDesignCreative.com site.
let’s get start the procedure!
[ads1]
Step-1: Open a new document by using shortcut commend Ctrl+N in windows, Command+N in mac and take the dimension width-1000, height-600. Now select gradient (G) from tool palette.
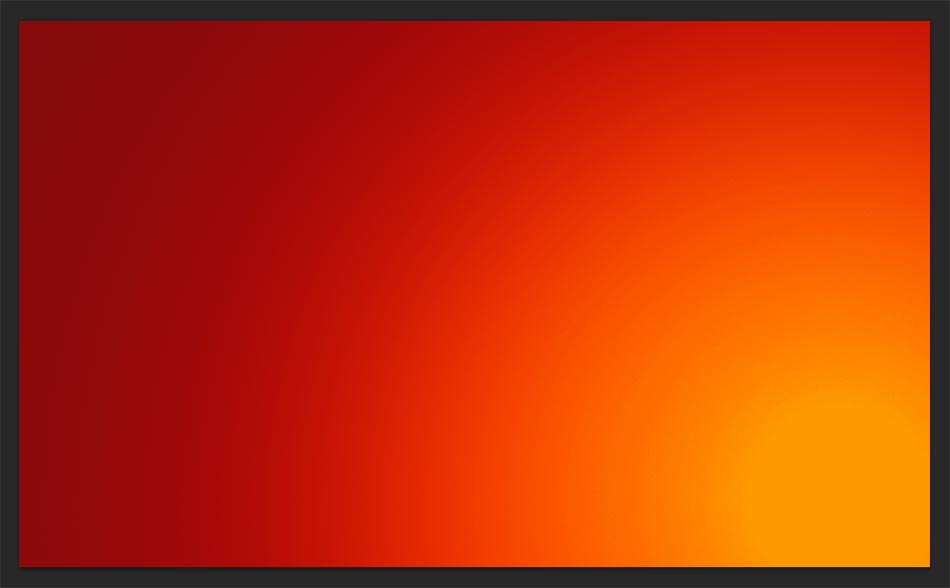
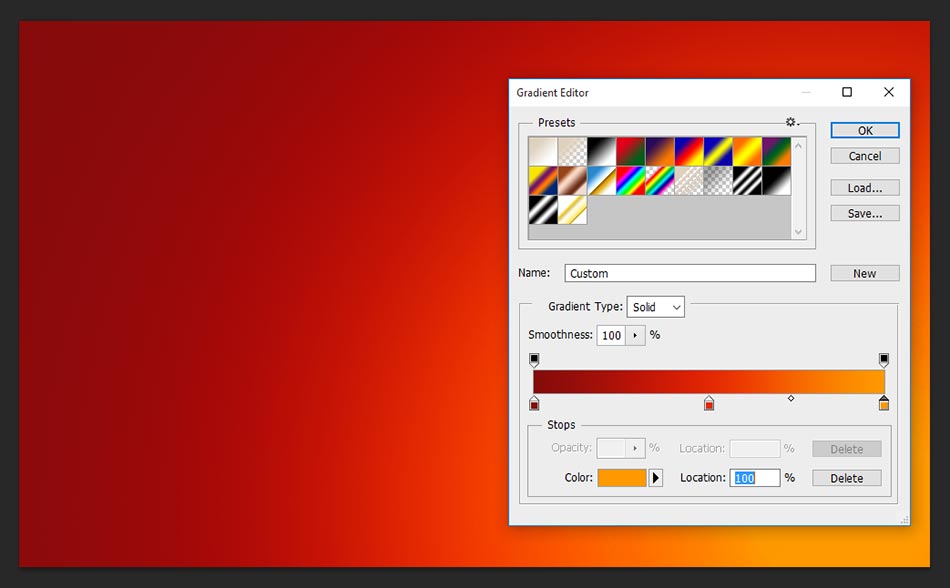
Fill the background color by using gradient editor as shown the above page, just make it your color filling in the presets as following screen shot image. here color follows respectively #850b0b, #f33f01, #fe9900. Now you are still in gradient selection, just choose gradient style- radial from below the menu bar and drag right down side to left up side then probably you will get the same background what i got.
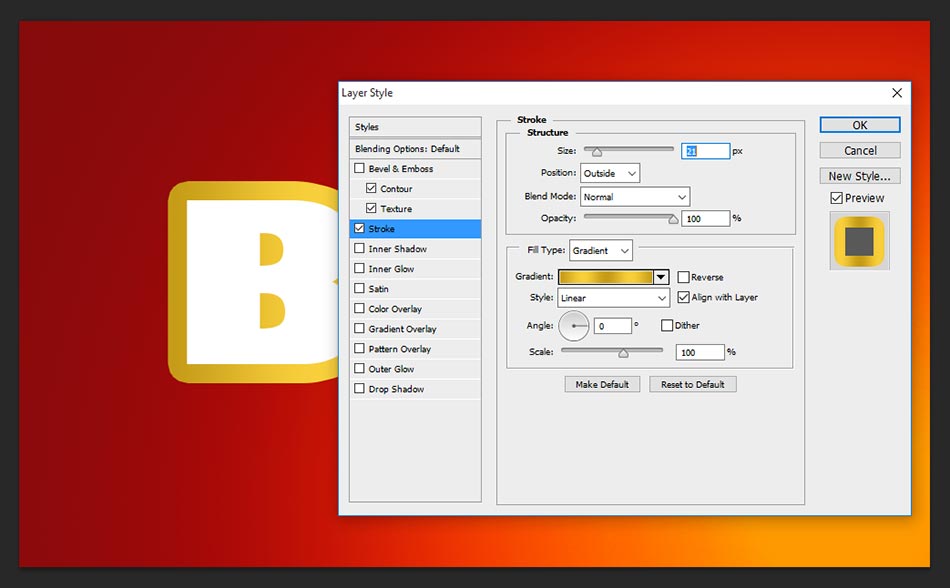
Step-2: Now apply blending option to the text layer, choose stroke and change the sizes-21 px, position-outside, blend mode-normal, opacity-100%, fill type- gradient, color values- #c59b17, #f8cf3b, #c59b17, #f8cf3b, #c59b17, style-linear.
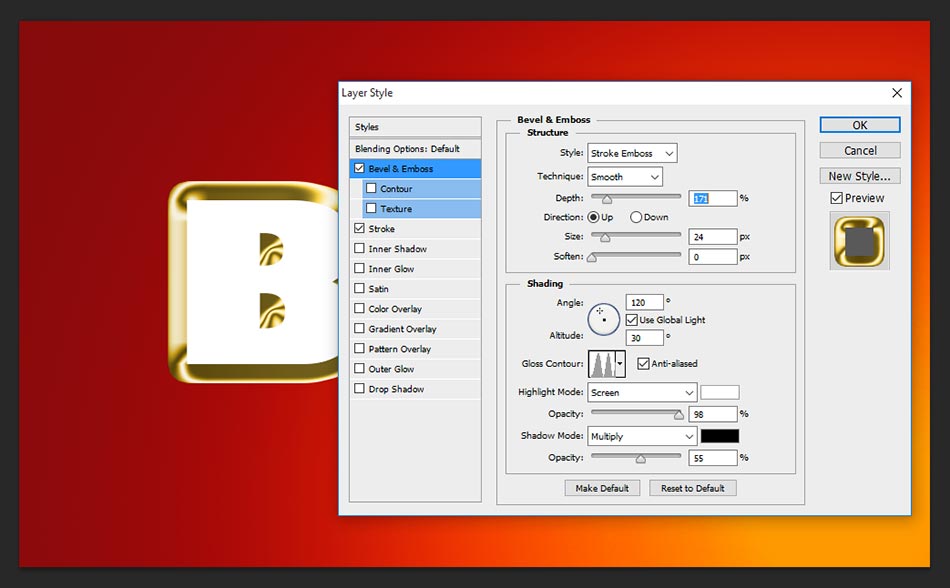
Step-3: Choose bevel & emboss and change the values as follows;
style-stroke emboss,
technique-smooth,
depth-171%,
direction-up,
size-24px,
angle-120 degree, altitude-30 degree,
gloss contour-ring double,
highlight mode- screen, opacity-98%,
shadow mode- multiply, opacity-55%.
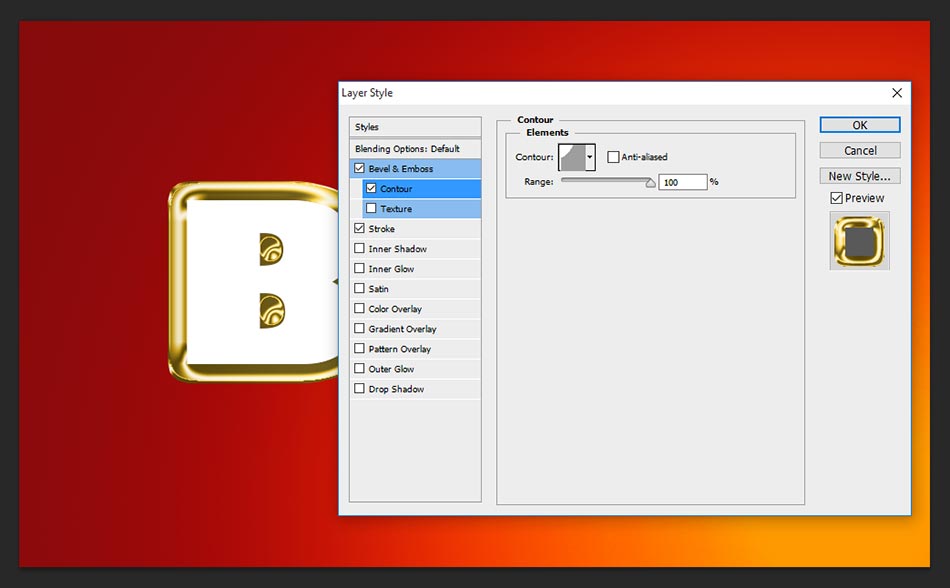
Step-4: Now select directly contour by clicking on the small check list icon to display the elements option, here just change the contour-cove shallow and keep range- 100% as well.
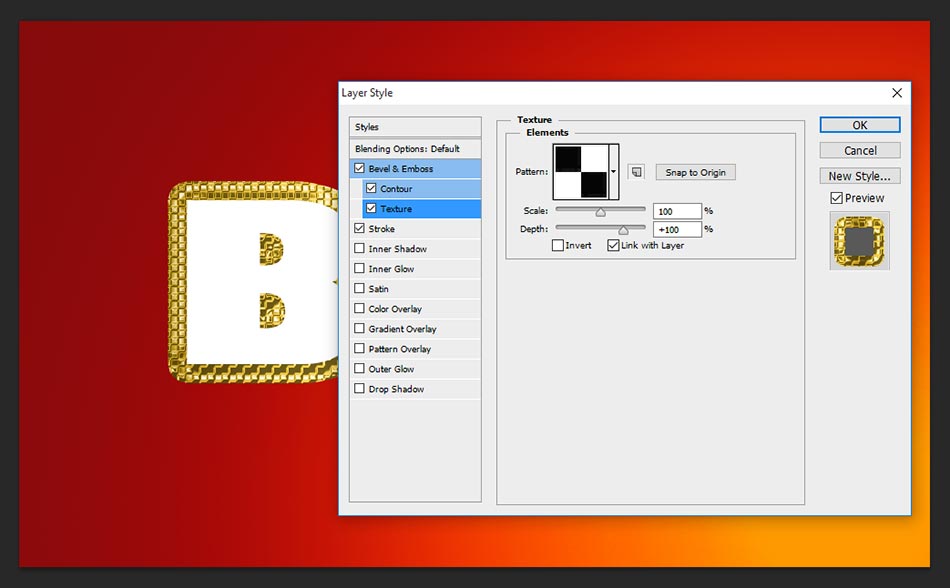
Step-5: Again select additional option of texture from bevel & emboss, here take pattern something similar one and scale it according your pattern size and give it depth 100%
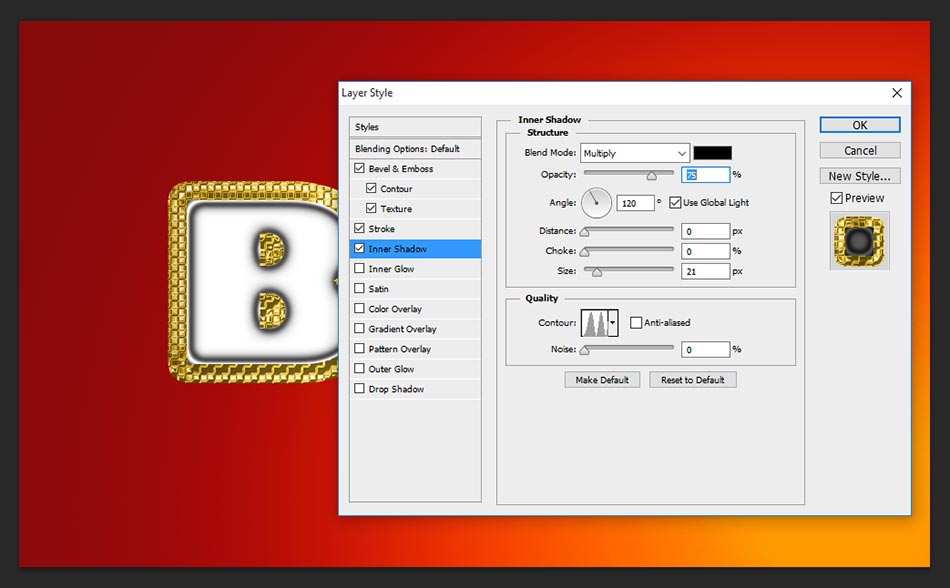
Step-6: Take inner shadow, it gives inside what the texture apply that will highlight, to apply inner shadow just change the setting as distance-0, choke-0, size-21px, contour-ring double, remaining setting keep it as default.
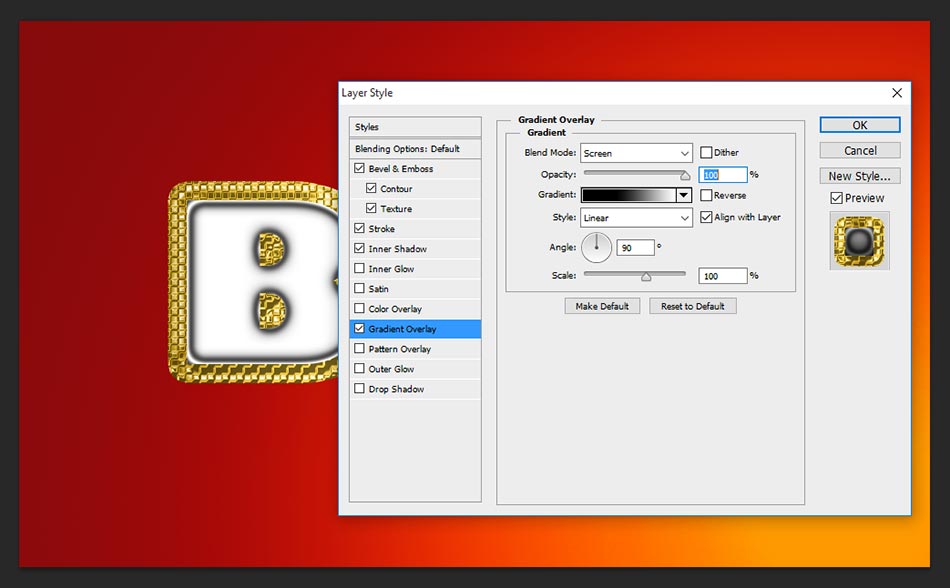
Step-7: Choose gradient overlay, it gives cool white and black color over lap on the texture, you can able to see this result after applying the pattern overlay.
Step-8: Select pattern overlay and change the setting as follows; blend mode- luminosity, opacity-100%, scale-95 %, once applied pattern you can feel better realistic box gold text effect in over all looking.

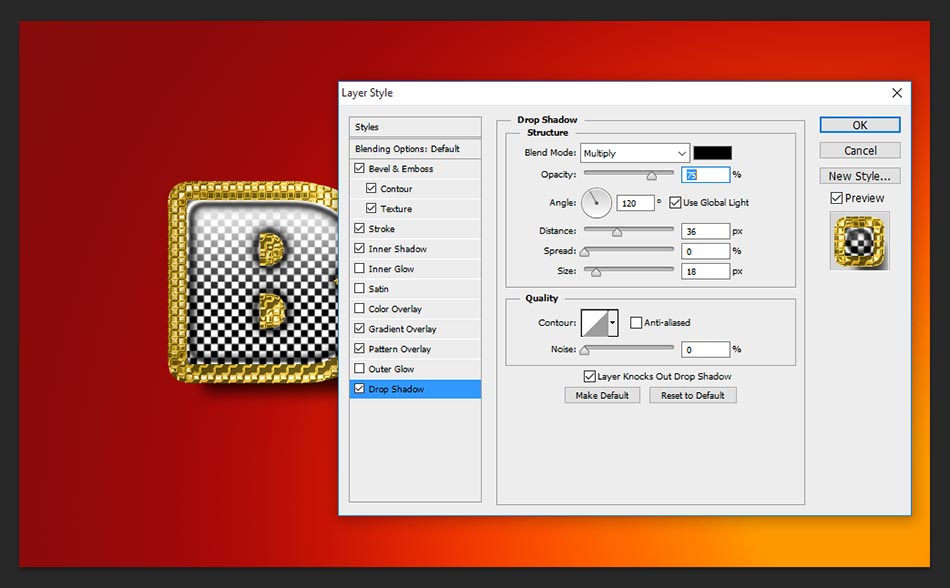
Step-9: Almost done! To creating an easy realistic box gold text effect tutorial in Photoshop, now need to apply drop shadow to bring something more eye catching looking. Just change the setting as follows;
blend mode-multiply,
opacity-75%,
angle-120 degree,
distance-36 px,
size- 18 px.
Thanks for watching this tutorial, for more tutorial visit regular to our website.

[ads2]
[button color=”green” size=”big” link=”https://www.alldesigncreative.com/free-psd/text/box-gold-text-effect-psd/” icon=”Download PSD Here!” target=”true”]Download PSD Here![/button]