1.5K
Realistic water drops Photoshop Tutorial:
Water drops we can see probably after rains, some water drops can be on the leaf, flower, fruits, and any of things. You would also see those water drops over in your area. Now we are going to learn how to make water drops on the leaf or flower by using Photoshop. Here I have selected one of grapes leaf, you select any of leaf as your wish. you can apply this technique of effect in your any object.
[ads1]

- First insert leaf on the document, after draw a water drop shape, for that go to tool palette and select Pen tool (P key) and start to draw a shape as you like.
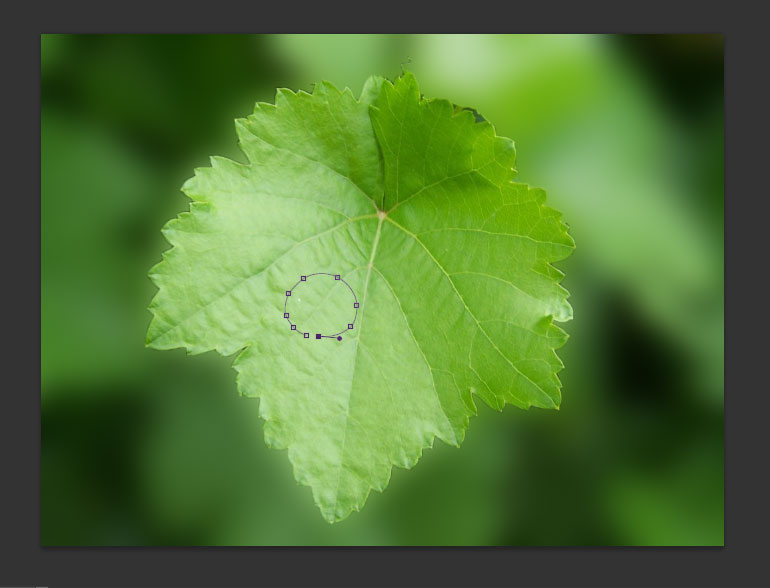
- After Press Ctrl+Enter in keyboard for Marque selection, now fill with white color and reduce the opacity into 50%.

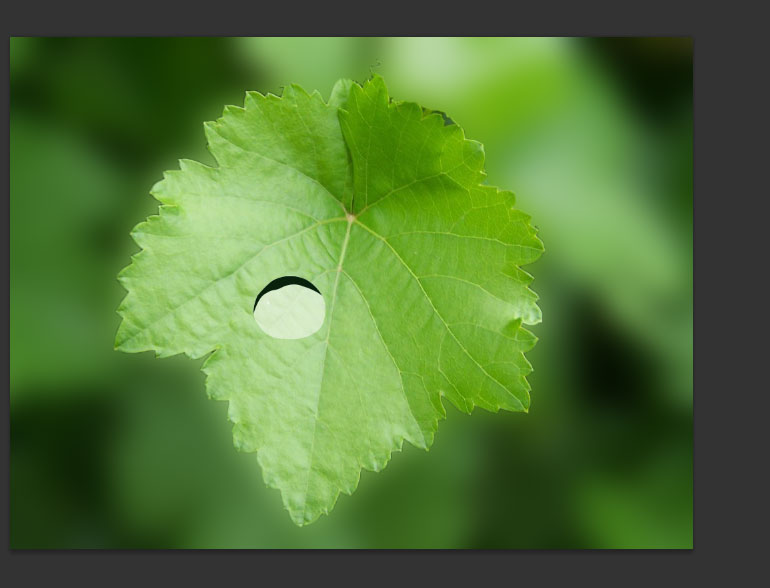
- Now again take pen tool and draw a shape as shown below image.

- Fill it with dark green color (value of color is #08210b).
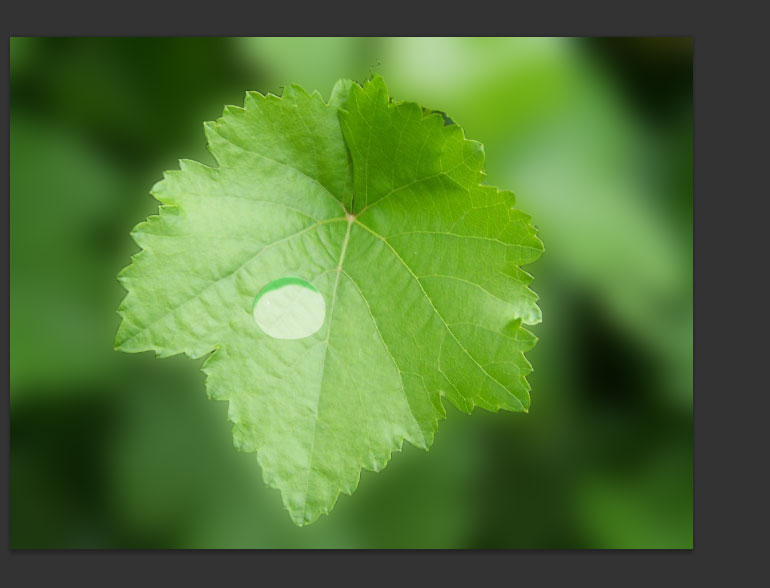
- Now reduce the opacity 50% and change the effect vivid light in blending mode option, then after you can see your image as shown below.
- Now we have to add some styles to this shape, go to layer menu>layer style> and choose inner shadow and here keep exist opacity 75%, distance 2, choke 3, size 29.
Note: This value depends on your dimension of the design or shape of water drop size.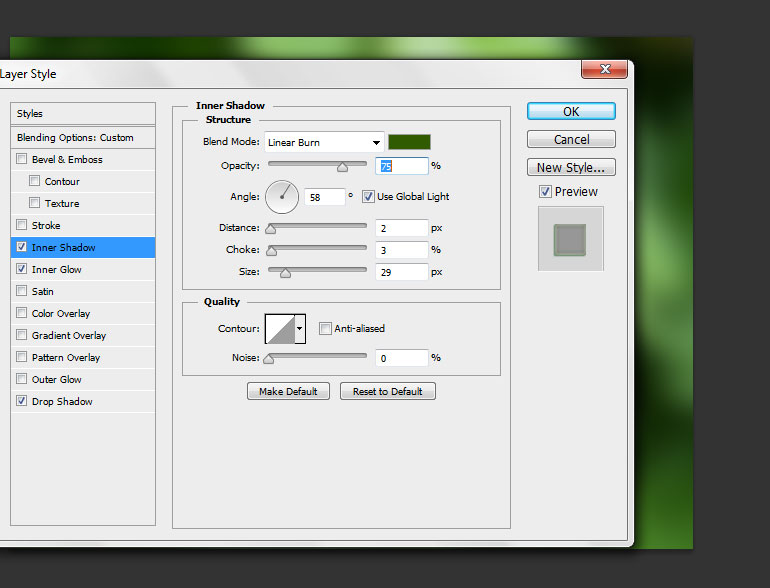
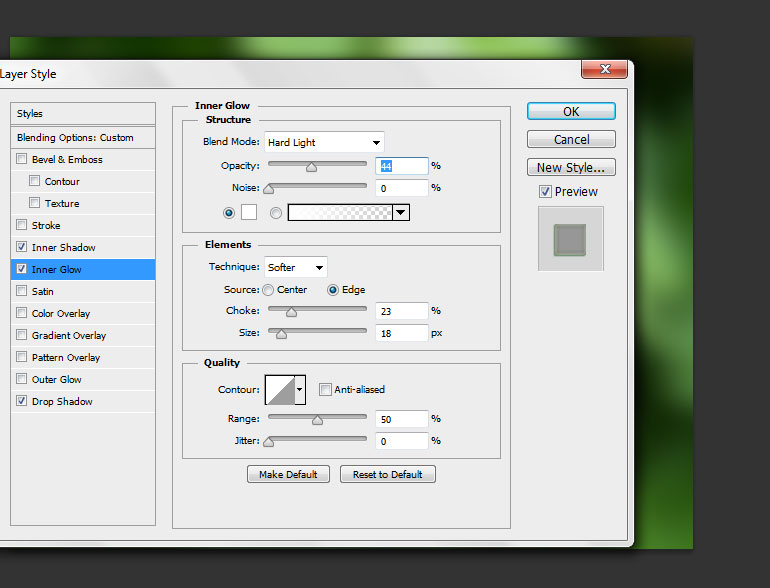
- Now choose inner glow, here reduce the opacity 44% and change the setting choke, size and range as following.
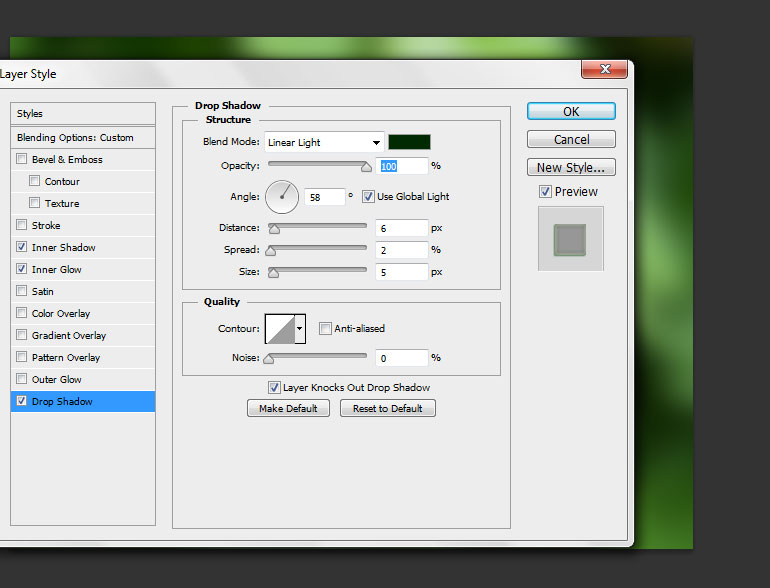
- Choose drop shadow and increase opacity in to 100%, and change the following setting angle-58 degree, distance-6 px, spread-2 %, size-5 px. These values depend on shape of sizes. Please mind it.
- Now real thing is starting, just copy the leaf background with the shape of what you already drawn water drops have. Make it with separate layer.

- Now arrange this copied leaf background above the original leaf background and apply the blend mode effect into color burn and also reduce opacity little which is you feeling better. After you can see the effect like below image.

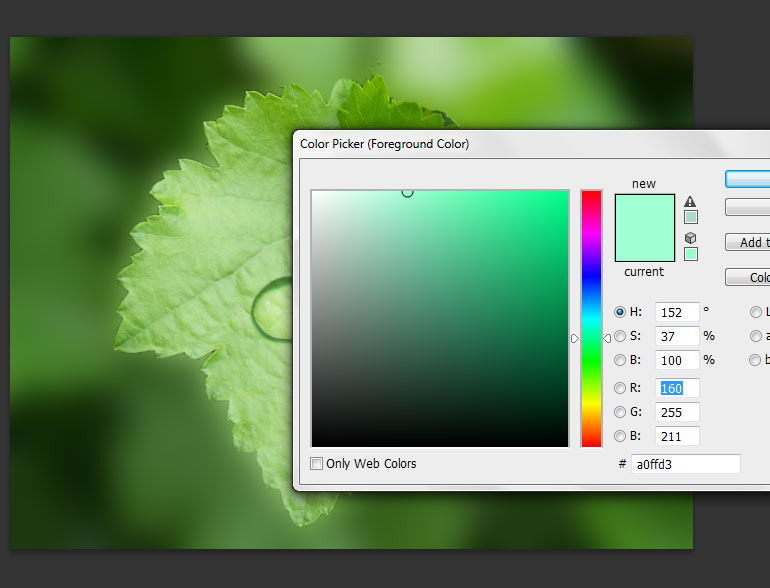
- Now we have to try to bring some more realistic water effect for that simply select the following color (#a0ffd3) and then take brush tool and apply this color in the area of the water drop shape randomly, after change the blend mode effect into Hard light and also reduce the opacity 50 %, then after you image seem to be following image.
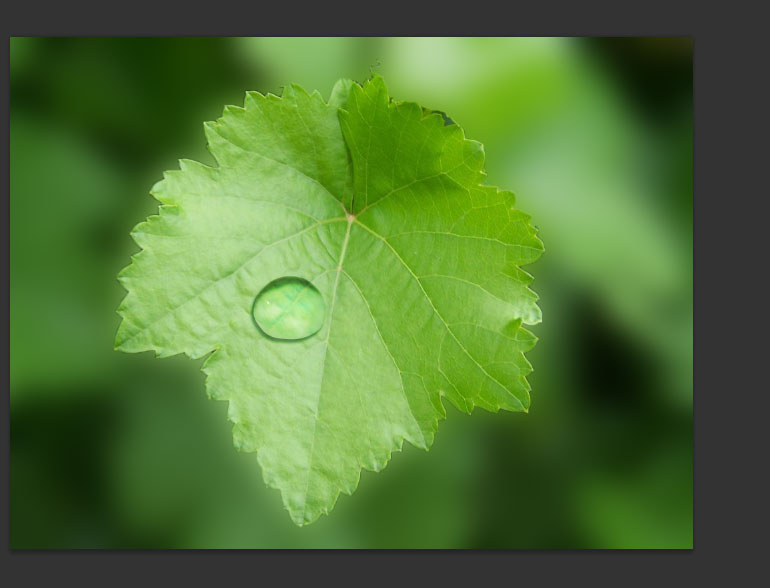
- Finally just make one of small white circle center on the water drop area and also apply little blurriness to that white circle. That’s it we got final require effect. Like this way we can make very simple as realistic water drops, there are more tricks are there to create water drops, those all tricks I will bring in my site as soon.

- Thanks for visiting and reading my tutorials… any doubts or any comments if you feel to give, no objection you can proceed in our below comments section.